Configuring

for a tile display
Configuring
for a tile display
The other pages talk about getting walkabout, getting it running, and creating new scene files.
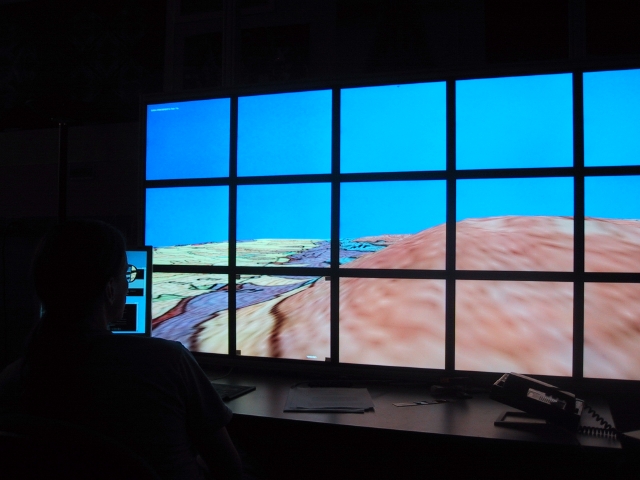
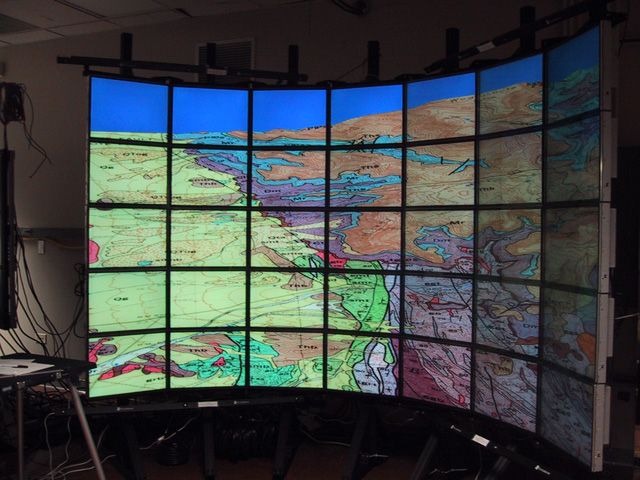
This page is for those people who would prefer to run walkabout on a tile display (like the one above) as opposed to a GeoWall. This is pretty easy to do starting with version 1.2 of Walkabout
Overview
This assumes you have a cluster where each display is driven by its own machine and you have another separate master machine running its own display. You can make walkabout work with other configurations but this is what we use so that's what I'll describe below. Specifically, if you have one machine per tile then you can configure walkabout to take the borders of the tiles into account giving a more pleasing effect. With more than one tile per machine walkabout will not take the borders between those tiles into account.
Basically the way this works is that you run a copy of walkabout on all of the nodes of the cluster, and another copy on the master. The master copy of walkabout is used to 'drive' the cluster machines by sending its position data over the network to the cluster walkabout clients. This information is currently sent as UDP packets the same way avatar data is sent between walkabout applications. Each of the clients renders a certain rectangular percentage of the entire image. Starting with walkabout 1.3.1 there is also an option to use MPI so that the tiles will synchronize their swapping which gives a nicer effect, but you will need to recompile for MPI. Even without MPI and each client running as fast as it can independently, it gives a satisfactory effect.
Each of the client screens can be a different size, and can run on different operating systems.
The master could have a windows.txt file such as:
1
M
0 0 1024 700
my_name
0 100 0 100
-
This way the master renders the entire image in a window with a border.
The clients need to have a windows.txt file that puts them into 'S'lave mode, and tells what percentage of the overall image they are to render. The client will probably also want to hide the window borders so we can choose 'm' for the display mode. For example the display.txt file below is for a client to render the bottom left 1/4 of the overall picture.
1
m
0 0 1024 700
my_name
0 50 0 50
S
You could also use the same windows.txt file as the master but override those settings in the command line for the client as in:
./walkabout -mode m -client -percent 0 50 0 50
You will need one scene file for the master and one for the clients. The only difference is that the clients should have no network information specified since they will not be sending any data, however the master will be sending data to the clients so the master will need a scene file such as the following:
#networking
REALTIME_POSITIONING_TIME_INTERVAL (0.1)
REALTIME_POSITIONING_TIMEOUT (30)
REALTIME_POSITIONING_PORT (6000)
REALTIME_POSITIONING_CLIENT (10.0.0.1:10.0.0.2:10.0.0.3:10.0.0.4:10.0.0.5:10.0.0.6:10.0.0.7:10.0.0.8:10.0.0.9:10.0.0.10:10.0.0.11:10.0.0.12:10.0.0.13:10.0.0.14:10.0.0.15)
In this case the position data is updated 10 times per second for each of the 15 clients listed by their IP addresses.
You will probably also want to hide the overlays in the scene file for the clients so the client scene file should NOT have the following lines:
#show the text overlays be shown
SHOW_TEXT
and then since the tile display most likely doesnt have the same aspect ratio as a single screen you will want to set that ratio.
So to run all the 15 clients on our tile display and the master I can use a shell script such as:
#!/bin/sh
WALKPATH=/nfs/evl/aej/walkaboutLinux
WALKSCENE=HICKEY/hickey.wbt
WALKMASTERSCENE=HICKEY/hickey_master.wbt
ssh -x -f scylla1-10 "setenv DISPLAY :0; cd $WALKPATH; ./walkabout $WALKSCENE -percent 0.7 19.3 67.3 98.7 -aspect 2.2" &
ssh -x -f scylla2-10 "setenv DISPLAY :0; cd $WALKPATH; ./walkabout $WALKSCENE -percent 0.7 19.3 34.3 64.7 -aspect 2.2" &
ssh -x -f scylla3-10 "setenv DISPLAY :0; cd $WALKPATH; ./walkabout $WALKSCENE -percent 0.7 19.3 1.3 31.7 -aspect 2.2" &
ssh -x -f scylla4-10 "setenv DISPLAY :0; cd $WALKPATH; ./walkabout $WALKSCENE -percent 20.7 39.3 67.3 98.7 -aspect 2.2" &
ssh -x -f scylla5-10 "setenv DISPLAY :0; cd $WALKPATH; ./walkabout $WALKSCENE -percent 20.7 39.3 34.3 64.7 -aspect 2.2" &
ssh -x -f scylla6-10 "setenv DISPLAY :0; cd $WALKPATH; ./walkabout $WALKSCENE -percent 20.7 39.3 1.3 31.7 -aspect 2.2" &
ssh -x -f scylla7-10 "setenv DISPLAY :0; cd $WALKPATH; ./walkabout $WALKSCENE -percent 40.7 59.3 67.3 98.7 -aspect 2.2" &
ssh -x -f scylla8-10 "setenv DISPLAY :0; cd $WALKPATH; ./walkabout $WALKSCENE -percent 40.7 59.3 34.3 64.7 -aspect 2.2" &
ssh -x -f scylla9-10 "setenv DISPLAY :0; cd $WALKPATH; ./walkabout $WALKSCENE -percent 40.7 59.3 1.3 31.7 -aspect 2.2" &
ssh -x -f scylla10-10 "setenv DISPLAY :0; cd $WALKPATH; ./walkabout $WALKSCENE -percent 60.7 79.3 67.3 98.7 -aspect 2.2" &
ssh -x -f scylla11-10 "setenv DISPLAY :0; cd $WALKPATH; ./walkabout $WALKSCENE -percent 60.7 79.3 34.3 64.7 -aspect 2.2" &
ssh -x -f scylla12-10 "setenv DISPLAY :0; cd $WALKPATH; ./walkabout $WALKSCENE -percent 60.7 79.3 1.3 31.7 -aspect 2.2" &
ssh -x -f scylla13-10 "setenv DISPLAY :0; cd $WALKPATH; ./walkabout $WALKSCENE -percent 80.7 99.3 67.3 98.7 -aspect 2.2" &
ssh -x -f scylla14-10 "setenv DISPLAY :0; cd $WALKPATH; ./walkabout $WALKSCENE -percent 80.7 99.3 34.3 64.7 -aspect 2.2" &
ssh -x -f scylla15-10 "setenv DISPLAY :0; cd $WALKPATH; ./walkabout $WALKSCENE -percent 80.7 99.3 1.3 31.7 -aspect 2.2" &
sleep 8
cd $WALKPATH; ./walkabout $WALKMASTERSCENE -master -percent 0 100 0 100
now if you have MPI things are a bit different since each MPI process needs to have the same command line. So we give walkabout a command line argument -mpi text_file_name which tells walkabout to look for a text file containing a set of command line arguments to substitute. As each process runs it attempts to find itself in the list below and then subsitutes the approriate command line arguments.
19
scylla.evl.uic.edu walkabout HICKEY/hickey_master.wbt -master -percent 0 100 0 100
scylla1-10.evl.uic.edu walkabout HICKEY/hickey.wbt -percent 0.4 13.9 0.8 39.2 -aspect 2.2
scylla2-10.evl.uic.edu walkabout HICKEY/hickey.wbt -percent 14.7 28.2 0.8 39.2 -aspect 2.2
scylla3-10.evl.uic.edu walkabout HICKEY/hickey.wbt -percent 29.0 42.5 0.8 39.2 -aspect 2.2
scylla4-10.evl.uic.edu walkabout HICKEY/hickey.wbt -percent 43.3 56.7 0.8 39.2 -aspect 2.2
scylla5-10.evl.uic.edu walkabout HICKEY/hickey.wbt -percent 57.5 71.0 0.8 39.2 -aspect 2.2
scylla6-10.evl.uic.edu walkabout HICKEY/hickey.wbt -percent 71.9 85.3 0.8 39.2 -aspect 2.2
scylla7-10.evl.uic.edu walkabout HICKEY/hickey.wbt -percent 86.1 99.6 0.8 39.2 -aspect 2.2
scylla8-10.evl.uic.edu walkabout HICKEY/hickey.wbt -percent 0.4 13.9 40.8 79.2 -aspect 2.2
scylla9-10.evl.uic.edu walkabout HICKEY/hickey.wbt -percent 14.7 28.2 40.8 79.2 -aspect 2.2
scylla10-10.evl.uic.edu walkabout HICKEY/hickey.wbt -percent 71.9 85.3 40.8 79.2 -aspect 2.2
scylla11-10.evl.uic.edu walkabout HICKEY/hickey.wbt -percent 86.1 99.6 40.8 79.2 -aspect 2.2
scylla12-10.evl.uic.edu walkabout HICKEY/hickey.wbt -percent 0.0 28.4 80.8 99.2 -aspect 2.2
scylla13-10.evl.uic.edu walkabout HICKEY/hickey.wbt -percent 29.0 56.7 80.8 99.2 -aspect 2.2
scylla14-10.evl.uic.edu walkabout HICKEY/hickey.wbt -percent 57.5 85.3 80.8 99.2 -aspect 2.2
scylla15-10.evl.uic.edu walkabout HICKEY/hickey.wbt -percent 86.1 99.6 80.8 99.2 -aspect 2.2
scylla16-10.evl.uic.edu walkabout HICKEY/hickey.wbt -percent 29.0 42.5 40.8 79.2 -aspect 2.2
scylla17-10.evl.uic.edu walkabout HICKEY/hickey.wbt -percent 43.3 56.7 40.8 79.2 -aspect 2.2
scylla18-10.evl.uic.edu walkabout HICKEY/hickey.wbt -percent 57.5 71.0 40.8 79.2 -aspect 2.2
and the file to launch walkabout now looks something like this:
#!/bin/sh
DEMODIR=/nfs/disk2/DEMO
WALKPATH=$DEMODIR/walkabout
export LD_LIBRARY_PATH=/usr/local/lib
cd $WALKPATH; mpirun -v -np 19 -machinefile machinefile ./walkabout -mpi walkabout_mpi_hickey.txt
$DEMODIR/bin/forall killall walkabout
you will also need to make sure that you set setenv DISPLAY :0.0 in your .tcshrc file (or whatever your favourite shell is) so walkabout will know to display on each of the tiles.
For those interested in the Programming
Since Open Inventor doesnt have a built-in off-axis camera I had to use OpenGL to set the camera ...
glMatrixMode(GL_PROJECTION);
glLoadIdentity();
makePerspective(camerafov, windowsWidth / windowsHeight, near, far);
gluLookAt(userX, userY, userZ, lookatX, lookatY, lookatZ, 0, 1, 0);
glMatrixMode(GL_MODELVIEW);
glClearColor(backColorR, backColorG, backColorB, 1.0);
glClear(GL_COLOR_BUFFER_BIT | GL_DEPTH_BUFFER_BIT);
SbViewportRegion *myViewPort = new SbViewportRegion(viewW, viewH);
SoGLRenderAction * myRenderAction = new SoGLRenderAction(*myViewPort);
glEnable(GL_LIGHTING);
myRenderAction->apply(root);
// the original version of makePerspective came from the Aura source code - thanks Luc!
void makePerspective(float fov, float aspect, float n, float f)
{
float b = n * (float) tan(fov * 0.5);
float r = b * aspect;
float l_factor = (minX - 50.0) / 50.0;
float r_factor = (maxX - 50.0) / 50.0;
float b_factor = (maxY - 50.0) / 50.0;
float t_factor = (minY - 50.0) / 50.0;
// I dont have a way to set the aspect factor (related to the tile layout) at this point
float aspect_factor = 1.0;
glFrustum(l_factor * r * aspect_factor, r_factor * r * aspect_factor,
t_factor * b, b_factor * b, n, f);
}
If you have any questions, comments, or suggestions please let me know - aej at evl.uic.edu
last update June 4, 2004.