Project 2

Overview

I will be discussing the overall work done in this project.  What I had to do to make the assets and how I put everything together to create this final image.  I went with a kinda standard dungeon look, but kept it on the brighter end.  And sorry... no caustics was done. =(  Along the way I'll describe how you can interact with the space (i.e. what key strokes do what.)  Another heads up, I'm not going to bother putting up the shader code, you can look at it though by downloading the project and perusing through it yourself.  I'm just going to describe it at an overall level, like I said before.


Parallax Normal Mapping!

So the first thing I started to work on was Bump/Normal mapping.  In order to do this I figured it would be a good exercise to make something that'll create my normal maps from something I can make in Wings3D.  So I modeled and wrote some code to load up an OBJ model, courtesy of Bob Kooima, using GLSL to process the normals as output color and some code to store the output to a PNG file (again thanks to Bob, but I edited it so I did some work :P ).  Here's an example output that was used to put spikes on a teapot model.


There is actually an alpha channel too.  I was going to do relief mapping but after getting it to kinda work, I noticed how slow it was.  It was waaaaay too slow.  So I took the resulting png, went into GIMP to normalize the alpha channel, just for the heck of it, even though I don't really use it, and saved it off as a PNG again.  So after that and having some Normal Mapping shader working, I added some parallax effect.  You can control the bias and scale of the parallax.  Press 'B' to increase the bias, and 'b' to lower the bias.  Press 'N' to increase the scale and 'n' to lower.  Normally the bias is scale * -0.5, but I wanted to have fun and modify them independently.  This shader is used through out the environment, minus the one quad to do the water surface.

Wave Simulation

I decided I wanted to have circular geometric waves, since my environment has a simple pool.  I didn't implement bouncing back of the waves so to increase some complexity of the surface I create N number of wave sources.  I randomly decide the position, wavelength, amplitude and speed of the wave sources.  Sometimes it works out well sometimes it doesn't.   In the end I decided that there should always be at least one or two waves at the onset... don't ask why, I just felt like it.  If you want to add more press 'M', and less press 'm'.  You can't go lower than two.  As a side note the waves aggregate well on my Nvidia card at home, but don't do quite as well on my laptop's ATI card.  Here's the reason why.  I use Framebuffer Objects, and what I do is iterate through each wave source, swapping the attached color texture that is rendered to per wave source.  Standard GPGPU stuff, and it works well on the Nvidia, not always so well on the ATI.  Maybe I'm not doing something exactly right, but time was running out :)

The simulation uses three shaders.  One to aggregate the height, the second to calculate the normals after the height map is finished and the third for the dudv of the normal map.  This again is only to simulate the waves, it doesn't actually determine the final color.  Here's some example captures of the process.

 
Final Height Map after Four Sources


    Final Normal Map with Height Encoded in Alpha


DuDv Map from Normal Map


Pool Surface Shader

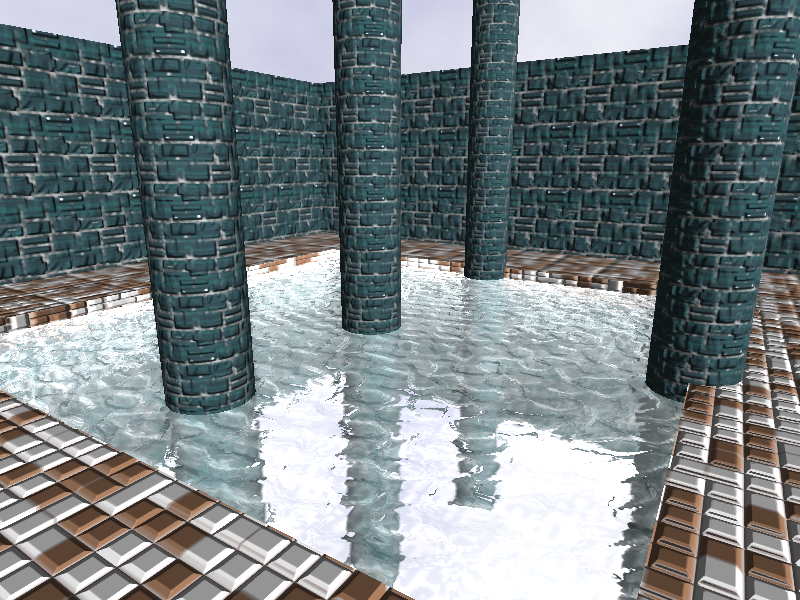
So going on to the most complicated thing, Pool Surface.  Using a similar method that was described by Christian , I basically followed the same procedure, creating a reflection, refraction image ( rendered to texture using Framebuffer Objects.  
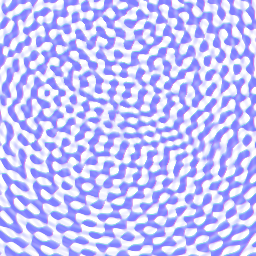
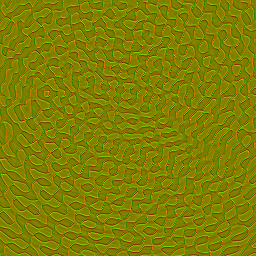
Here's some screen captures from the FBOs.
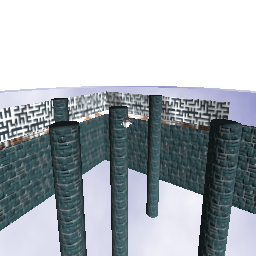
             
                                  Refraction buffer                               Reflection buffer with a clipping plane

I feel like this method is a bit kludgy, but again, time was running short.  I tried to incorporate my own calculations of the Fresnel term, so I think that's why the colors are a bit on the bright side.  Also, I modify how much of the reflection is visible when your are underwater or above water.  I did successfully get the refraction above water to show up, although again summing up the colors from reflection and refraction buffers washes out the color a bit. 

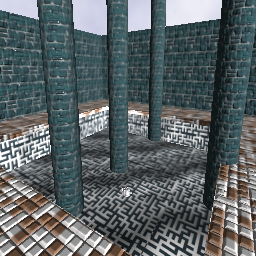
To move around, use the 'WASD' style control and use the mouse to look around and in the direction you want to move.  To run the program after you make it, you can type 'make run.'

Cool, now that that's all done.  Well, we're done.  For the normal map generation here is the code.  Here is the source code, The code should work on Mac OS X, Linux (32 bit & 64 bit).  In order to build the application you will need libpng and the SDL library.  On the Mac you can use Fink, or install from source.  Depending on which version of Linux you are using, you could probably install both via a package manager (e.g. apt-get, yast2, etc.).
Questions/Comments send mail to Arun Rao