Isosurface Generation Using VTK
|
|||||||
Using Python and Tkinter |
|||||||
|
|
|||||||
2.2.1. Creating a Tkinter Main Window
Although it was mentioned that it the programmer could try out examples in this tutorial by entering them line-by-line, this will not actually work when using Tkinter because once the main window starts executing, the interpreter focuses its attention on keeping that window alive and responding until it closes. Creating a Tkinter window only involves seven lines of code.
|
|||||||
|
#
Import the modules for the code import
Tkinter import
sys #
Setup for root window root
= Tkinter.Tk() root.title(
"Tkinter Test" ) frame
= Tkinter.Frame( root ) frame.pack(
fill=Tkinter.BOTH, expand=1, side=Tkinter.TOP ) root.mainloop() Example 2.1: Tkinter main
program |
|||||||
|
A floating title bar should appear that should be a window. Resize the window in order to get a feeling for what this thing is. The reason that the window shrunk was that there was nothing else in it. The variable named frame
serves as a container for other widgets.
Although this seems unimportant right now, it will become crucial for
anything that is placed into any window widget. The pack
function invokes the widget packer for Tk that behaves by putting things
in different regions of the frame.
This line tells the packer to fill the widget in both width and
height, that this widget is permitted to expand, and that the widget should
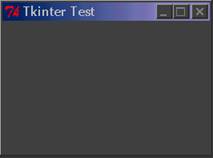
be placed in the top of the main window. Well, it is good to have a simple starting point, but there is a lot more to a VTK program than just showing a window with nothing else. See the figure below for what you should expect to see: |
|||||||
|
|
|
||||||
|
Example 2.1: Minimalistic Tk window |
|||||||
|
What’s a window without a menu bar? Build on the work from Example 2.1, move the line “root.mainloop()” from its current location to the end of this current section of code. Now, add the following code after the last line from the last example: |
|||||||
|
#
Function to exit program def
doMenuFileExit(): sys.exit( 0 ) #
Create a menu bar menuBar
= Tkinter.Menu( root ) root.config(
menu=menuBar ) menuFile
= Tkinter.Menu( menuMainMenu, tearoff=0 ) menuFile.add_command(
label='Exit', command=doMenuFileExit ) menuMainMenu.add_cascade(
label='File', menu=menuFile ) root.mainloop() Example 2.2: Tkinter
window with a menu bar |
|||||||
|
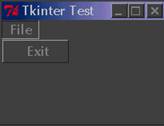
Tkinter.Menu causes a menu widget to be created. Issuing the config command on the root window named root adds the menu bar to the window. Creating a hierarchy of menus is not too difficult as seen by how a menu widget is added to a containing widget. In the above example, menuFile is added to menuMainMenu. Pay attention to the setting tearoff=0 because there is a weird (at least to this author) ability for the menu to tear off. Since 0 is false, this ability will be blocked, and there will not be any unexpected behavior. The other line to note is the add_command . Here, the programmer specifies the function callback to operate when the given menu item is selected. Also remember that with Python, any function that is called in the code must be defined linerally before it is called. This will likely not be a problem if OO programming is used because then many functions are defined of the C++ equivalent of the “this” pointer which is named menuMainMenu in Python. Below is the window that should appear after resizing it (again): |
|||||||
|
Figure 2.2: Tk Window with
menu bar |
|||||||
|
Selecting “Exit” should cause the window to disappear and the program to end. Now that the window appears and a menu bar appears, it is time to add the VTK rendering items. Right now, it is more a matter of knowing what to do and not necessarily understanding why. Chapter 3 focuses on VTK, and there is enough information to be able to master the goal of this tutorial. For now, just follow the structure. There is a Tkinter widget made specifically for holding VTK objects that appear later in the pipeline like vtkRender and vtkRenderWindow. These two VTK objects will be discussed in greater detail in chapter 3. Now, it is time to learn about vtkTkRenderWindowInteractor. This is the class that has a predefined user interface mapping so that when the user moves the mouse and holds down a button, the objects in the space will rotate about some axis. Another instance is pressing a key on the keyboard and witnessing another effect. This VTK class is a widget that must be packed with the other widgets in the Frame. In order to get a full feel for how this object is used, this new code will be provided and then explained. |
|||||||
|
#
Import the modules for the code import
Tkinter import
sys import
vtk from vtk.tk.vtkTkRenderWindowInteractor import
vtkTkRenderWindowInteractor #
Setup for root window root
= Tkinter.Tk() root.title(
"Tkinter Test" ) frame
= Tkinter.Frame( root ) frame.pack(
fill=Tkinter.BOTH, expand=1, side=Tkinter.TOP ) #
Setup for renderer render
= vtk.vtkRenderer() render.SetBackground(
0.329412, 0.34902, 0.427451 ) render.ResetCameraClippingRange() #
Setup for rendering window renWindow
= vtk.vtkRenderWindow() renWindow.AddRenderer(ren) #
Setup for rendering window interactor renWinInteract
= vtkTkRenderWindowInteractor(root, rw=renWindow, width=400, height=400) renWinInteract.Initialize() renWinInteract.pack(side='top',
fill='both', expand=1) renWinInteract.Start() #
Begin execution by updating the renderer and #
starting the Tkinter loop renWindow.Render() root.mainloop() Example 2.3: Tkinter
window ready for rendering VTK objects |
|||||||
|
Again, the focus for now is on the vtkTkRenderWindowInteractor. First, the widget must be initialized. Familiarity with Tkinter will allow one to
know why these things are specified in pairs.
If not familiar with Tkinter, it is important to understand that
Tkinter is simply a wrapping to Tk meaning that the original conventions for
creating widgets is basically the same.
rw represents
the parameter name for an object of type vtkRenderWindow. The function call pack simply indicates to the
widget packer that the widget should be placed on the top portion of the
container widget, fill the available horizontal and vertical space, and be
permitted to expand if necessary. The
author is not so certain about the Initialize
and Start function
calls, but making sure to follow this order would be helpful. If the reader is curious how this all
works, please look at some VTK demos in a Python wrapping. This would typically be found in some
“Wrapping” directory in the example files of VTK. When the program is run, a window |
|||||||
|
|
|||||||
|
|
|
|
|
||||