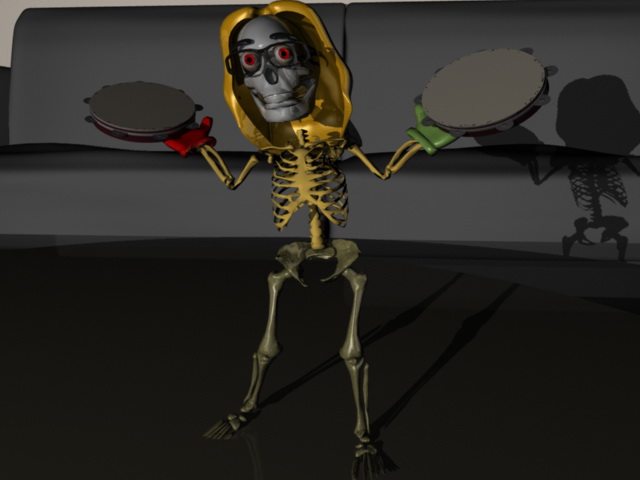
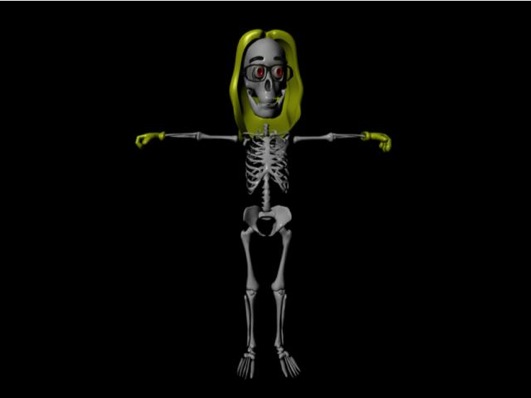
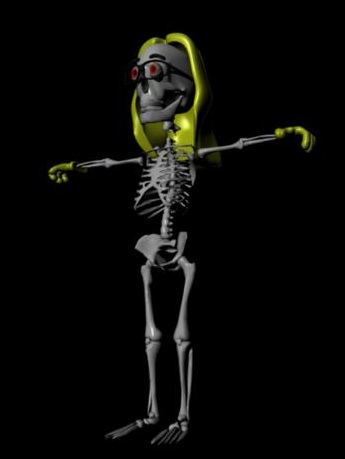
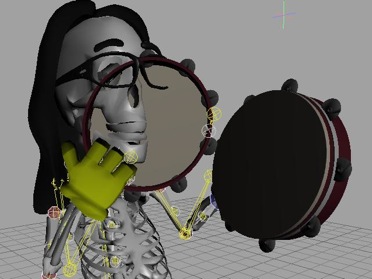
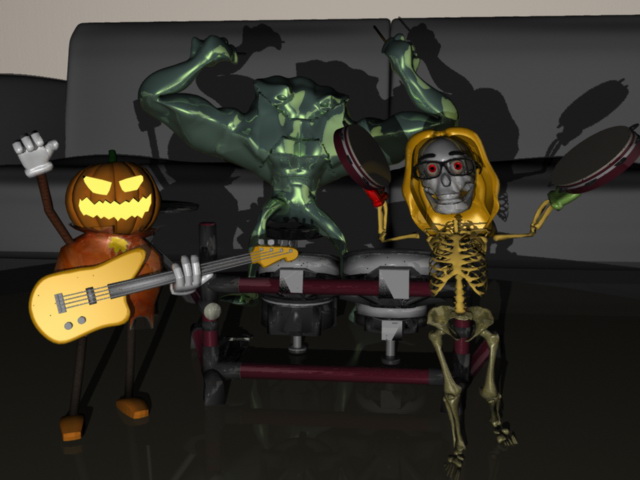
Tambourine Skeleton
Hyejung Hur
University of Illinois at Chicago

For character design, two factors were concerned.
- It should be fit into the story.
“Think more like Nightmare Before Xmax” - Don Olmstead
- It could be better if it makes people remind me.
From this experience, these are what I learn to be considered for motion capture.
- The suit should be fit to your body
- Capturing Range Of Motion(ROM) needs special care, not to hide dots.
- Do performance with concerning how your model looks like.
- Design dots position of prop, it can be important.
Story : Experience
We have large suit and extra large suit, so it was not fit to me.
My first motion capture was done alone.
I tried to tight the suite as possible as I can, but it didn’t work well.
It turns out that the data generate wired kinematic bone shape and really lots of mis-label.
So Second try was done together with my team members, and we tried to make the suit fit to me.
It helps to do subject calibration in easy, and data itself has much better quality.
We can have a sense of which dots can be easily hidden.
If we want to have good quality data and less manual subject calibration job, then we should
take care of not to hide dots at least when you capture ROM data.
Making me dance(maybe “move” is better words) was not easy. Thanks to Don Olmstead.
My instrument is tambourine. I hold the props representing tambourine.
Mine was normally not mixed with my hand dots, so it was okay.
However, like guitar, you are holding a props(guitar) and move your hands.
It can be really confusing.
So, in that case, design dots position must be very important.
From this experience, these are what I learn to be considered for refining data.
- Do Labeling as possible as you can. It will take long time, but it will produce better result.
- If the missing rate of a dot are very high, then delete all data of the dot and play the data.
If kinematic bone looks okay, then it’s good decision to delete all data from the dot.
- If there is gab, apply spine filling filter. If bone is jump from one to another in the gap filling
range, then delete the range and apply linear filling filter.
If the bone’s still little bit jumping, applying kinematic smooth was helpful for the my case.
- Generate very good quality ROM. ROM is perfectly labeled and has smooth motion.
From this experience, these are what I learn to be considered for retargeting.
- Reach retargeting seems okay.
- However, Touching key frame for preventing a part of body going inside of body is not good, so
We need this minimize this key frame touching job.
How to minimize, design props well, and do performance with considering characters’ shape.
Story : Experience
I have tambourine data from Vicon, but I didn’t use it for this animation.
There is always little different distance between hand and Tambourins.
I need to adjust distance between hand and Tambourine, so hand holds Tambourine.
However,
There is more simple way to generate
Tambourin animation.
It is to attach tambourine to “Hand end” bone.

These are what I learn from this phase.
- Naming bones should be same with Vicon kinematic and Maya skeleton.
- It could be better having same size of kinematic from Vicon and skeleton from Maya.
Story : Experience
If we create skeleton/kinematic by ourself according to model, then use that skeleton to Vicon and Maya. there could be no problem like things above.
However, it can also make lots of additional works and try and errors: specially where to attach
dots.
Then Rigging step should go to the next to the modeling phase.
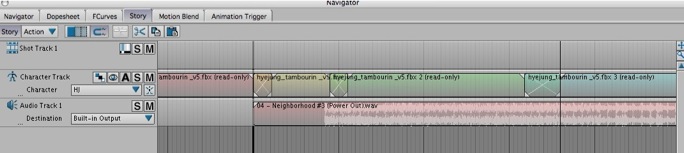
Synchronizing Performance and Music : using Motion Builder
Next Jobs are Team works :
- Merging characters (watching James doing and learned) : using motion builder
organize schematic tree from each character
merge using same Take name
- Layout characters (participated) : in motion builder
- Merging with environment (x) : using Maya
- Camera works (participated) : using Maya
- Rendering all frames (participated) : using Maya
- Creating Video (x)
Acknowledgment : Real Thanks to James Lee.
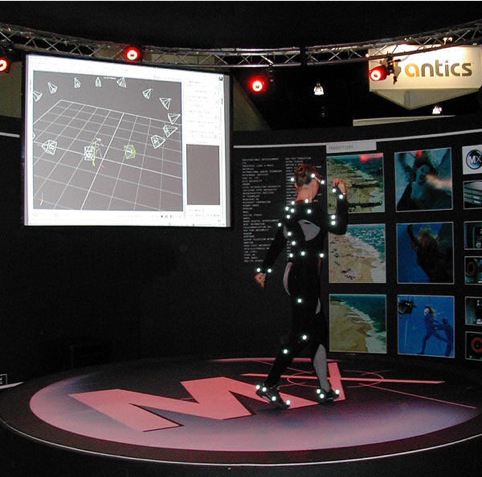
image from Wikipedia
Basic Process
1. Turn on cameras and system
2. Check indicators of all cameras are green.
3. Otherwise do calibration.
4. Wear the suit.
5. Check every markers are on right position.
6. Capture for ROM.
7. Do Subject Calibration.
8. Capture your Performance.
Basic Process
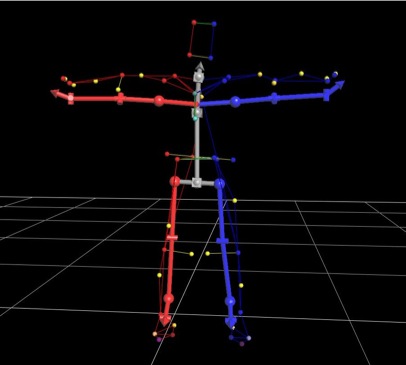
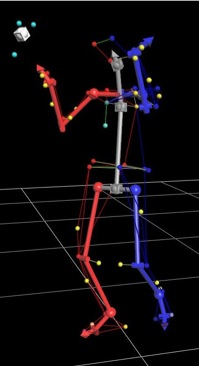
1. Reconstruct.
2. Select kinematic.
3. Set the best T-pose.
4. Do labeling on T-pose.
5. Run auto-ROM/subject calibration/trajectory label/kinematic.
6. Find unlabeled dots,
and label all as possible.
7. Find gabs, apply filters.
8. Complete ROM
Basic Process
1. Select skeleton template.
2. Select mesh and then bone.
3. Do “Bind Skin”.
4. Change to vertex mode.
5. Do manual binding.
* The basic process for the performance data is similar process with ROM process and the
same concerns above.
- except no 2,3,4, auto-ROM and subject calibration process.
Story : Experience
Personally, I like jobs doing labeling and applying gab filling filters.
Even if you don’t have any sense of natural smooth animation, you can improve your animation
by doing those two jobs. I felt like it’s kind of simple game. I enjoyed doing this.
Vicon software, IQ, is often crashed. From my short experience, motion builder was also
sometimes crashed when the file was modified from windows and tried to open it from Mac.
But to me, IQ was crashed several time.
Basic Process
Import Subject calibration data -> Import Motion Data -> Characterize the imported kinematic bones -> Merge rigged model data(mesh and bones) -> Characterize the rigged model ->
Change input type to character input (the rigged model) -> If you need, change values from Retarget -> Plot character (copy all data into the rigged model), input type is changed to control rig input -> Plot character(IK/FK) -> Create new layer for key framing -> Do Key framing for fixing the motion(detailed retargeting) -> Plot character
Contents
1. Character Design and Modeling
2. Retrieving motion data
3. Refining Data for smooth motion
4. Rigging
5. Retargeting for reach and preventing going inside of body
6. Synchronizing Performance and Music
Character Design and Modeling : using Blender
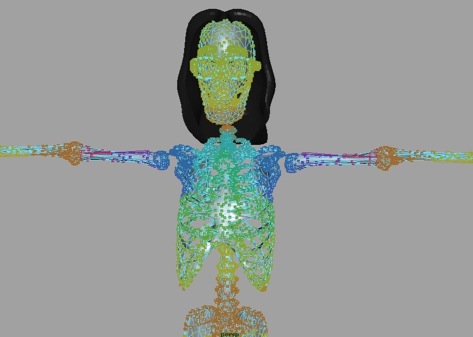
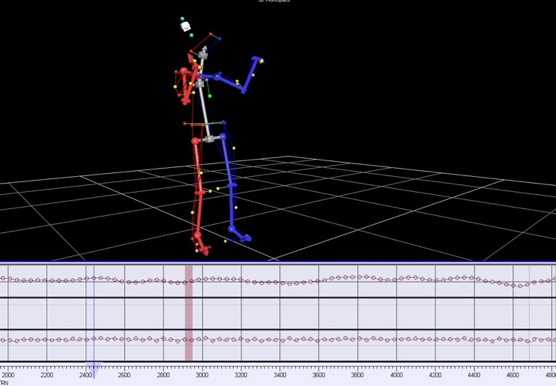
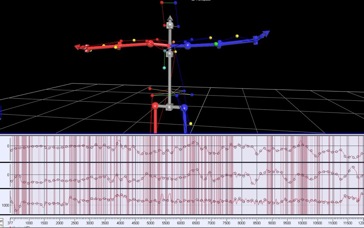
Retrieving motion data : using Vicon motion capture system
Refining Data for smooth motion : using Vicon software, IQ
Rigging : using Maya
Retargeting for reach and preventing going inside of body
: using Motion Builder
Conclusion
For creating animation from the motion tracking, we need at least two captured data.
One is called by ROM, it’s base motion including subject calibration. ROM data should have
perfect good smooth motion. Base on the ROM, the other captured data can be automatically
calculated kinematic motion. However, we also need manual job for generating good smooth
motion data.
Next step will be retargeting the motion data to the model. From this step, we can make your
model can reach at the points where we expect the model can touch or grab.
And we need to fix the animation if there is a part of our model goes inside of its body
Final step is to synchronize motion with music.
Now, we are ready to put our character into the world.
Story : Experience
It’s different to watch somebody is doing something and do it by myself.
We had several tutorial training time, but I remembered something, but what was exactly, and to
find how it can work was not easy.
Now, with this experience, I can use Vicon motion tracking system and generate animation.
It was great experience.
Story : Experience
It was simple and easy.
Motion builder supports nice interpolation of overlapping area
Basic Process
Merge your last modified file -> Register the directory including the last modified file from asset window -> Select Story tab from Navigator window/and Story tab from main window -> Drag the motion file that you want to use from the asset window to Short Track in Navigator window -> Drag music file that you wan to use from the asset window to Short Track in Navigator window -> Play (Motion and Music) -> Cut the motion to segments and Edit the segments. -> Plot all or selected (from Animation)