Byungil Jeong
This tutorial shows you how to add your own commands to DBPro using Visual C++. DBPro can load DLLs written in other languages to expand its commands. All you have to do is write a DLL for your commands using Visual C++ and place it in a specified folder. Then, DBPro automatically scans DLLs and adds your commands as its own new commands. You can find another tutorial for this in DBPro help/Technical Document. It describes how to create two simple commands — creating a message box and returning an integer value to the DBPro program. I will present here a somewhat more complicated thing: creating a file dialog box and returning a file name to the DBPro program.
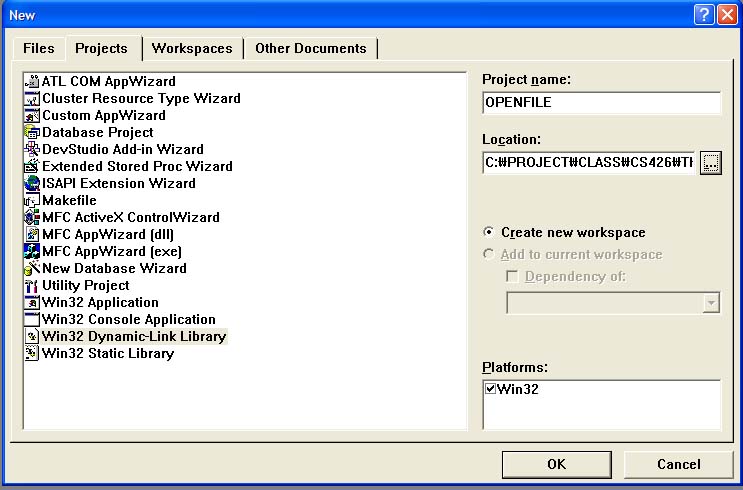
a. Open Visual C++ 6.0 and select NEW, choose Win32 Dynamic-Link Library, call your project “OPENFILE” and click OK.
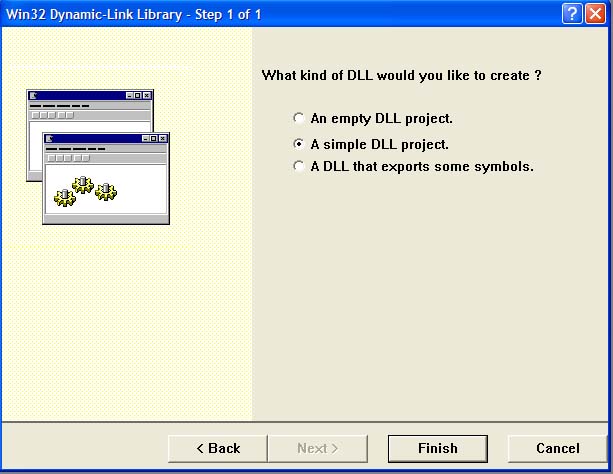
b. Select 'Create a SIMPLE DLL Project'.
c. In FileView, double click OPENFILE files, then Source Files, then OPENFILE.cpp. Then you will see the DLLMAIN function common to most DLLs.
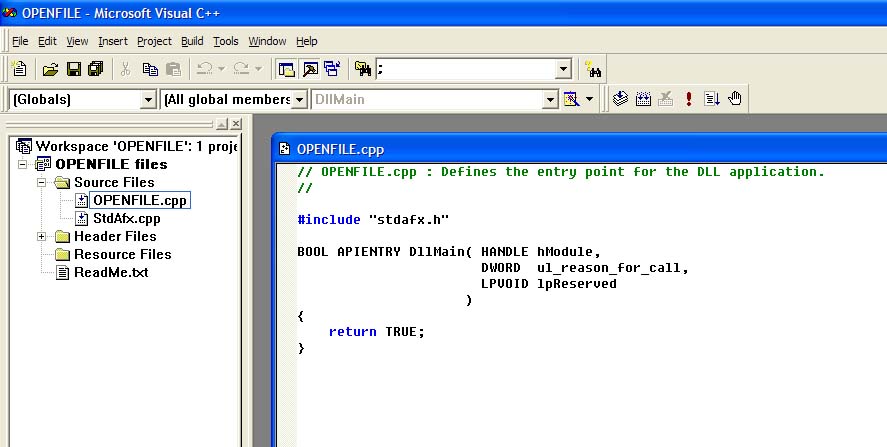
d. Add followings below #include “stdafx.h”. We need ‘GlobStruct’ for returning a string to DBPro.
#include “stdliba.h ”
#include "commdlg.h" // header file for openfile dialog box
#include "globstruct.h" // header file for core data structure of DBPro
GlobStruct* g_pGlob = NULL;
e. You can find ‘globstruct.h’ at C:\Program Files\Dark Basic Software\Dark Basic Professional\Help\documents\Files\Third Party Commands\TESTCOMMANDS2. You have to copy this file to your project directory before compiling your project.
f. Then we have a problem to use this header file. It requires ‘D3dx9tex.h’, but we don’t have the file. So we have to modify some part of ‘globstruct.h’
— comment out #include "D3dx9tex.h ”
// Header to support texture ptr
//#include "D3dx9tex.h"
— find the following part:
LPDIRECT3DTEXTURE9 o pCurrentBitmapTexture;
LPDIRECT3DSURFACE9 pCurrentBitmapSurface;
LPDIRECT3DSURFACE9 pHoldBackBufferPtr;
LPDIRECT3DSURFACE9 pHoldDepthBufferPtr ;
— change to this:
void* pCurrentBitmapTexture;
void* pCurrentBitmapSurface;
void* pHoldBackBufferPtr;
void* pHoldDepthBufferPtr ;
g. Add the following before DllMain().
#define MYCOMMAND __declspec ( dllexport ) // indicating following function will be exported to other executables
//
// Constructors (optional)
//
MYCOMMAND void Constructor ( void )
{
// Create memory here
}
MYCOMMAND void Destructor ( void )
{
// Free memory here
}
MYCOMMAND void ReceiveCoreDataPtr ( LPVOID pCore )
{
// Get Core Data Pointer here
g_pGlob = (GlobStruct*)pCore;
}
h. Add the following below DllMain(). You can get more information about the OPENFILENAME struct from the MSDN Library.
MYCOMMAND DWORD OpenFile( DWORD pOldString )
{
// Delete old string
if (pOldString)
g_pGlob->CreateDeleteString ( (DWORD*)&pOldString, 0 );
OPENFILENAME OpenFileName;
// Structure for common dialog File/Open
TCHAR szFilter[]=__TEXT("All Files(*.*)\0*.*\0\0");
TCHAR szFile[MAX_PATH];
LPSTR lpszFileName = NULL;
// Initialize variables
szFile[0] = __TEXT('\0');
OpenFileName.lStructSize = sizeof(OPENFILENAME);
OpenFileName.hwndOwner = NULL;
OpenFileName.hInstance = NULL;
OpenFileName.lpstrFilter = szFilter;
OpenFileName.lpstrCustomFilter = (LPTSTR) NULL;
OpenFileName.nMaxCustFilter = 0L;
OpenFileName.nFilterIndex = 1L;
OpenFileName.lpstrFile = szFile;
OpenFileName.nMaxFile = sizeof(szFile);
OpenFileName.lpstrFileTitle = NULL;
OpenFileName.nMaxFileTitle = 0;
OpenFileName.lpstrInitialDir = NULL;
OpenFileName.lpstrTitle = __TEXT("File Browser");
OpenFileName.nFileOffset = 0;
OpenFileName.nFileExtension = 0;
OpenFileName.lpstrDefExt = NULL;
// No default extension
OpenFileName.lCustData = 0;
OpenFileName.Flags = OFN_SHOWHELP | OFN_PATHMUSTEXIST |
OFN_FILEMUSTEXIST | OFN_HIDEREADONLY |
OFN_EXPLORER | OFN_LONGNAMES;
// Create File Dialog Box
if (GetOpenFileName(&OpenFileName)) {
DWORD dwSize=strlen( OpenFileName.lpstrFile );
g_pGlob->CreateDeleteString ( (DWORD*)& lpszFileName, dwSize+1 ); // allocate memory space for return string
strcpy(lpszFileName, OpenFileName.lpstrFile);
}
// Return file name string
return (DWORD) lpszFileName;
}
i. Press F7 to compile your DLL
A DLL string table informs DBPro which commands the DLL has and which function is associated with each command.
a. Click INSERT from the Menu, then RESOURCE.
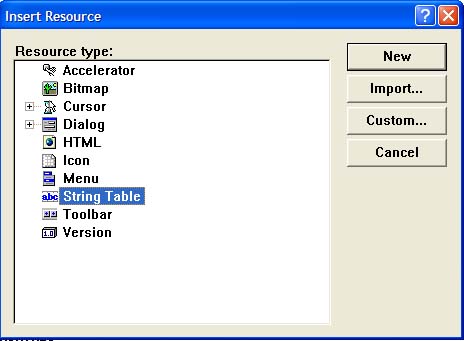
b. Select STRING TABLE to highlight it and then click NEW to create a new string table
c. Double click the highlighted box under ID and then click in the caption box where we will type out our command:
BROWSE FILE[%S%?OpenFile@@YAKK@Z%String
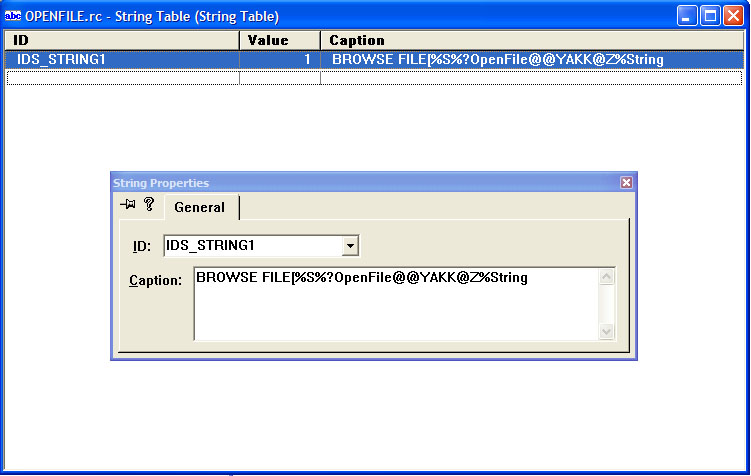
d. This string is divided into several parts by ‘%’. The first part, ‘BROWSE FILE[’, is the command itself which will be used in DBPro. ‘[’ indicates that the command has a return value. Otherwise, you have to delete ‘[’. The second part tells types of a return value and parameters. S denotes a string. L would denote an integer. F would denote a float. D would denote a pure unsigned 4 byte dword. In case of this command, ‘S’ means the type of return value is String. The next part is the decorated form of function in your DLL which is associated with your command. You can find this form by loading your DLL into Notepad and searching the function name. The last part is a description of the parameters which will be used for generating a help page about your command.
e. Save this resource file in your project directory assigning file name as ‘OPENFILE.rc’.
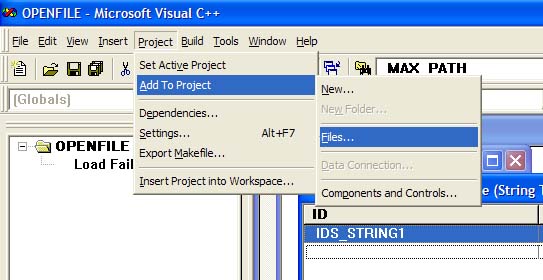
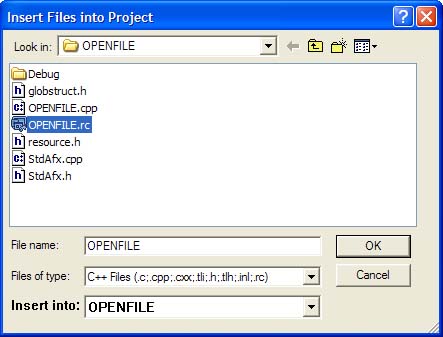
f. Now select the PROJECT menu and click ADD TO PROJECT and then FILES. Select ‘OPENFILE.rc’ and click OK. To make sure, click F7 to compile your DLL again. It will now contain a string table describing your first command.
a. You can find your DLL file(OPENFILE.dll) in debug directory or release directory under your project directory according to your compile mode.
b. Copy your DLL file to plug-in user folder of DBPro. The default path to this folder is ‘C:\Program Files\Dark Basic Software\Dark Basic Professional\Compiler\plugins-user’.
c. Launch DBPro and type out followings.
S$ = BROWSE FILE()
PRINT S$
WAIT KEY
d. Press F5 to run the program and see the file dialog box.
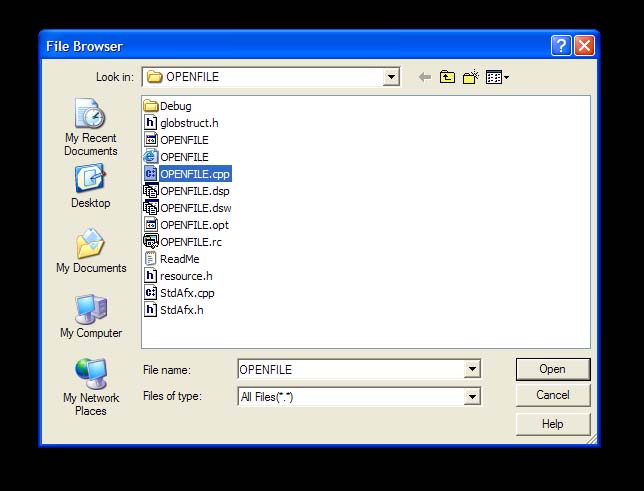
e. Select a file and click ‘open’ button. You will see the path to the file is displayed on screen.
f. You can use this command to get a filename for DBPro file commands such as OPEN TO READ or OPEN TO WRITE.
You can get more information about parameter types and string tables from another tutorial in DBPro help. It also deals other issues such as returning a float value or memory management. You can use other types of common dialog boxes in Platform SDK such as color dialog box, font dialog box, and so on. Set some arguments and call functions such as ChooseColor or ChooseFont instead of GetOpenFileName in your DLL code. For more detail information for using these, refer to Platform SDK / User Interface parts of MSDN Library.