2008 Fall CS 525 (GPU Programming)
Shader Presentation
Volumetric Fog II
Sangyoon (James) Lee (sjames @ evl.uic.edu)
Electronic Visualization Laboratory
University of Illinois at Chicago
1. Application
Choosen shader and application is Volumetric Fog 2 from Humus site. (http://www.humus.name/index.php?page=3D&ID=70)
Pre-build binary from this website does not work very well (crash right after execution). So, if you are interested in this application, need to download its source along with Humus' Framework3. Once you compile it by yourself, it should work well.
One change here is Humus' recent framework (Framework3) has issue with OpenGL depth testing configuration. Humus suggested to change following line in OpenGLRenderer.cpp (line 213).
glDepthFunc(GL_LESS); to glDepthFunc(GL_LEQUAL);
Without this change, you will see all black screen.
2. Screenshots
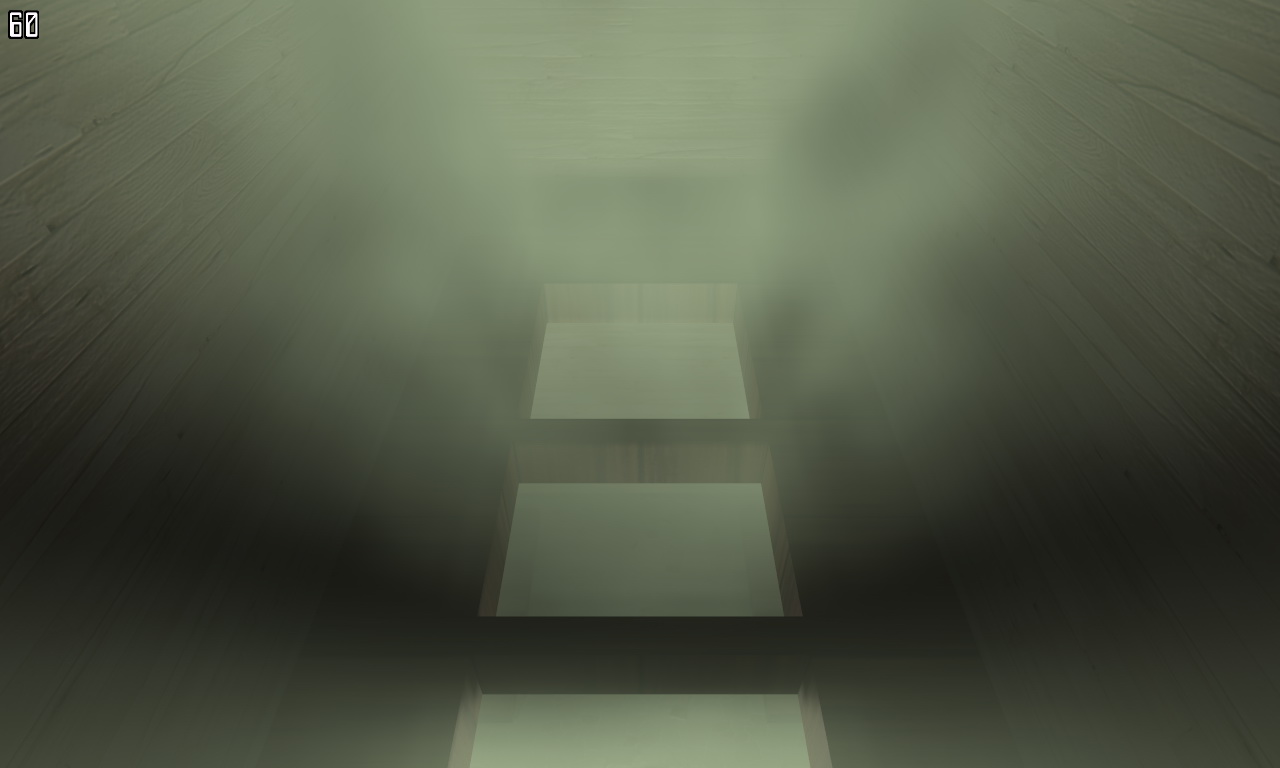
- Initial Scene
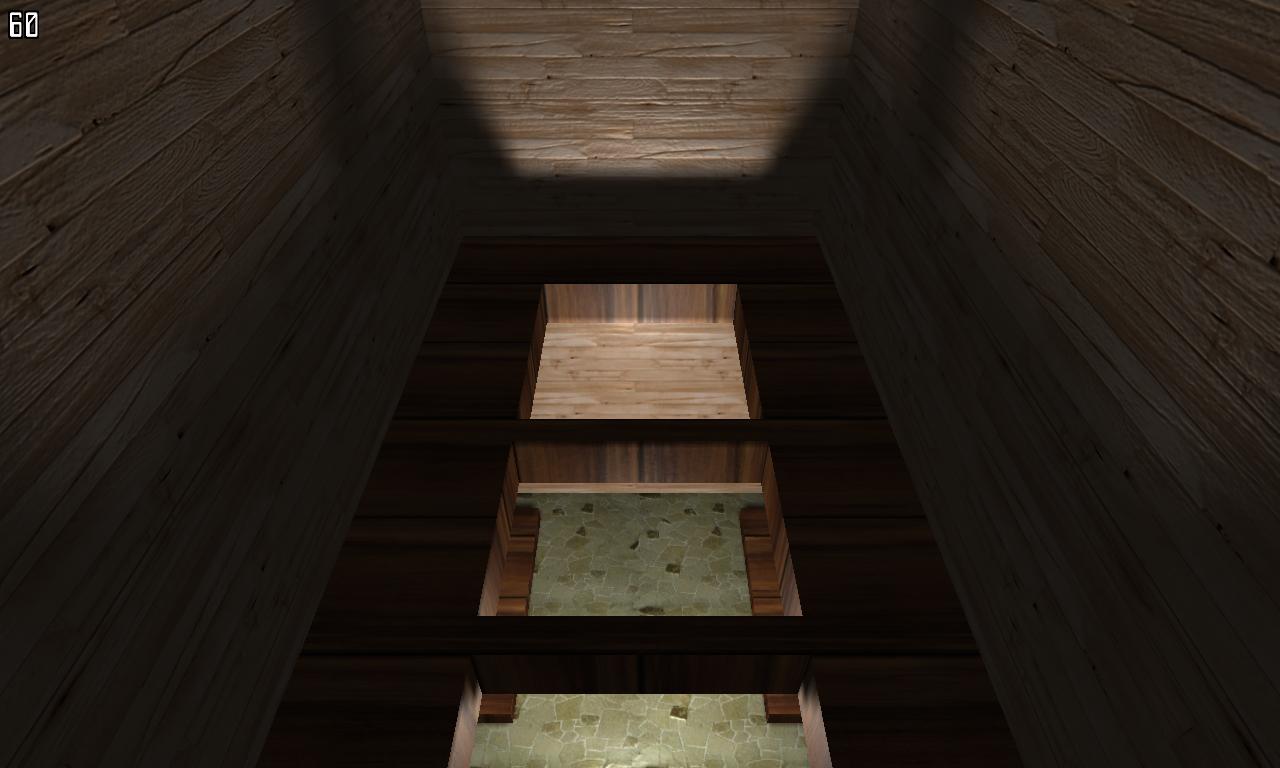
- Center Chamber under initial scene
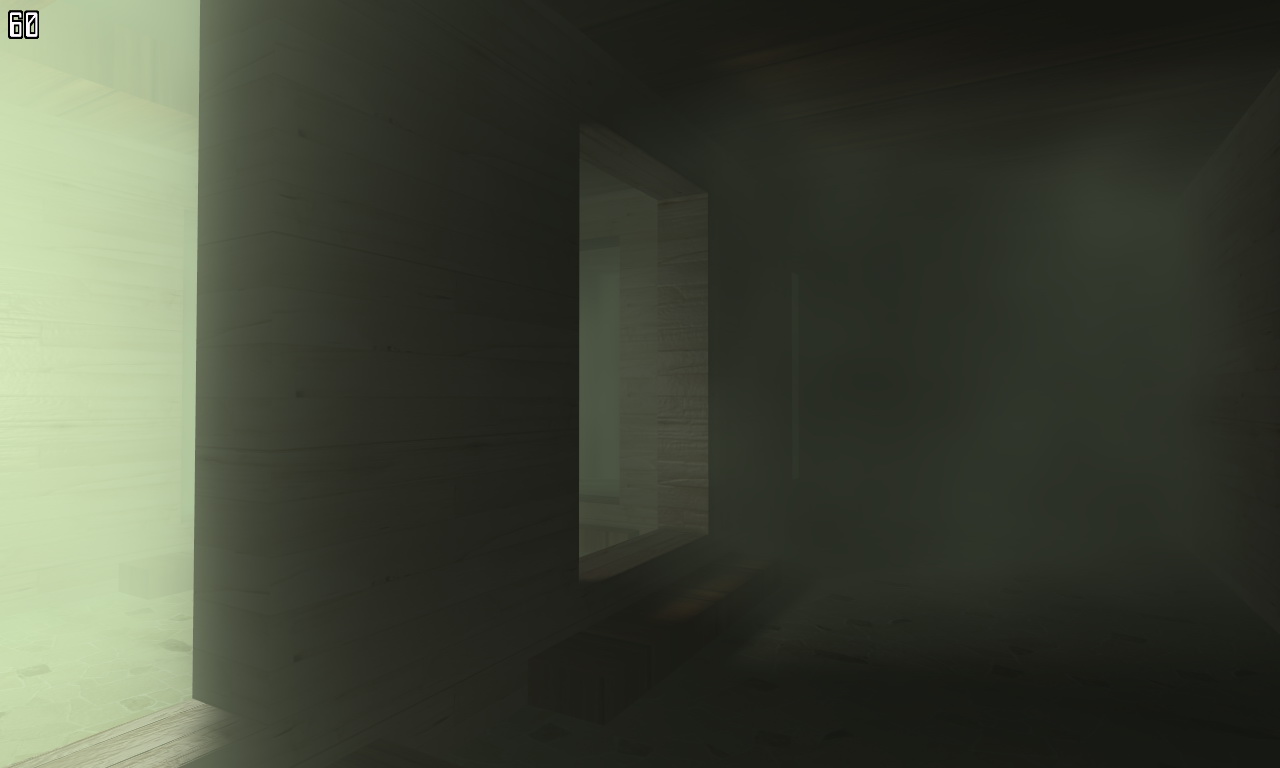
- Side Room Light Effect
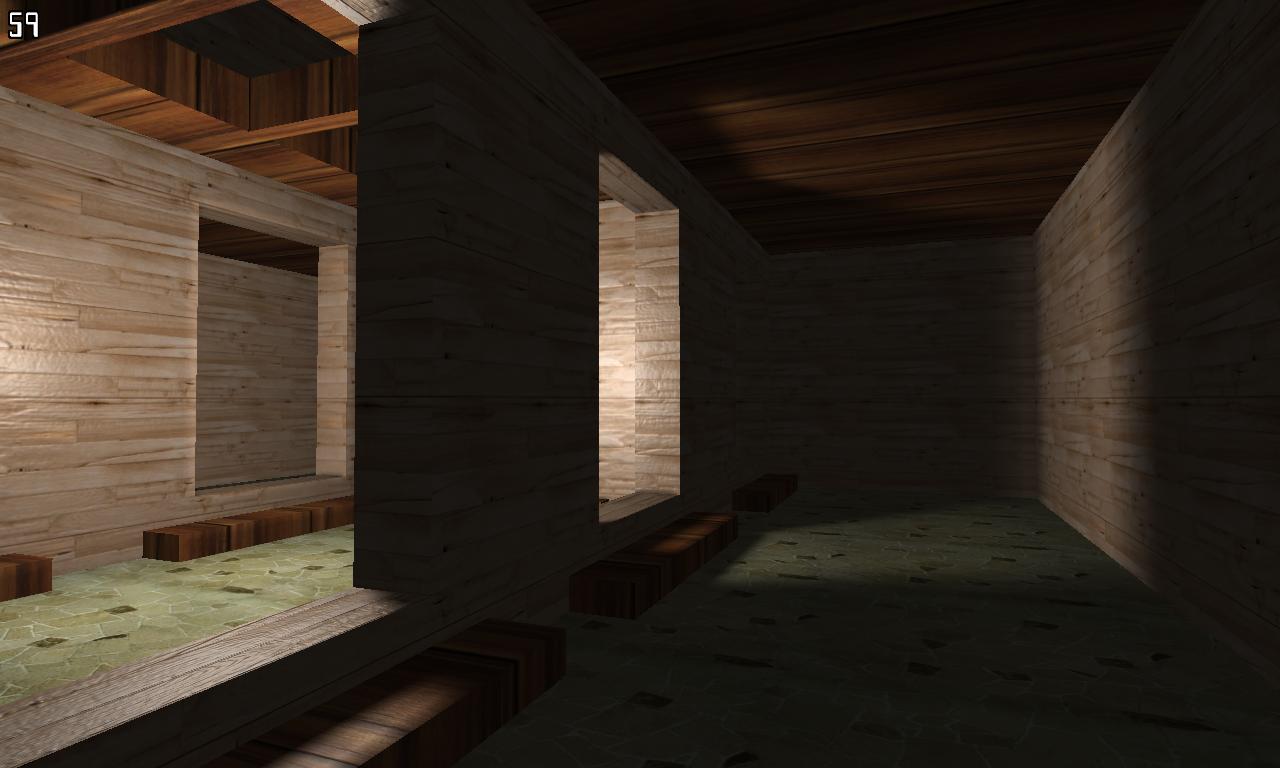
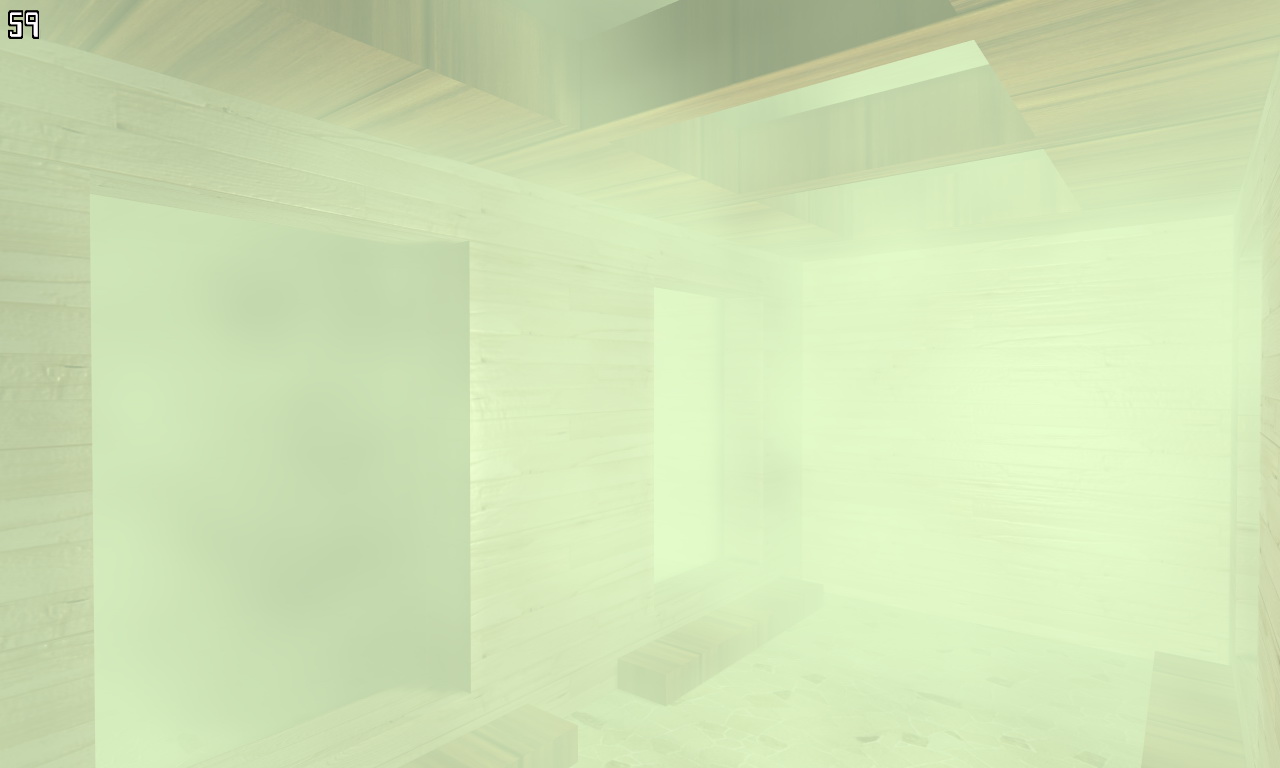
- Compared to previous images, these two images show scene without fog effect but lightmap applied. (Since this app's shader includes lightmap, I am showing these to see fog effect more clearly.)
3. Ideas
Main idea here is to replace default uniform fog function. Default fog generates its density purely based on the distance from eye. In other word, there is no distinction in the scene where some part of scene does not require fog (i.e. high in the sky). It also very static. No changes over time if eye stays in the same position and direction. Volumetric fog enables the fog only within desired area (cubic volume or other shapes depending on implementation.). This techniques also can be applied to volume light effect. It is similar concept to Fog's.
Note that this volumetric shader approach here only works for static lighting and fogging.
- 3D Texture
This app uses two of special textures - 3D texture. 3D texture is an extension of common 2D texture. It collapses many of images into one. It forms Dense 3D pixel information. Usually 3D texture has much bigger size that 2D. For instance, 128x128x128 texture file size is simply 128x128x128x 24bit (6 MB). This is 128 times bigger than 2D 128x128 texture (48 KB).
The first 3D texture is lightmap (LightMap.dds) and the second is fog map (Noise.dds).
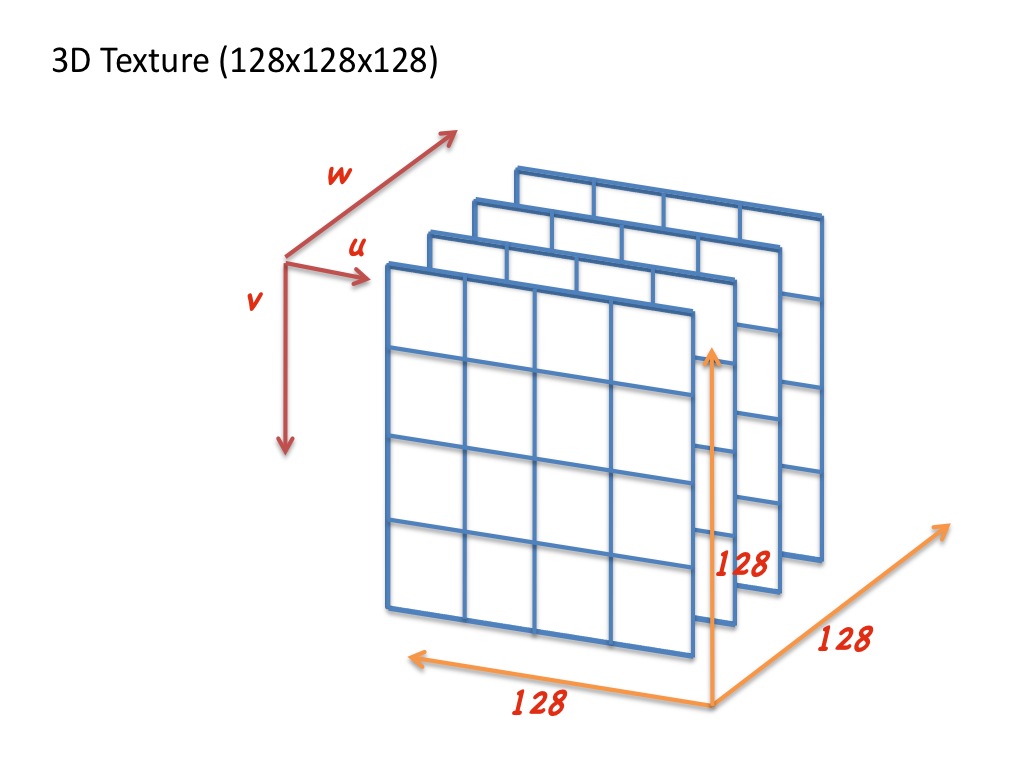 Left image shows general concept of 3D texture.
LightMap texture (128x128x128, this picture shows small part of it. - 128x128x6. Red grid line is added to see the boundary of each dimension.)

Fog (Noise) texture (64x64x64, this picture shows small part of it. -64x64x6. Red grid line is added to see the boundary of each dimension.)

Below two movies illustrate the changes of 3D texture along w axis in time frame.
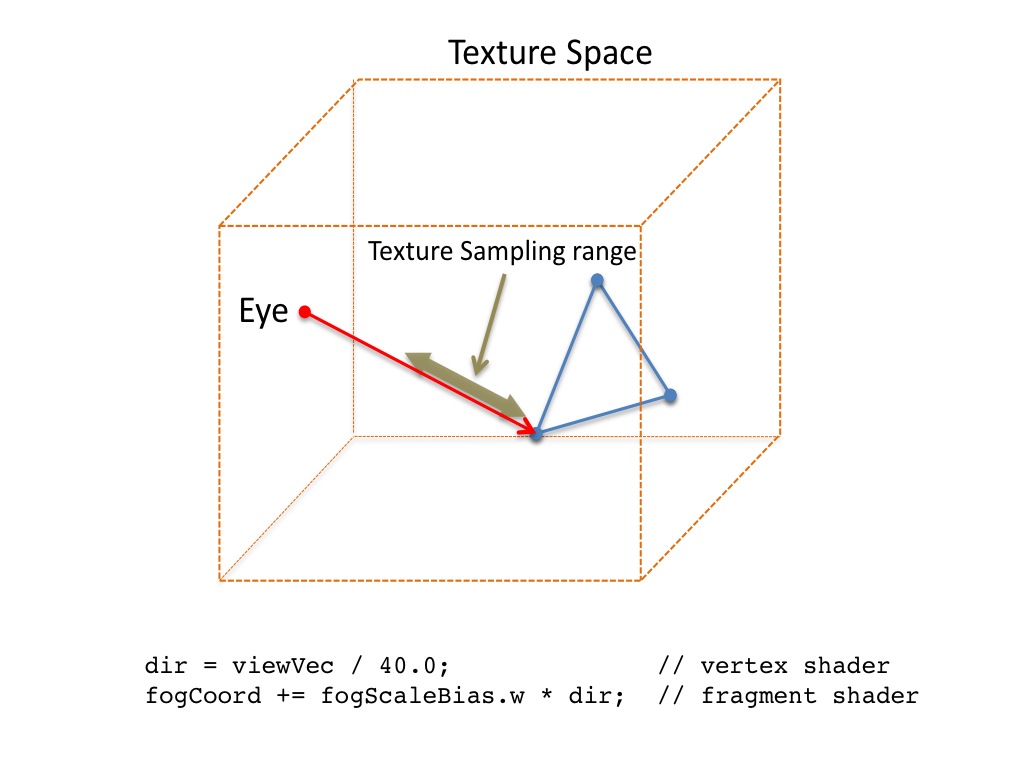
Basic idea of this shader technique is oversamling fog texture voluem along with Light volume. Following image shows this concept. The range is defined by the FogBias.w factor and the number of sampling iteration. (see more detials in following shader section).
4. Shaders
This application uses GLSL that we are most familiar with after project 1 in the class. Following section will explain its two shaders (vertex / fragment) for volumetric fog technique. Presented shader code snippet here is slightly different from the original code to make it easy to understand. (removed some of unnecessary part of code.)
- Vertex Shader
In vertex shader, first block of code is fairly simple operation. It computes basic coordinate and some extra for bump mappling. Since bump mappling is not the main topic here, I will skip this part.
You can find more interests in the second part. Most likely vertex shader does not compute that much here. It generate two of 3D texture coordinates. One for fog and another for shadow. As we've seen in previous images, fog texture is generated by noise algorithm. Also fogCrd is result of time function from application side (fogScaleBias is defined as vec4 fogScaleBias(0, -0.06f * time, 0, 0.0008f); in app. Here, time is application clock time.). This will give smooth animation effect on Fog density. shadowCrd is computed primarily based on vertex position. In addition to this, shadowScale and Bias is applied (This is an adjustment of texture coordinate and scene model size.).
void main() {
gl_Position = mvp * gl_Vertex;
vec3 viewVec = camPos - gl_Vertex.xyz;
texCoord = textureCoord;
vec3 lightVec = lightPos - gl_Vertex.xyz;
lVec.x = dot(lightVec, tangent);
lVec.y = dot(lightVec, binormal);
lVec.z = dot(lightVec, normal);
vVec.x = dot(viewVec, tangent);
vVec.y = dot(viewVec, binormal);
vVec.z = dot(viewVec, normal);
dir = viewVec / 40.0;
fogCrd = gl_Vertex.xyz * fogScaleBias.w + fogScaleBias.xyz;
shadowCrd = gl_Vertex.xyz * shadowScale + shadowBias;
}
- Fragment Shader
Just like many of shaders we've seen in the class, fragment shader takes main role of fancy effect. Let's start with simple stuff.
First part of shader code (before meet for loop) has three stage of texel color generation. The first one is bump, the second is shadow and the third one is mixture of first two components. When, it compute shadow color, we sample LightMap (3D texture). What we can see upto now is the lightmap screenshot in prevous section.
Now, we get into the part of volumetric fog computation. Inside for loop, we basically compute the mixture parameter a and b for base lighting (bump+shadow) and fogColor. The number of iteration defines the range of fog sampling (refer to prevous illustration). Most importantly to form a volume of fog, we take light volume (light map) into account. If there is no light, then fog color is of no use. The first two lines inside loop advances texture3D coordinate along view direction so that all fog & light texture color sampled within range.
void main() {
const vec3 fogColor = vec3(0.9, 1.0, 0.8);
const float fogDensity = 0.005;
float n = fogDensity * length(dir);
vec3 fogCoord = fogCrd;
vec3 shadowCoord = shadowCrd;
// Regular per pixel lighting
float atten = 1.0 / (1.0 + 0.000001 * dot(lVec, lVec));
vec3 lightVec = normalize(lVec);
vec3 viewVec = normalize(vVec);
vec3 base = texture2D(Base, texCoord).rgb;
vec3 normal = normalize(texture2D(Bump, texCoord).xyz * 2.0 - 1.0);
float diffuse = saturate(dot(lightVec, normal));
float specular = pow(saturate(dot(reflect(-viewVec, normal), lightVec)), 16.0);
float shadow = texture3D( LightMap, shadowCrd ).x;
vec3 lighting = atten * shadow * (diffuse * base + 0.5 * specular) + 0.14 * base;
float a = 1.0;
float b = 0.0;
// Volumetric fog computation
for (int i = 0; i < COUNT; i++) {
fogCoord += fogScaleBias.w * dir;
shadowCoord += shadowScale * dir;
float fog = texture3D(Fog, fogCoord).x;
float shadow = texture3D(LightMap, shadowCoord).x;
// Compute weighting factors.
float x = 1.0 - fog * n;
a *= x;
b = mix(shadow, b, x);
}
gl_FragColor.rgb = lighting * a + fogColor * b;
}
5. Summary & Notes
We have looked at Humus' Volumetric Fog 2 application. This shader example illustrates how we can create volume light & fog effect using shader. One important aspect of this example is that it uses 3D texture to look up light (shadow) volume and fog volume more efficiently. In fact, this is a trick to gain performance. Even this obtain performance, it cannot be applied to general case of scene since it requires scene specific texture data (lightmap).
You can find more general approach of volumetic lighting & fog effect example in Gamasutra volumetric rendering tutorial or Nvidia's Fog Polygon Volume example. Essentially these example incoporates with another pre-rendering pass of fog density. The first pass of rendering will generate appropriate volumetric fog density in offscreen buffer and utilize this in the second pass to blend scene with fog or light effect. See further details in reference link.
6. References
- Volumetric Fog 2, Humus 3D, http://www.humus.name/index.php?page=3D&ID=70
- Volumetric Rendering in realtime, Gamasutra, http://www.gamasutra.com/features/20011003/boyd_01.htm
- Fog Polygon Volumes, Nvidia SDK 9.5 DirectX example, http://developer.download.nvidia.com/SDK/9.5/Samples/samples.html