Alpha Due Saturday 10/10 at 8:59pm Chicago time Application Due Saturday 10/17 at
8:59pm Chicago time
Documentation Due Monday 10/19 at 8:59pm Chicago time
Project 1 focused on presenting useful information in
Augmented Reality at the tabletop scale. For project 2 we are
going to look at a more playful and a more personal use of AR at
tabletop scale and life-size. For this project you are going to
create your own AR action figure / doll play set, that is, it is
going to be a figure of you in a play set of
your choice (though one that one that theoretically could be
sold in a store so please keep it PG rated and not offensive).
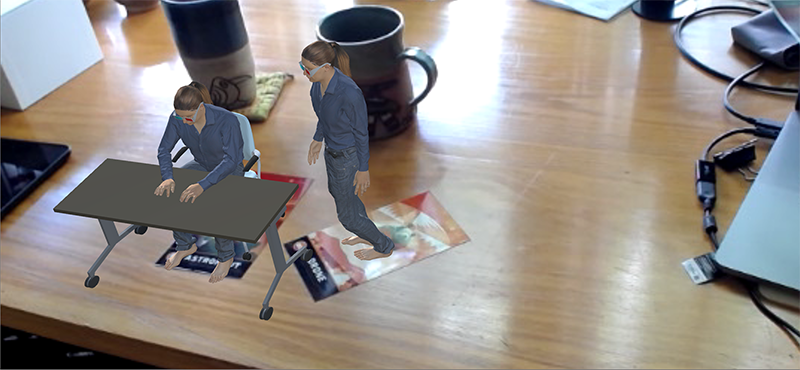
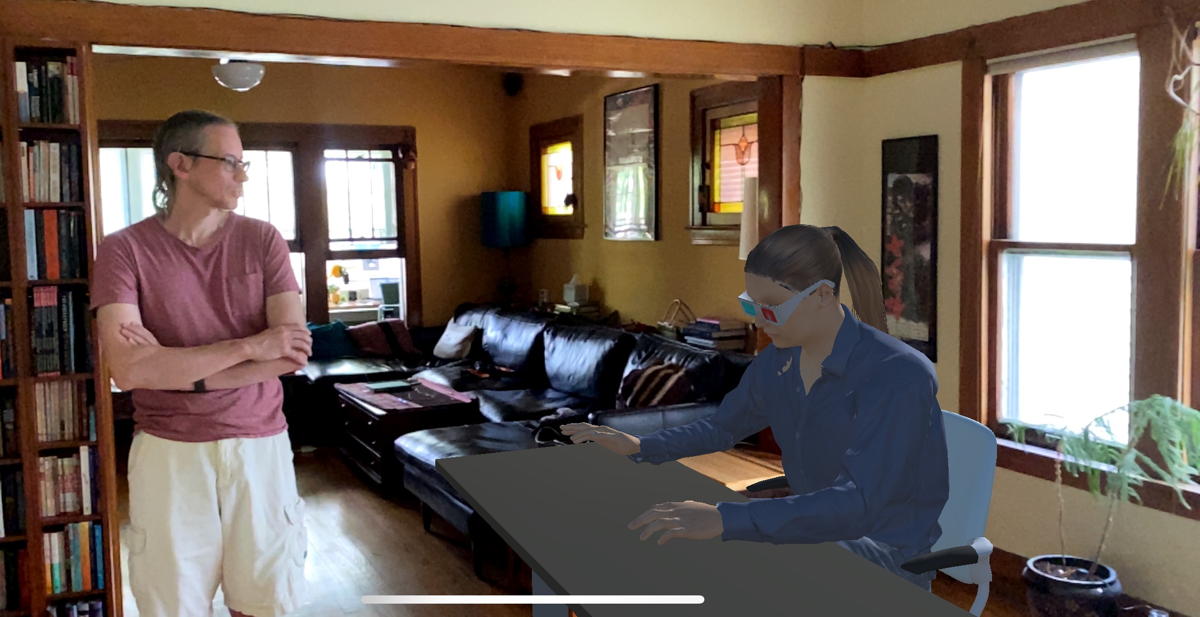
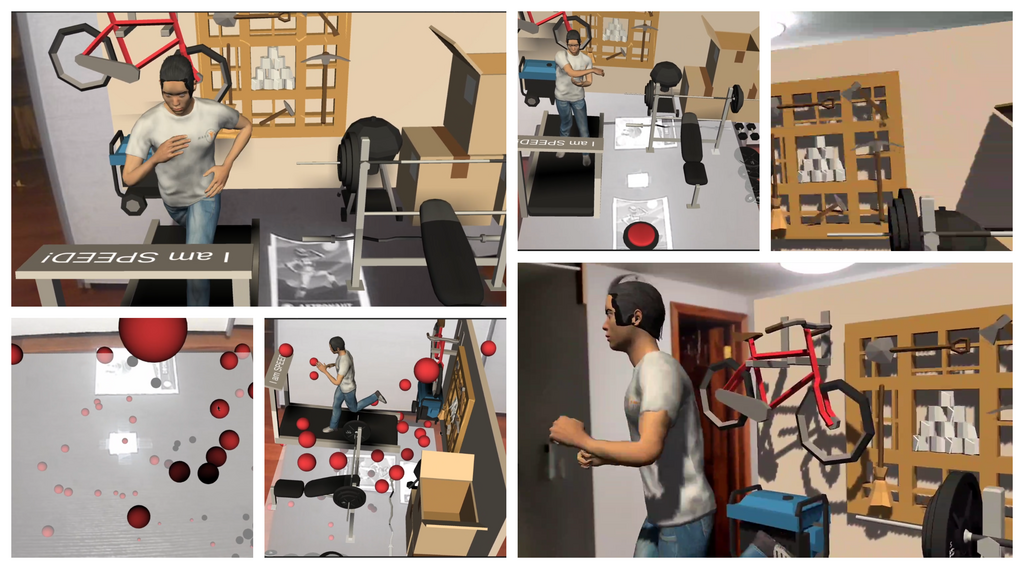
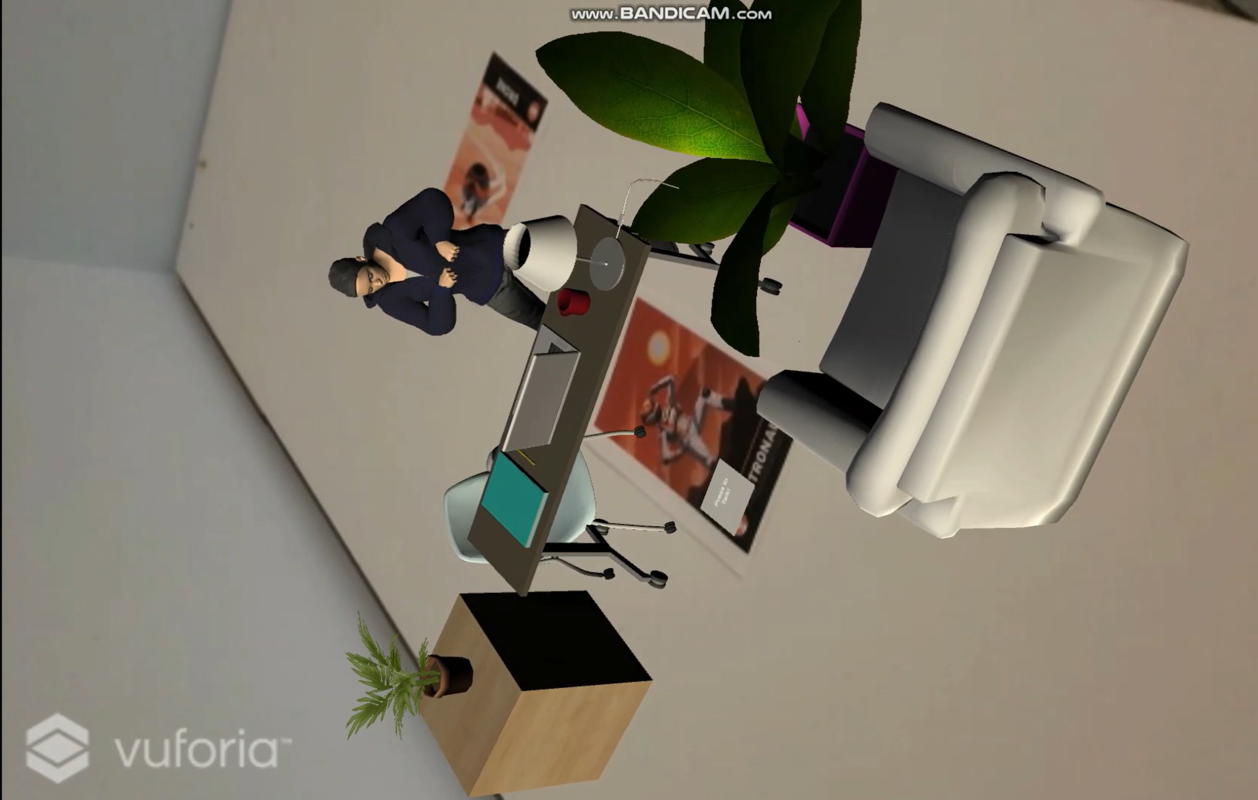
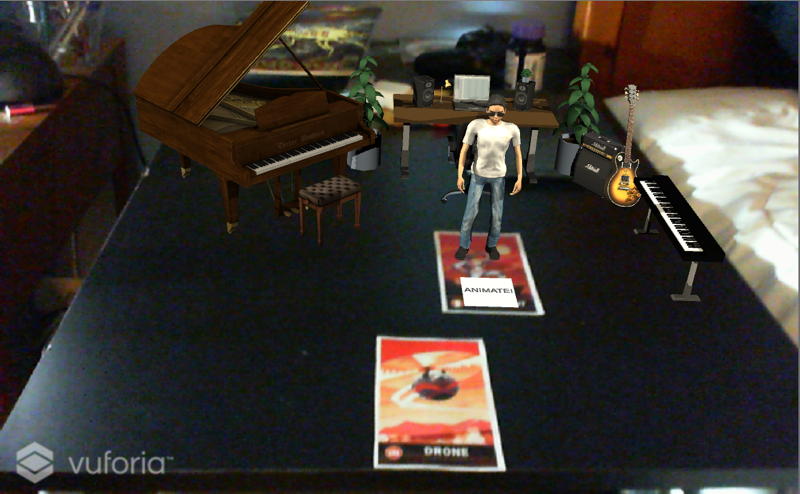
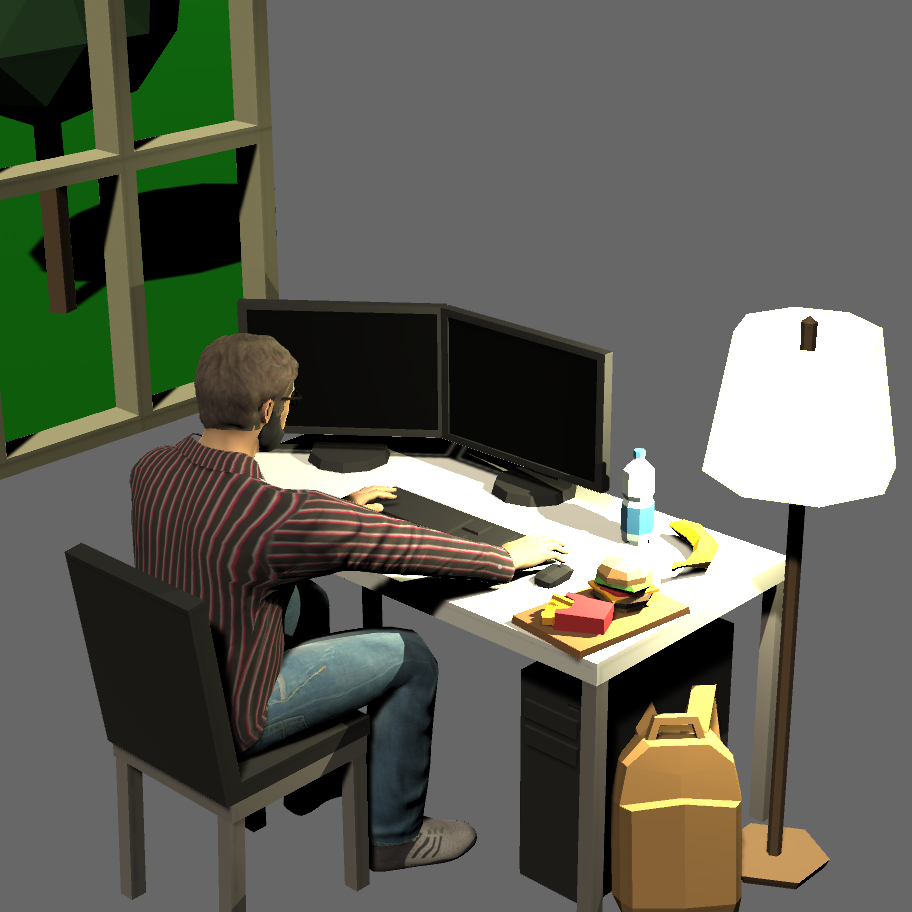
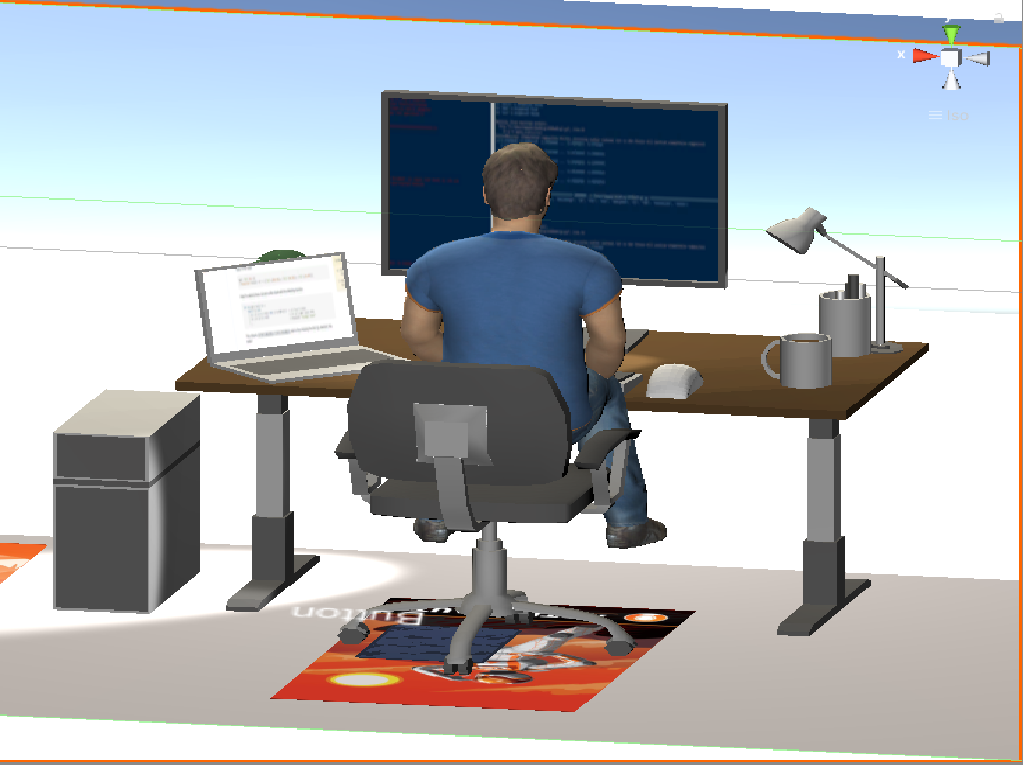
Here
is a simple one that I created shown at table-top scale with
markers and life-size using a ground plane.
Again, we assume that in the future people will be
accessing AR environments like this easily through lightweight
glasses, but for now we will stick with fiducial markers and
ground planes to keep it accessible to the class. In the future
we will also be able to easily scan the environment to find
surfaces and movable objects, but again for compatibility sake
for now we will use fiducial markers to locate the objects and
model them by hand. In the future once you have your digital
character you could then buy additional digital assets for them
(outfits to wear, items to hold, interesting places to go) and
these AR figures would be smart enough to know where the edge of
the table is, or react when other characters come close to them,
and in general be more 'alive' than traditional ones.
The
goal here is to work with AR that is more connected to its
environment, including through physics and lighting, and to see
how representations of people at different scales fit into this
ecosystem.
This is an individual
project.
Implementing the
Project
You will be
implementing the project in Unity
2019.4.1f1 and Vuforia 9 and making use of the standard
Vuforia Mars Image Target Database. From Week 2 you should
already have Unity and Vuforia set up. If not, follow those
notes.
Make sure you have a
recent version of Blender - https://www.blender.org/ - installed on
your computer as it will be needed to convert the models for my
sample scene.
You should start by creating a new Unity project.
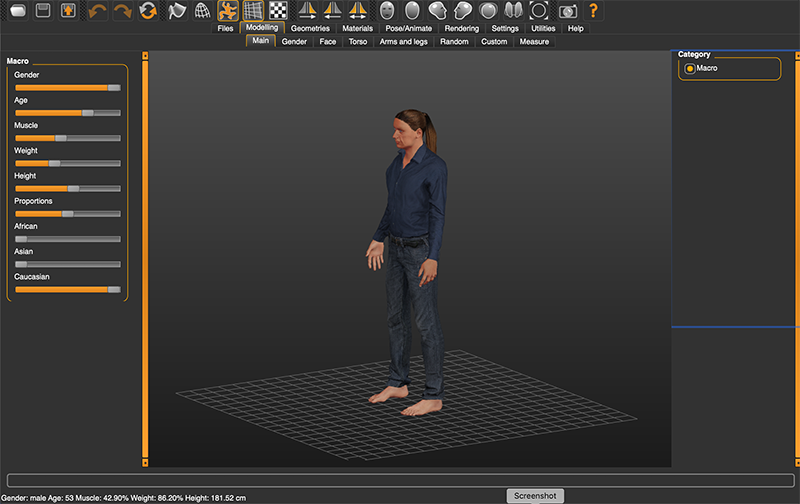
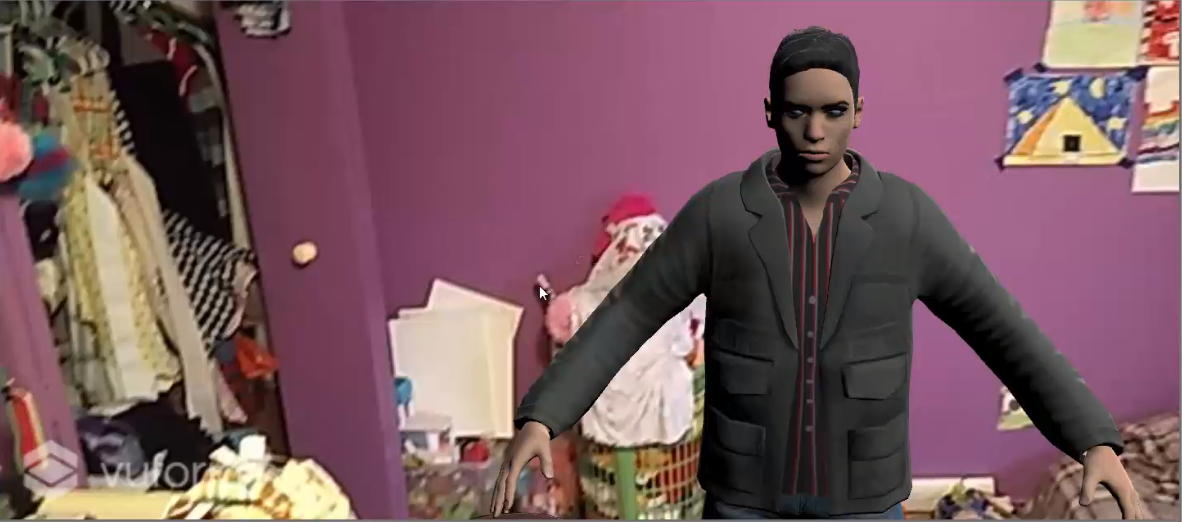
We will be making use of MakeHuman, a tool from www.makehumancommunity.org
for windows and OS-X to create your figure. There are various
tools for creating articulated human figures that are compatible
with Unity (UMA, Adobe Fuse, etc.) and each has different
strengths. MakeHuman integrates nicely with Mixamo for motion,
and is pretty easy to integrate with Unity so we will be using
it. Here is a
version of me that I created in MakeHuman.
There
are a variety of extras you can find for makehuman at http://www.makehumancommunity.org/clothesgallery.html
- including things like the red/blue glasses for my avatar. Note
that some of these assets could be very appropriate for your
play set, and some are very very inappropriate for your play
set. There are also various tutorials online if you want to make
your own accessories.
There
are a variety of YouTube tutorials on how to use MakeHuman,
though for the most part you can play with the various tabs and
sliders, and even use exact measurements if you want. Make sure your figure is rigged by
going under Pose/Animate / Skeleton and setting the Rig Preset
to Game Engine. Note that you can both Save and Export
your figure. You will want to do both, so you can come back to
MakeHuman and make changes, and also export a version to use in
Mixamo and Unity. You can export directly into the Unity Asset
folder with Mesh Format: fbx, Feet on Ground, Binary FBX, and
Scale Units set to meter.
Back
in Unity the figure should automatically get loaded in and then
you can drag your figure into the scene to take a look at your
character. Click on the asset version of the figure and in the
Inspector set the Rig to Humanoid for compatibility.
We will be using Mixamo www.mixamo.com
to add motion to your figure. You can sign up for a free
account. By default you will see a bunch of sample free
animations for their default set of characters. You can upload
the MakeHuman FBX character that you created of yourself to see
the animations play out on your character. Here is my MakeHuman
figure going through the mixamo motions. Don't worry about the
lack of textures - we'll get those back in Unity.
Find
an animation you like and download it (FBX for unity, 3D, with
skin, no keyframe reduction) and drag it into the assets folder
for your project. You can drag this new one into the scene. Now
there will be two of you but the MakeHuman version brought along
all the textures which this version can now use. You can hide
the MakeHuman one and keep the Mixamo one. Now we can get the
Mixamo one moving. Click on the Asset version of the Mixamo
figure and change the rig to Humanoid. Then click on the
animation tab at the bottom and press Play to see the character
go through their motions in that window.
Now
we want to put that motion into the scene. Create a new
Animation Controller, Create a new Empty State, open up the
Asset version of the Mixamo character and drag the animation
(triangle icon) into the motion field. Click on the Asset
version of the character, go to the animation tab, check on Loop
Time, and click apply. Go back to the Mixamo character in the
scene and set its controller to the new animation controller you
just made. Play the scene and your figure should be animating.
Be
sure to make sure that after importing you set the Rig to
Humanoid, and be sure to check Loop Time for it to loop.
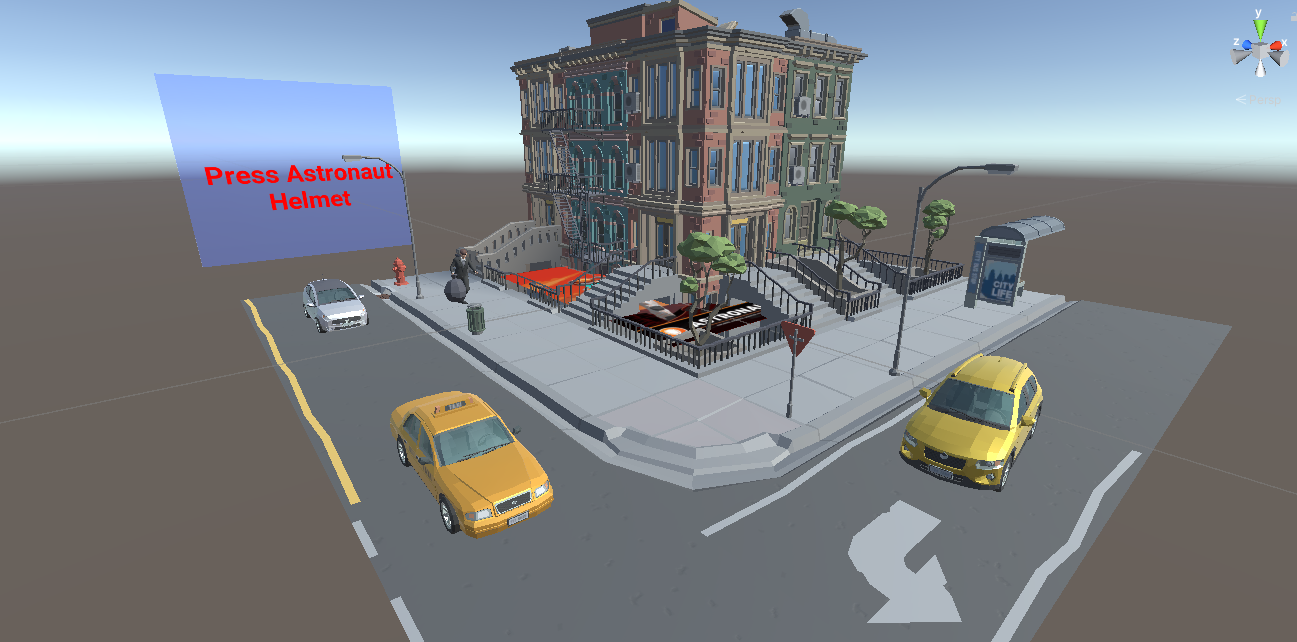
Now you can make this a Vuforia project and have your
figure appear based on a marker in the scene. Be sure to check
the scale - you will probably need to scale your figure down to
0.1 for it to work on a table. You should already have the fiducial markers from
Project 1 which we will re-use.
You
can make combinations of animations that trigger based on
different conditions and Unity will smoothly interpolate between
them as they have the same basic human rigging. Here is a
YouTube tutorial on this - there are many: https://www.youtube.com/watch?v=JeZkctmoBPw
In combining your animations you may also need
to check the Root Transform Positions in the animation
controller states to make sure the characters don't jump between
the different animations - i.e. for standing or sitting
characters it may be better to set the Y position based on their
feet.
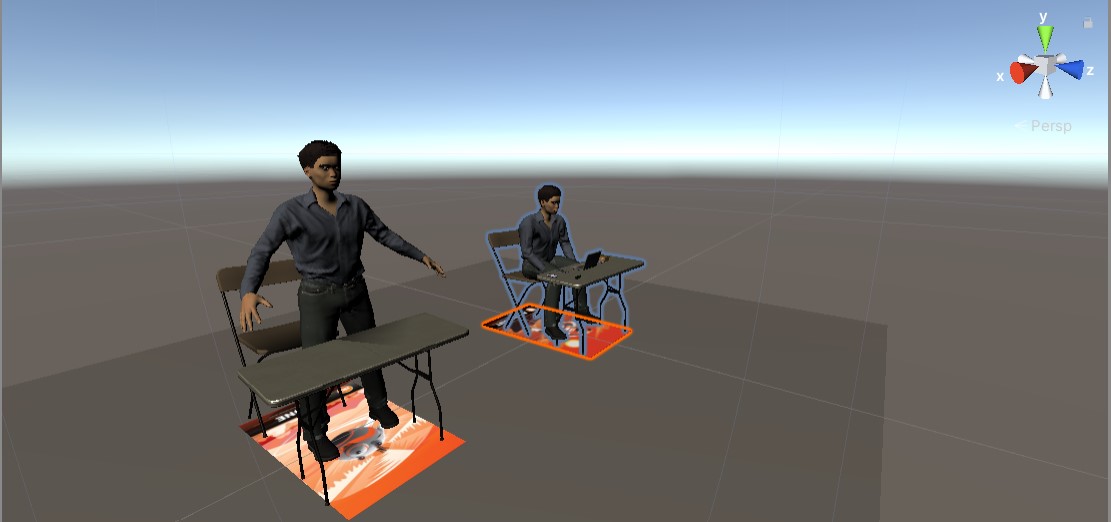
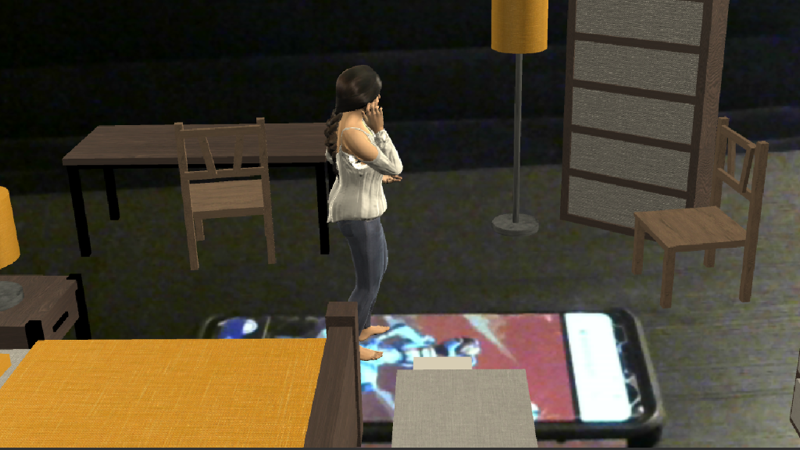
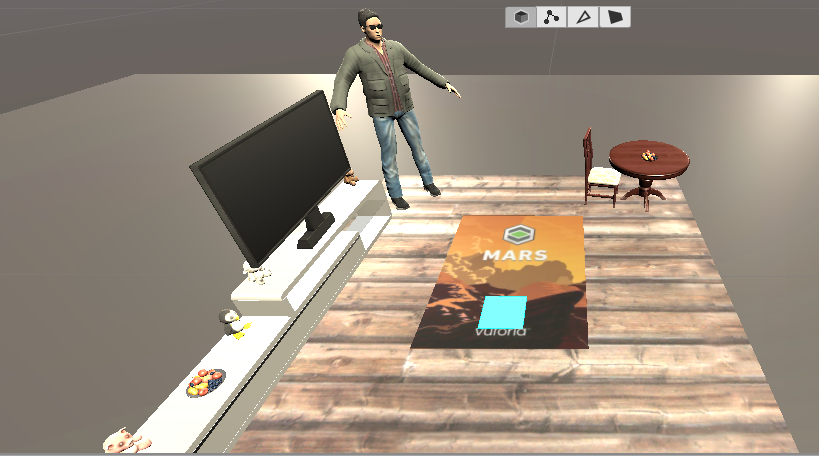
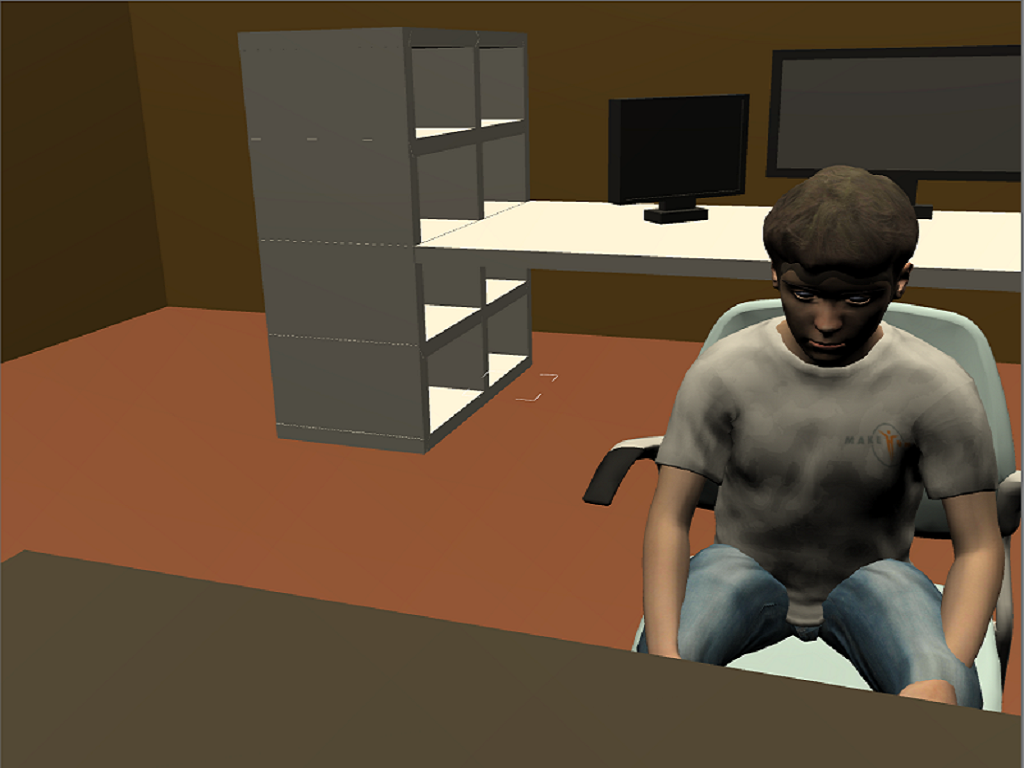
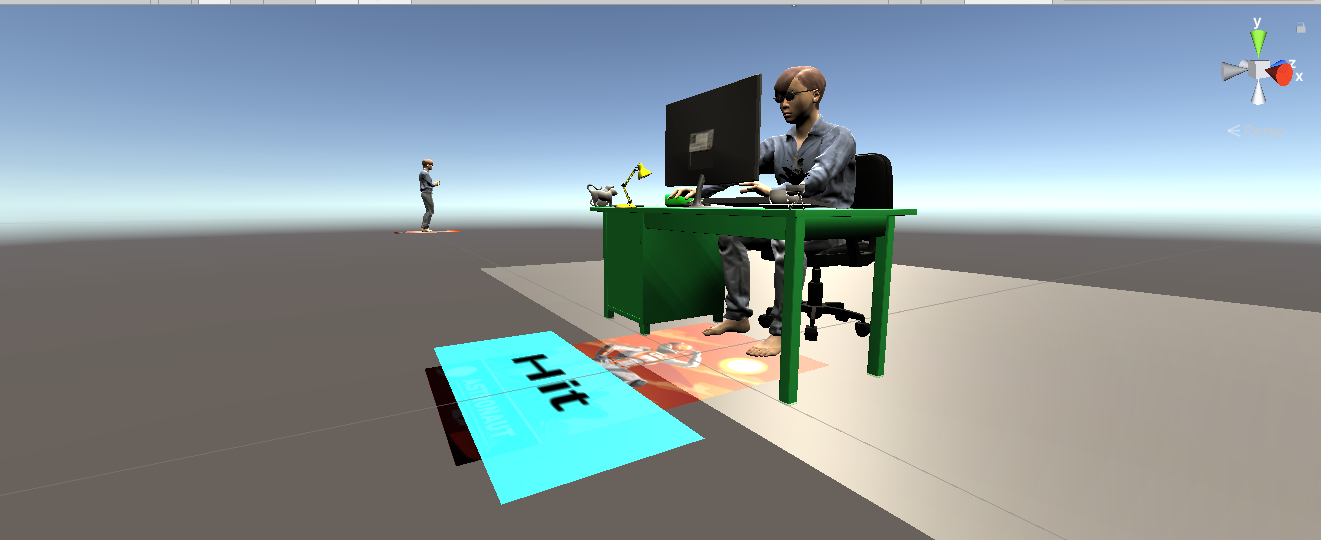
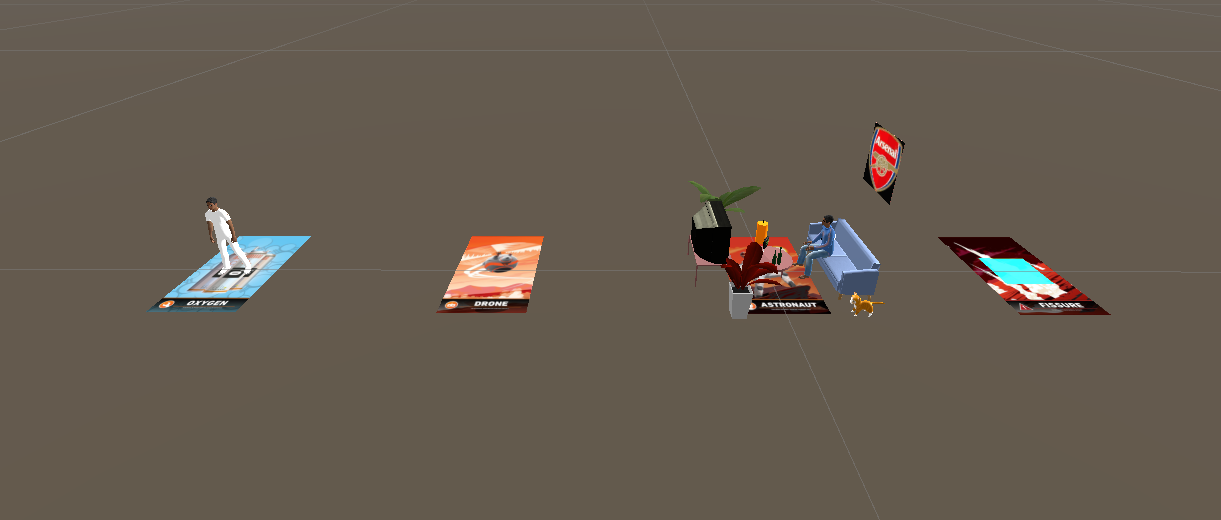
Here is
a copy of a couple small sample scenes that I made. I removed
the Library folder to keep the download small (30MB rather
than 650MB) so Unity will take some time to import the assets
(including using blender to convert the blender furniture
files). If you look in the Project under Assets/Scenes you
should see two scenes: Tabletop and Lifesize that you can drag
into the Hierarchy. You can then set one of these to be the
Active scene and remove the Untitled one. Make sure only one
of Tabletop or lifesize is loaded at any given time. Tabletop
has sitting me and standing me and is designed to run with the
astronaut marker on a tabletop through a webcam or smartphone.
lifesize shows sitting me lifesize using a groundplane that
you can position on the floor using your smartphone.
For this project you
can either create your own models and sounds, or make use of
more professional ones from the web, as long as you have the
right to use them, and as long as you fully cite the creators
for your work. You also need to make sure that those models do
not have too many polygons and slow down your application. You
should also make sure they don't have any embedded cameras that
will mess up your scene. Note that if you find a collection of
objects that you like online and if you position them as a group
then it counts as one object, If you break that set apart and
independently position the various objects in different
locations then those count as separate objects.
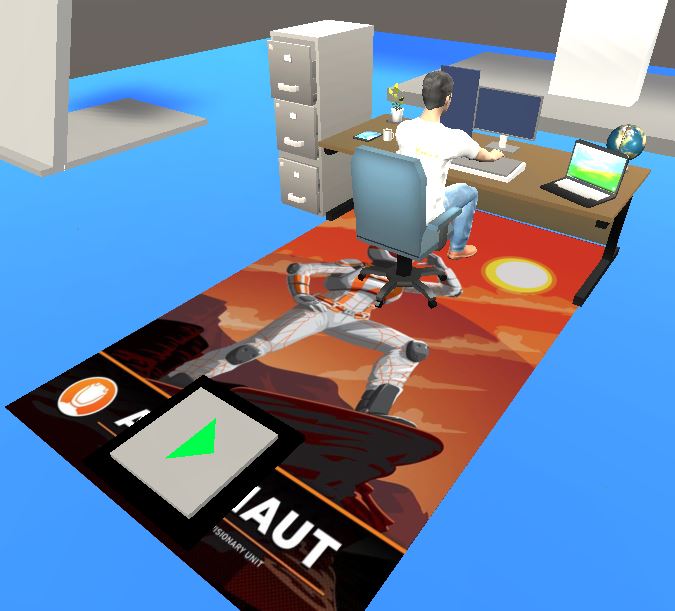
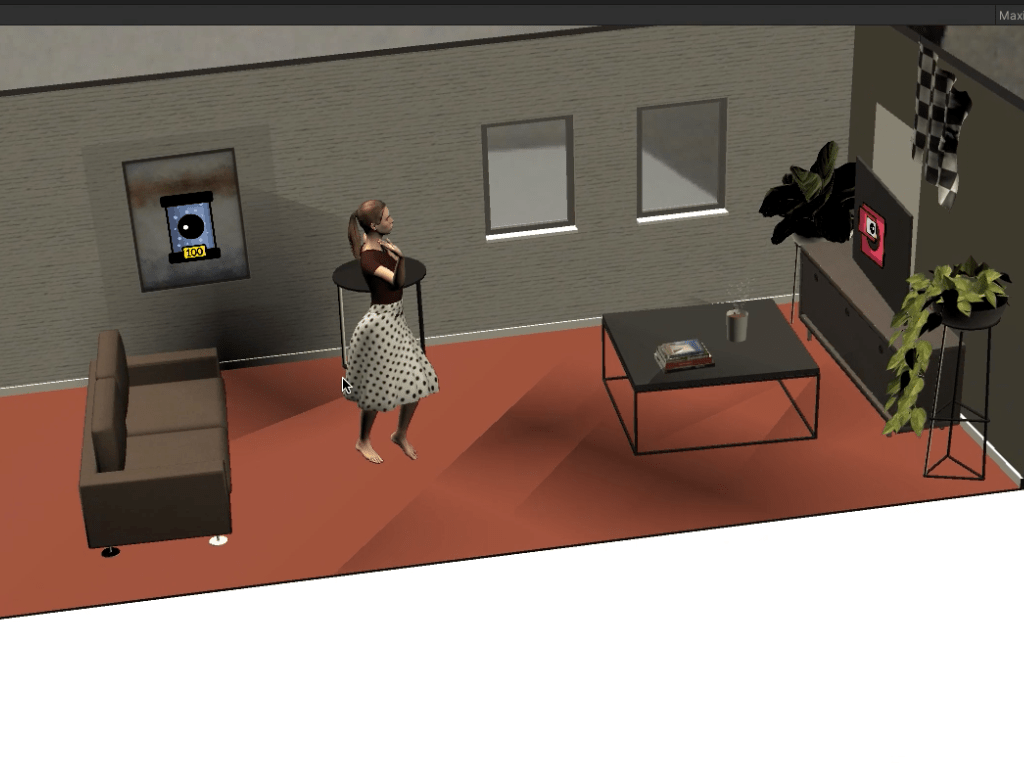
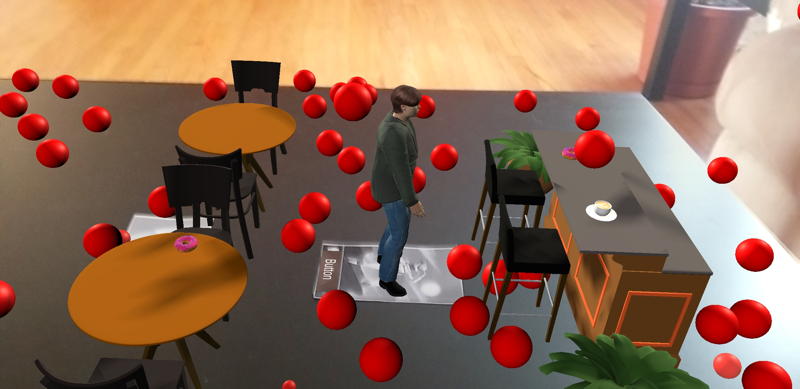
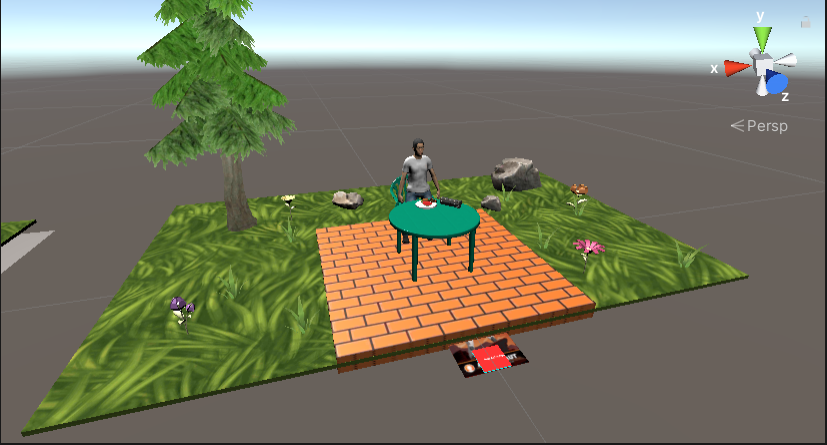
50% of the points on
the project are for the basic playset:
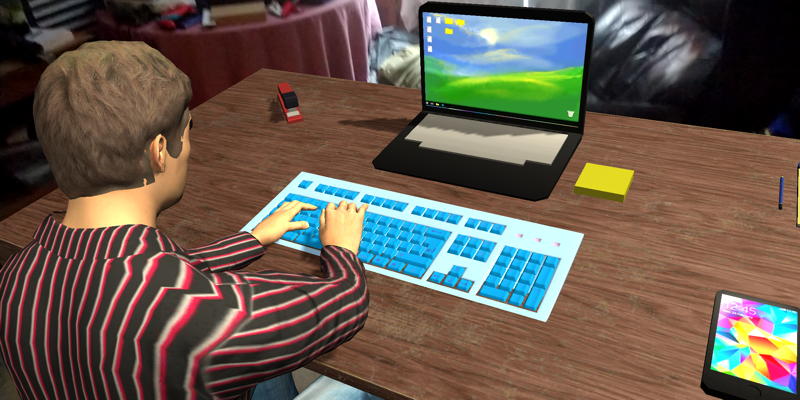
astronaut
marker - basic table top play set (garage, beach, office,
soccer goal, coffee shop, couch, garden, etc. that is roughly
1 foot (30cm) square with a (roughly) 1 foot tall recognizable
MakeHuman figure of yourself controlled by a unique mars
database fiducial marker. The play set should be realistic -
i.e. a place that you could realistically be.
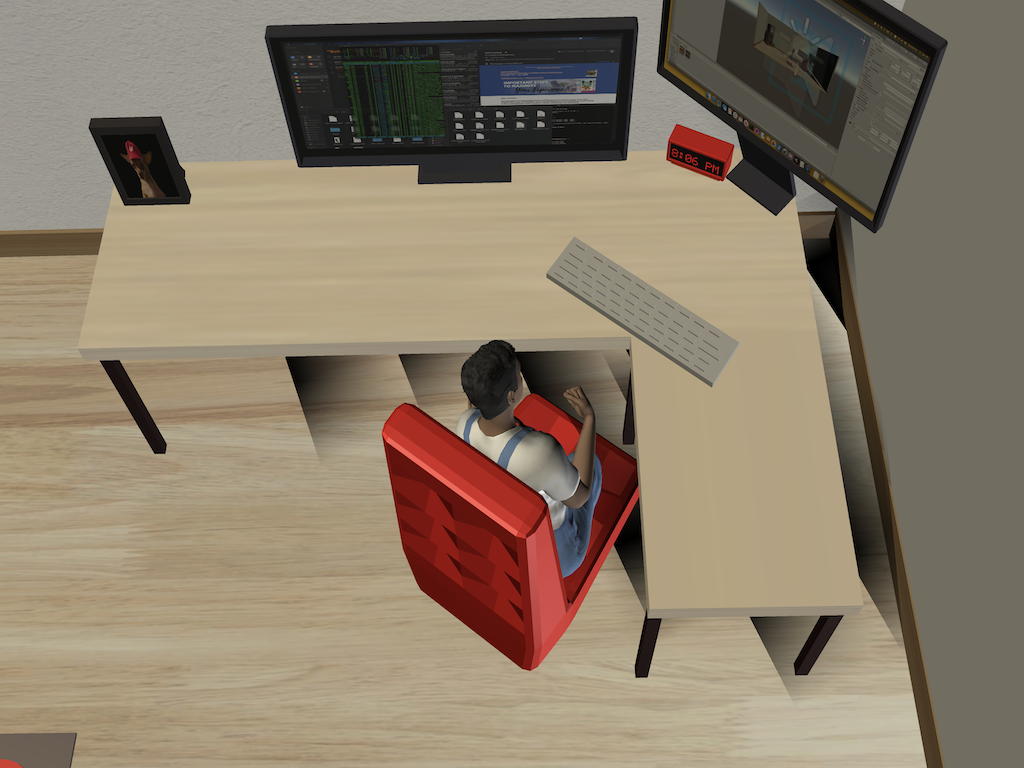
the figure of yourself should have one looping
relevant Mixamo animation attached
at least 10 objects in the play set related to
the theme
at least one relevant ambient sound
appropriate lighting to help integrate the AR
play set into the real world - you should be able to do this
with 2 or 3 lights
the play set should have a vuforia button that
makes your figure say something in your voice relevant to the
scene, and changes the animation on your character with a
smooth transition, then then character should go back to what
they were doing (e.g. your figure could be sitting on the
couch, stand up, say something, and sit back down again
resuming their routine)
the user can move around the markers and the
widgets should re-position themselves appropriately
the frame rate should remain high (> 30 fps)
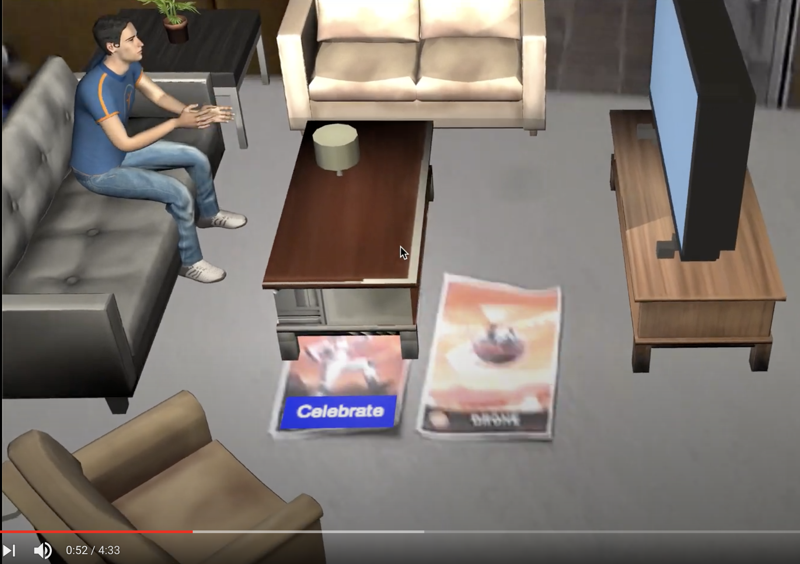
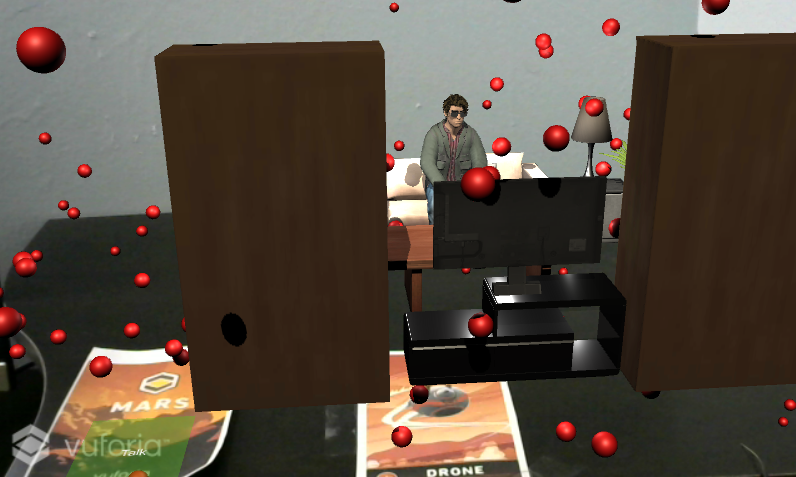
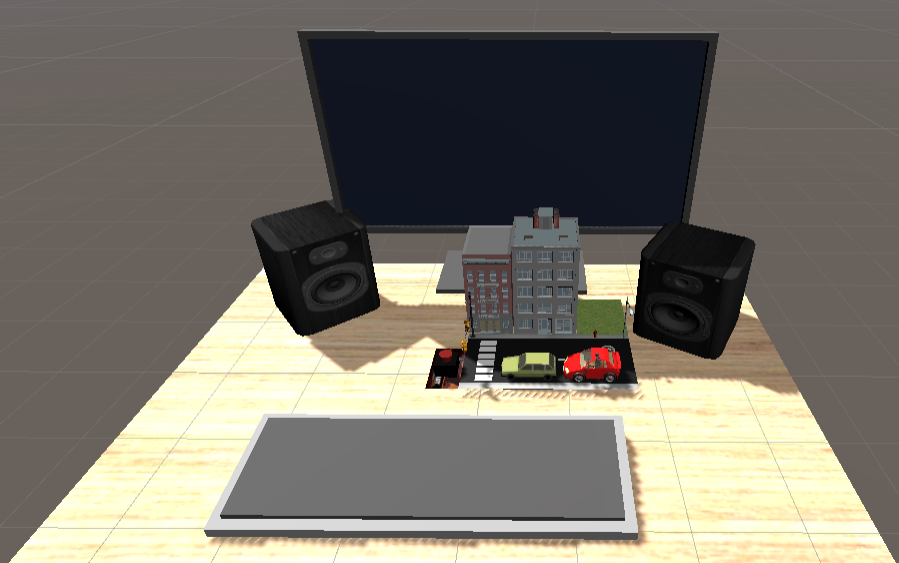
30% of the points on
the project are for adding in physics:
drone marker - model your actual physical table top
itself in Unity. A
modern phone / Hololens etc would scan this actual physical
table surface in, but for compatibility you will model your
actual
physical tabletop yourself at 1:1 scale as
a cube or cylinder or other set of simple unity primitives,
and then placing the drone marker in a fixed position on the
actual
physical table will allow Unity to know
where the edges of the actual
physical table are. Add an appropriate
collider to your virtual representation of the table
surface.
Your figure should have an appropriate
collider (Capsule is usually a pretty good starting point)
so objects bounce off of you as well.
The objects in your scene should have
appropriate colliders so objects bounce off of them as well.
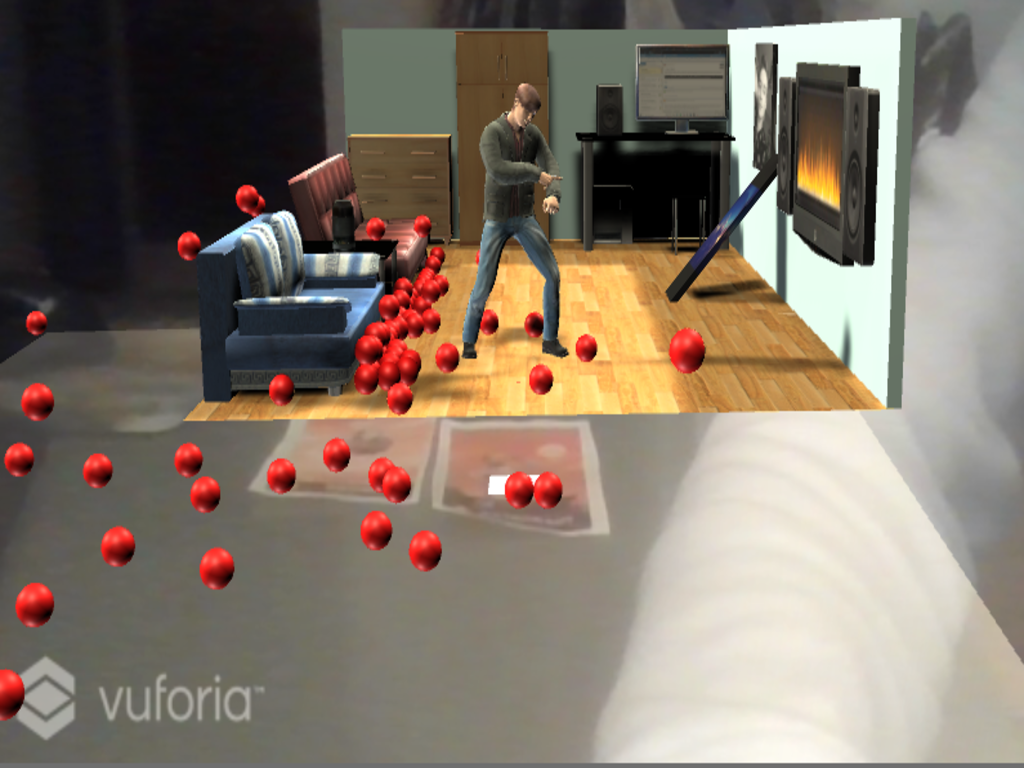
Pressing the mouse button should unleash a
cascade of red balls that should bounce around your virtual scene, flow over
the actual
physical table, and fall off the edge of
the actual
physical table, to show that your objects
have appropriate colliders on them. See my code for an
example. (note that in my code I use a single marker for the
table surface and the figure to keep things simple since I
don't know what kind or size of table you have. You will
have one marker for the play
set and a separate marker for your appropriately
modeled table surface).
<if you are having input manager errors with
the mouse button then check your Build Settings / Player
Settings / Player / Other Settings and make sure that your
Active Input Handling* is set to Input Manager (Old).
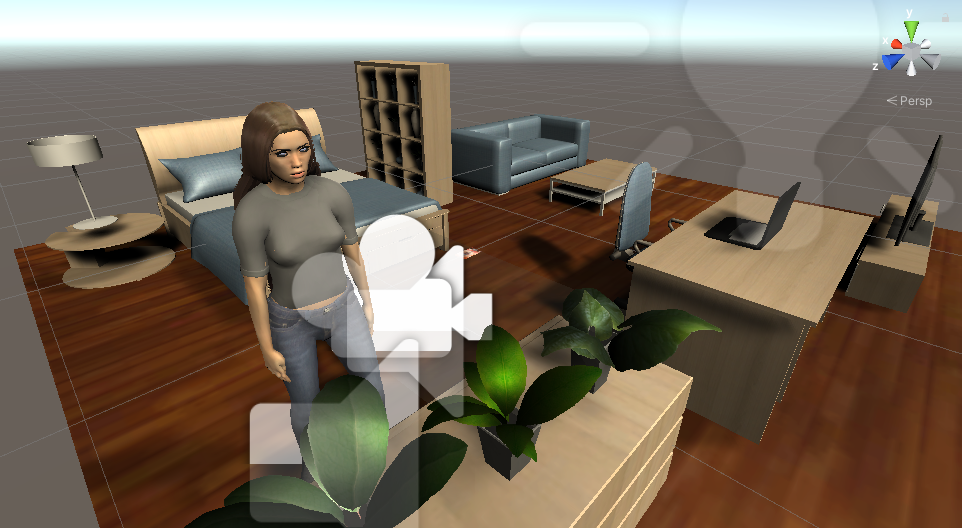
20% of the points on the project are for a
life-size version of the basic table top playset
The same ideas can work
at human scale, so instead of using an image target to
show your basic scene as a play set on a table or
desk, you can use a ground plane to show the same
scene life size on the floor,
similar to what we saw back in Week 1 with the human
body and the penguin from Google search. At life-size
scale your basic scene should be about 6' cubed (2m
cubed). The 'Introduction to Ground Plane in Unity' tutorial is a good starting
point. Create another scene in your unity project that
makes use of the Ground Plane State and the Plane
Finder (separate from the scene with the fiducial
marker above). Deploy your 2nd scene to an iOS or
Android phone and use the Vuforia Ground Plane to
position your basic play set on the ground or floor
life size. Be sure to turn off
'Duplicate Stage' in the Plane Finder so you can move
your playset around when you tap on the screen and not
make multiple copies of it each time you click on the
ground.
Graduate
students in the class also need to create a deluxe version of
the play set
the play set should be animated with at least
5 things happening - e.g. there should be blinking lights,
or a flag moving in the breeze, or a little animal running
around - in general things that makes the scene seem more
dynamic beyond your figure moving - making it a really cool
looking play set
oxygen marker - take your MakeHuman character
and give them a different outfit (work time vs fun time /
adventure time) and a different looping Mixamo animation and
add them into the scene. Whenever this character is brought
near the object on the table it should trigger this
character to smoothly transition into a different animation,
and say something different (again in your voice) and then
when the character is moved away from the object on the
table they should go back to their default animation. Note
that as an alternative to creating another version of your
character for this part, you can trade figures (and voices)
with another classmate to bring their character into your
play set, but you have to make sure that what they say and
do makes sense in your play set.
Turning in the
Project You should create a GitHub page
for your project. You can integrate Unity with git so that
it will track all your changes, or just regularly push
files to git. The final project will need to be turned in
via git so we know the timestamp on the files, but it can
be also helpful to have regular commits in case something
goes wrong so you can get partial credit. Initially this repository
should be private to yourself, and then you can make it
public for turning it in.
Note that there is a very big
difference between getting something working and getting it
working well. The first is not that hard. The second takes
much more time. You are expected to have things working well.
There are three
due dates for the project.
The alpha is due
first. At this point you should have all the basic
functionality for the basic play set working. Add
the TA as a collaborator to your GitHub repository
so she can have access to your work, and email a
link to the repository to her.You should also create
a short 1 minute YouTube video showing that basic
functionality of your application working, probably
captured through a screen capture program. Send a link to
the video to the TA by the alpha deadline. The alpha helps
ensure you are making progress on the project and aren't
going to have any last minute issues with Git or YouTube.
The
unity source and application is due
next. This will be turned in via GitHub by making your
repository public to at least everyone at UIC. Be
sure to email the location of your repository to Andy and
the TA before the deadline.
The third deadline is
for the documentation.
You should create a public web page with multiple sections
(visible to anyone for at least the duration of the course)
that describes your work on the project. You can host your
web page at UIC(http://people.uic.edu),
GitHub, or the provider of your choice,
as long as it remains publicly available to all. You can use
any publicly available templates as long as you cite them,
or create your own.
This page should have several sections including:
introduction and
description of how to use your application and the things
you can do with it
link to your git page
that allows someone to easily download the source code to
your entire project to be built and run. This page should
have instructions on how to build your application and
list the supported version numbers of all relevant
software (Unity, Vuforia. etc).
listing of the source
for any assets (models, textures, sounds) that you used
that you didn't create yourself
link to a 5 minute
video showing off your project (see below)
at least a one
page / 500 word discussion on whether you think
these kinds of play sets would be popular in several
years when people are regularly wearing AR glasses,
and do you think kids would want to literally
interact with a figure that looks like them. How is
it different seeing yourself as a small figure, and
life size in AR.
all of which should haveplentyof
screenshots with meaningful captions. Web pages like this can
be very helpful later on in helping you build up a portfolio
of your work when you start looking for a job, so please put
some effort into it.
You should also create a 5 minute YouTube video showing the
use of your application including narration with decent audio
quality. That video should be in a very obvious place on your
main project web page. The easiest way to do this is to
capture video from your webcam while interacting with your AR
widgets. You can try to narrate while interacting but you will
most likely find its useful to do some editing afterwards to
tighten the video up. This video is helpful for us to know
which parts of your project work, and may be useful in the
future when you want to show off some of the projects you did
but you cant get the code to compile anymore or you have lost
the markers.
Once you have your webpage done, send the URL to
Andy and the TA before the deadline. We will respond to this
email as your 'receipt'.
We will be linking your web page to the course notes
so please send Andy a nice representative jpg or png
image/photo of your application for the web. This should be
named p2.<your_last_name>.jpg
or p2.<your_last_name>.png
and be roughly 1024 x 768 in size. If you take a photo with your phone please make it
horizontal.
Presenting the Project
An important part of creating
AR applications is getting feedback and using it to improve your
design, and learning to give quality feedback to others.
Normally we would be spending time in class for each person to
show off their work and get feedback. This term we will be doing
this asynchronously. See
the course notes for week 9 and 10 for more details.