Application
Due Saturday September 18th at 9pm Chicago time
Documentation Due Monday September 20th at 9pm Chicago
time
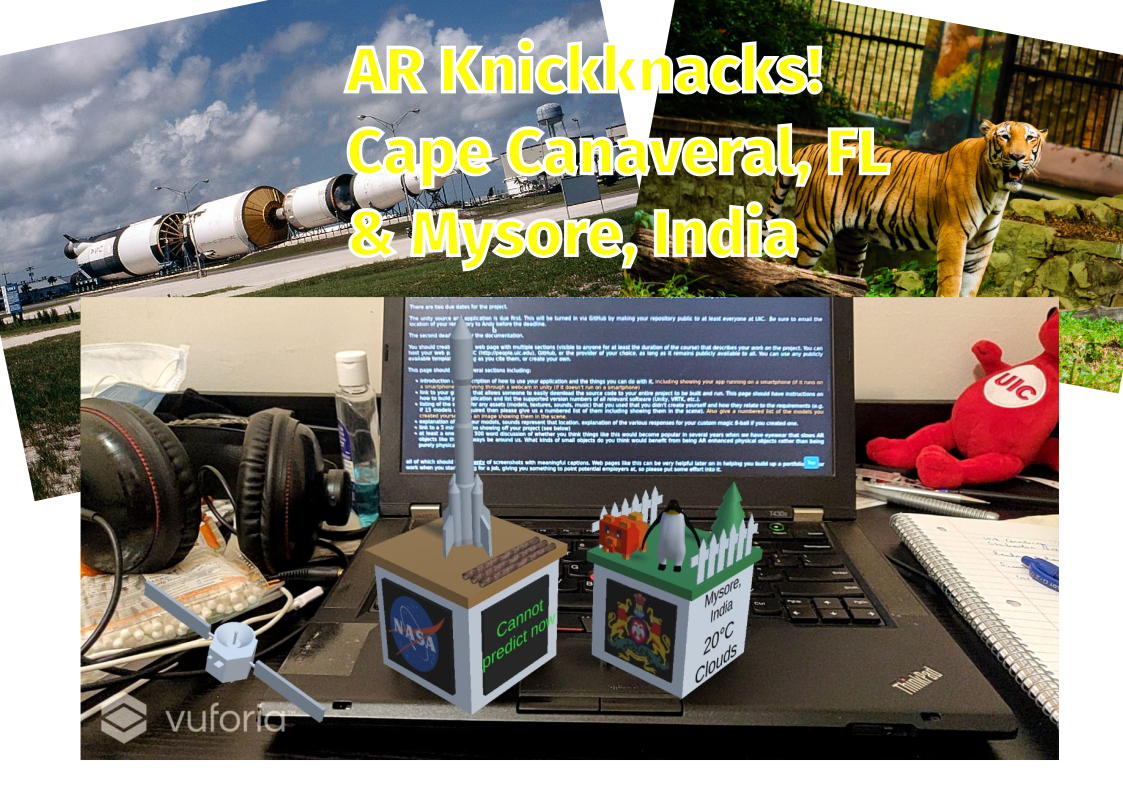
Project 1 is
focused on Augmented Reality. In the future when everyone is
wearing their AR enabled eye-wear much of the time, what kind of
future will it be? We are going to explore this a bit by looking
into some AR knickknacks. A common thing to see in shops when
you travel are small snow globes or other little trinkets that
you can take home and place on a desk or a shelf to remind you
of the place - i.e. the things you could buy in the shops on
Navy Pier that highlight aspects of the city. What if these were
virtual instead of real so you could have the same physical
placeholder that could take on the form of different
knickknacks. Since these are virtual they could also be somewhat
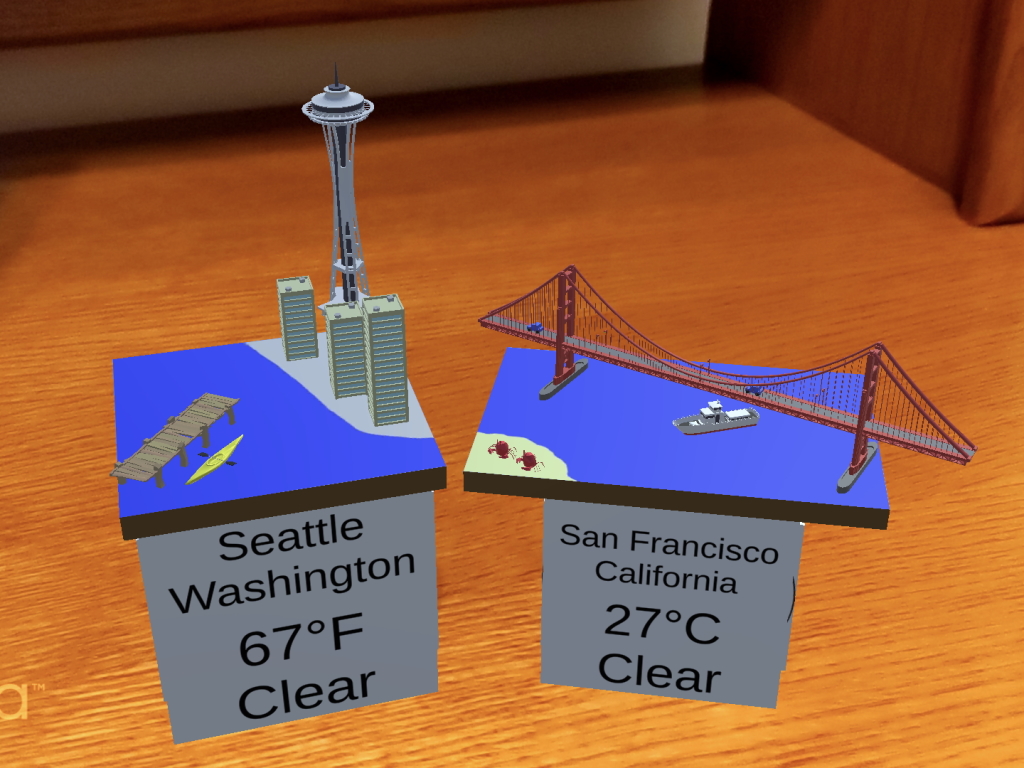
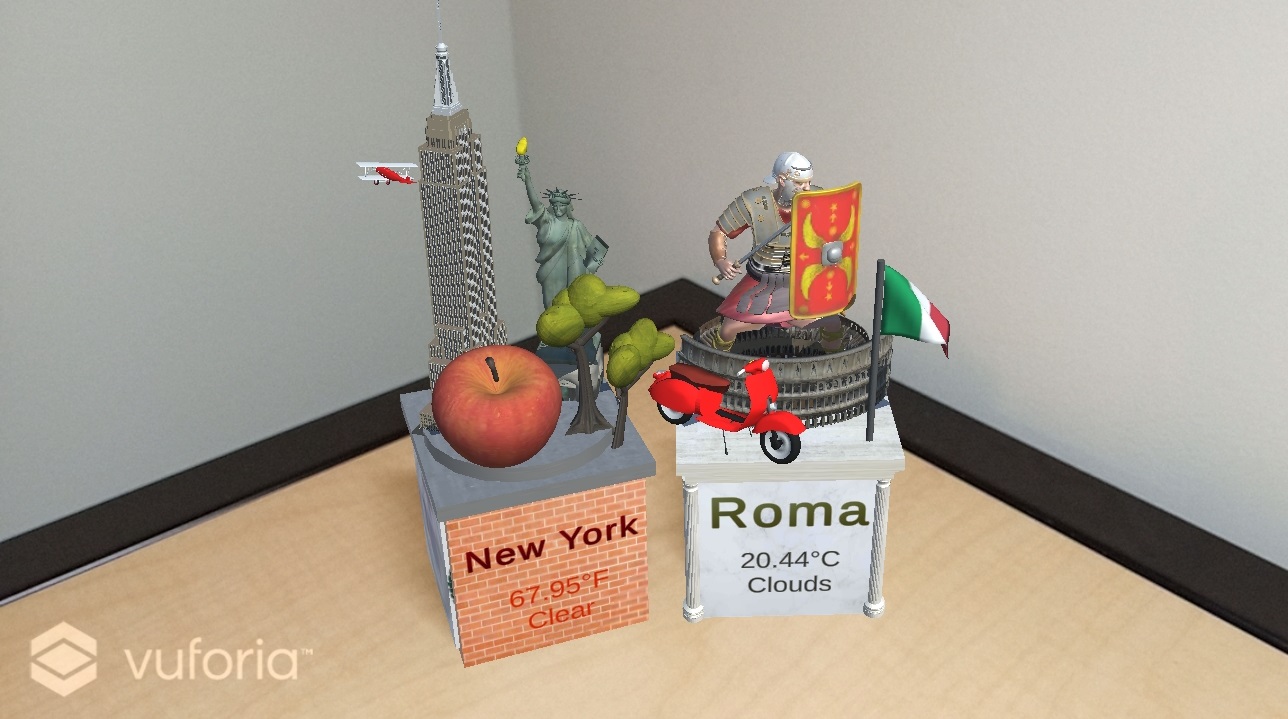
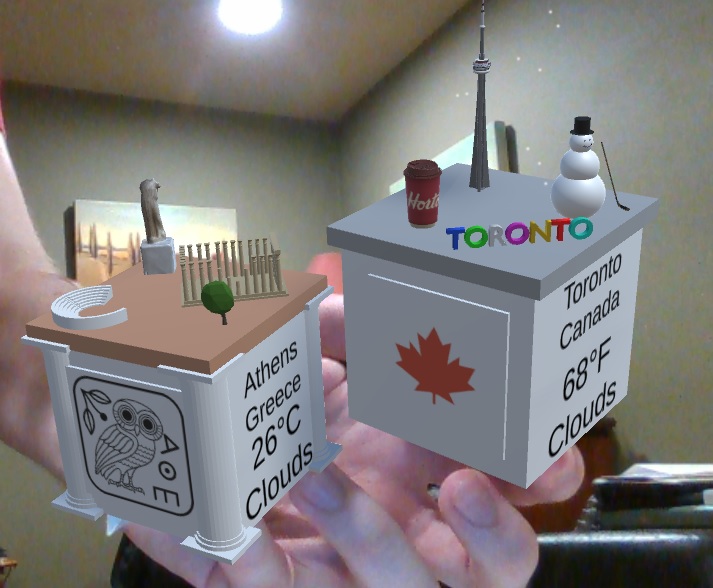
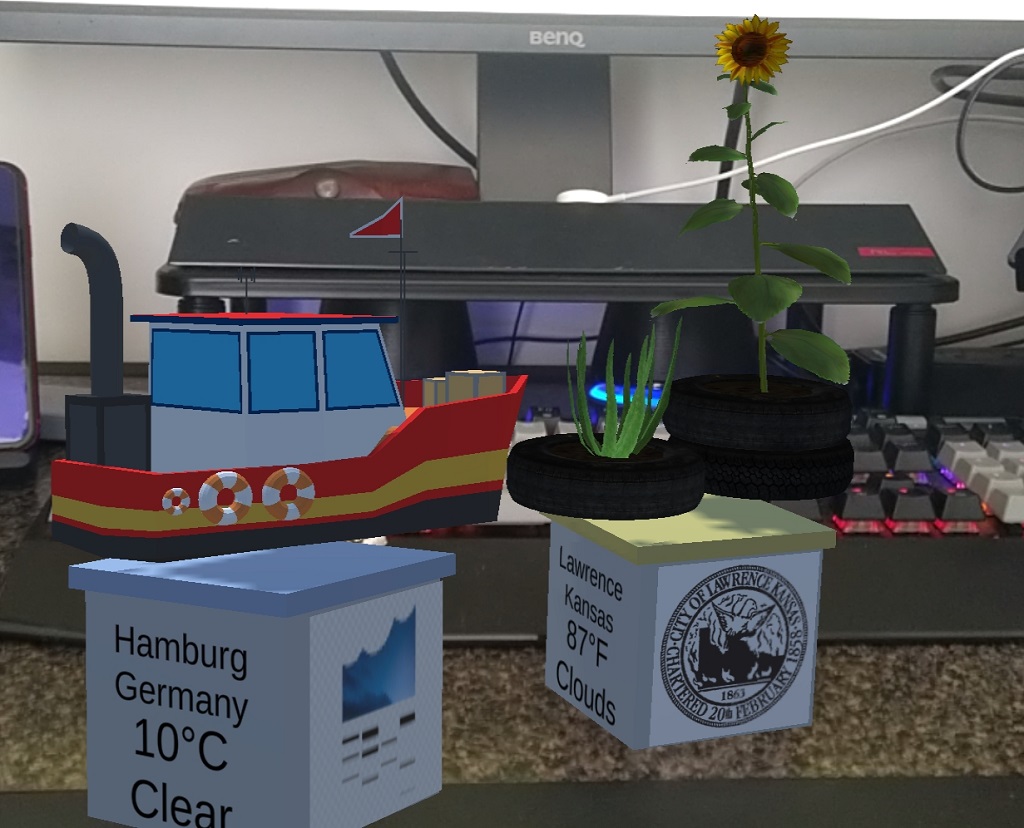
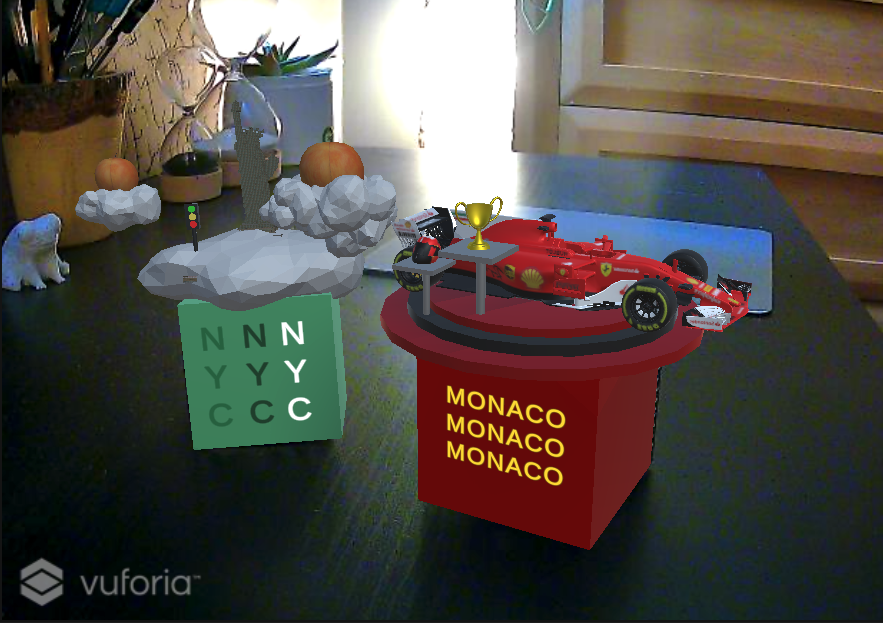
'smarter' than their older siblings. In our case we are going to
have these knickknacks be able to grab the current weather at
the location they represent, and have them also function as a
magic 8-ball when you turn them upside down.
You will be implementing
the project in Unity 2019.4.28f1 and Vuforia version 9.8. Note
that the current version of Vuforia is 10, but we are sticking
with 9 for this project.
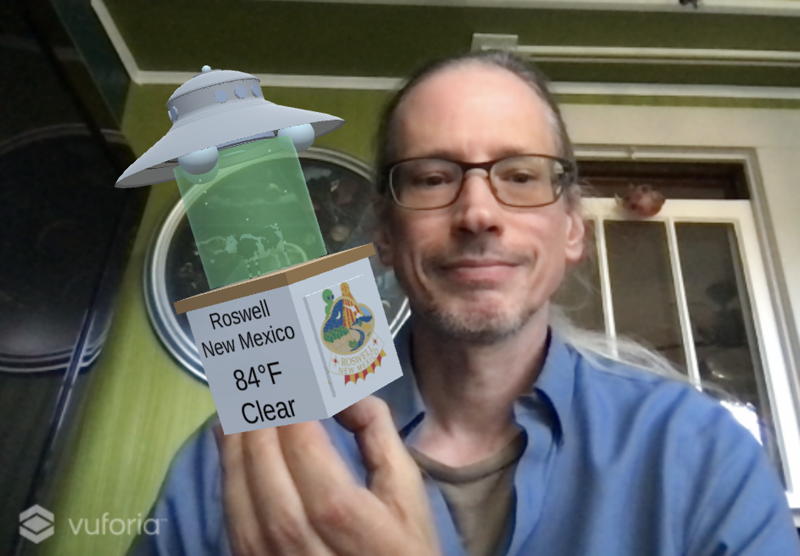
I have created a sample starter project with
a knick-knack for Roswell, New Mexico. You can grab a zip file here.
Inside the Assets/Scenes folder you will find RoswellScene. Drag
that into your hierarchy and remove the default Untitled scene.
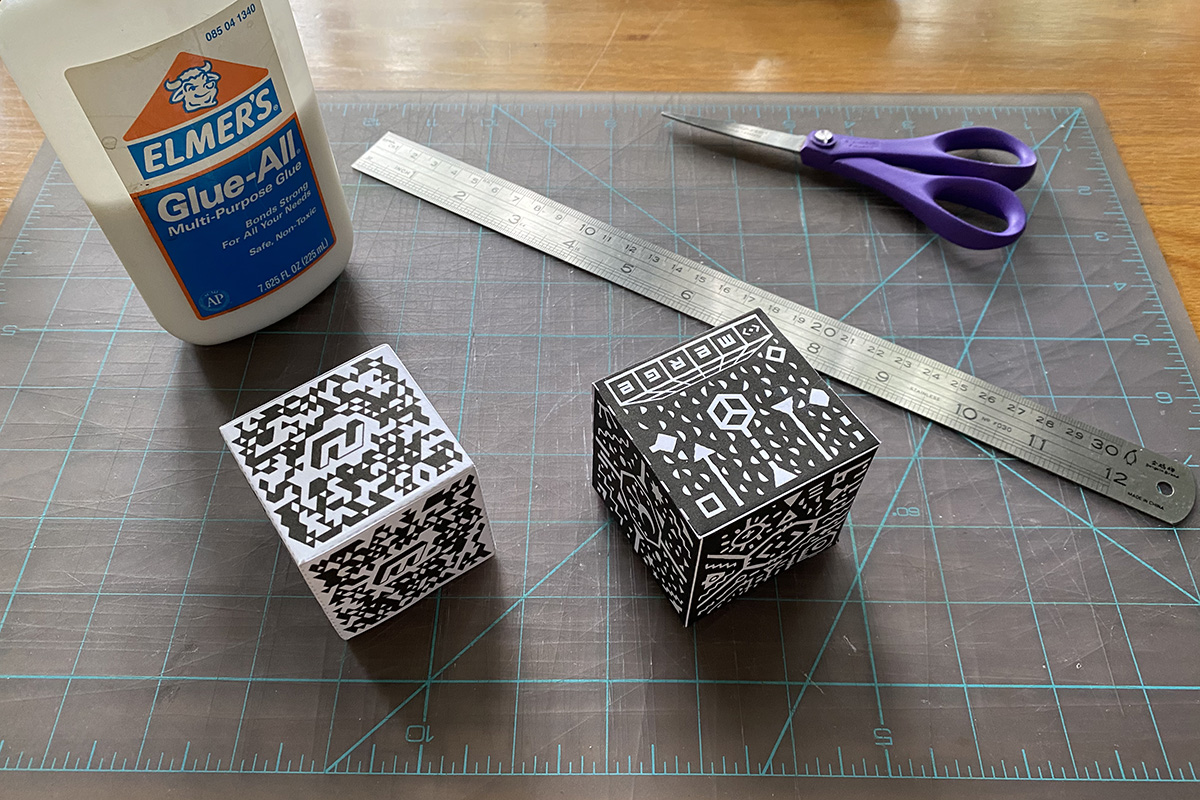
You will need to create
the physical Class cube so the application has something to
map my AR knick-knack onto. You will also need to create the
physical Mergecube for the second half of the assignment. Here
is a zip
file containing images that you can print out and then
cut out, fold, and re-assemble. I will also have some printed
copies available in class.
You will need to create a
Vuforia developer account and get a free Vuforia App License key
that you can paste into the Vuforia Configuration window in
Unity in order for Vuforia to track your cubes. On the
Vuforia developer site you can click on Develop / License
Manager and then Get Development Key to create a new license
key. You can then go to the project in Unity and bring up
Window / Vuforia Configuration and look near the top in the
Global section and add in your App License Key.
You will need to create an account at
OpenWeather to get your API key to download weather information
for the knickknack to display. You will need to add this key to
the url variable at the top of the WeatherAPIScript.cs .The Week 2 notes discuss
this.
This application should
give you a good starting point for creating your own AR
knickknack.
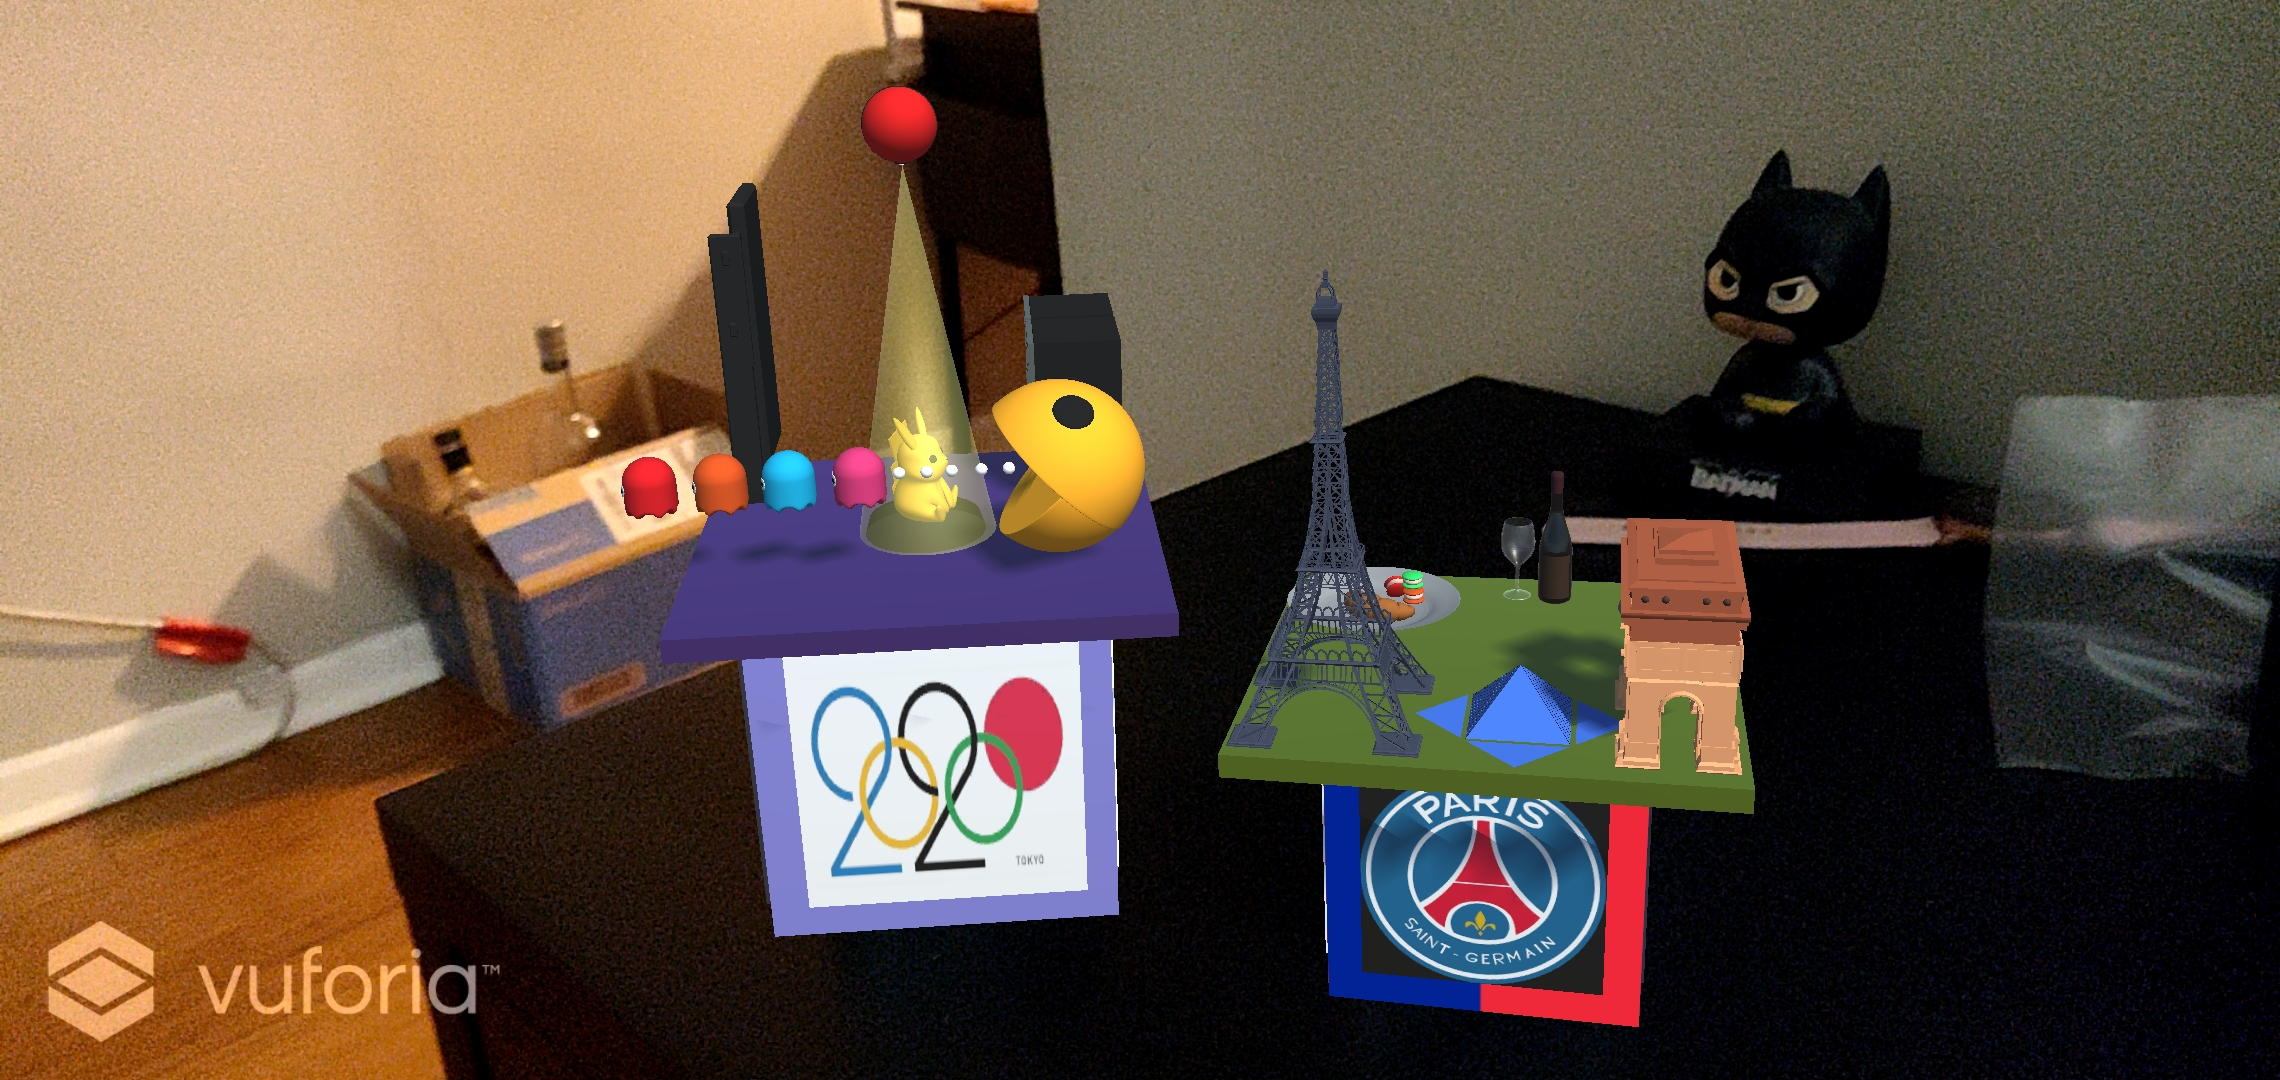
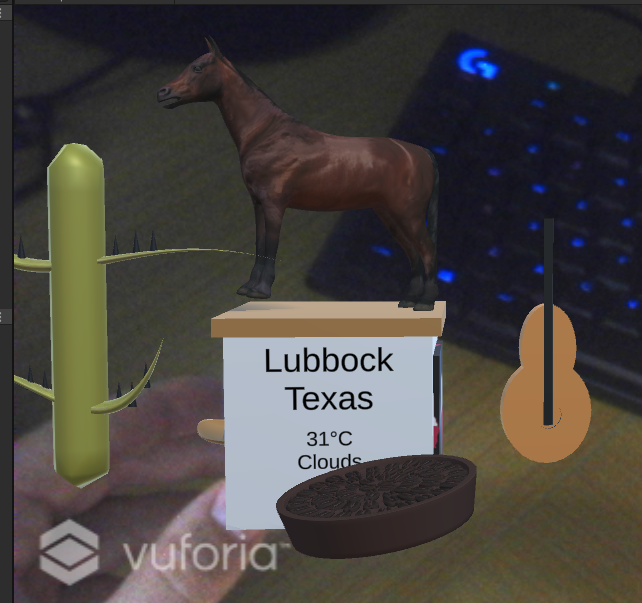
You should pick a location other than
Chicago or Roswell for your knickknack. Locations in other
countries are fine. Your knickknack should be an appropriate,
and preferably obvious, representation of that place. The models
you use should be reasonably detailed but do not need to be
photo-realistic.
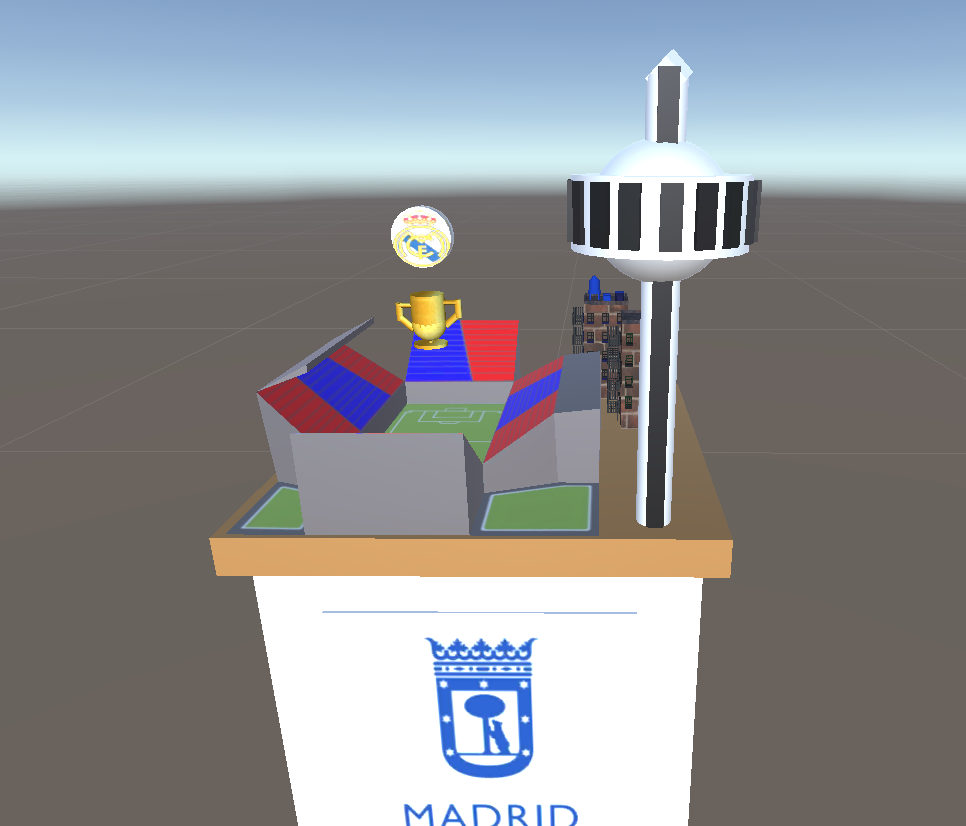
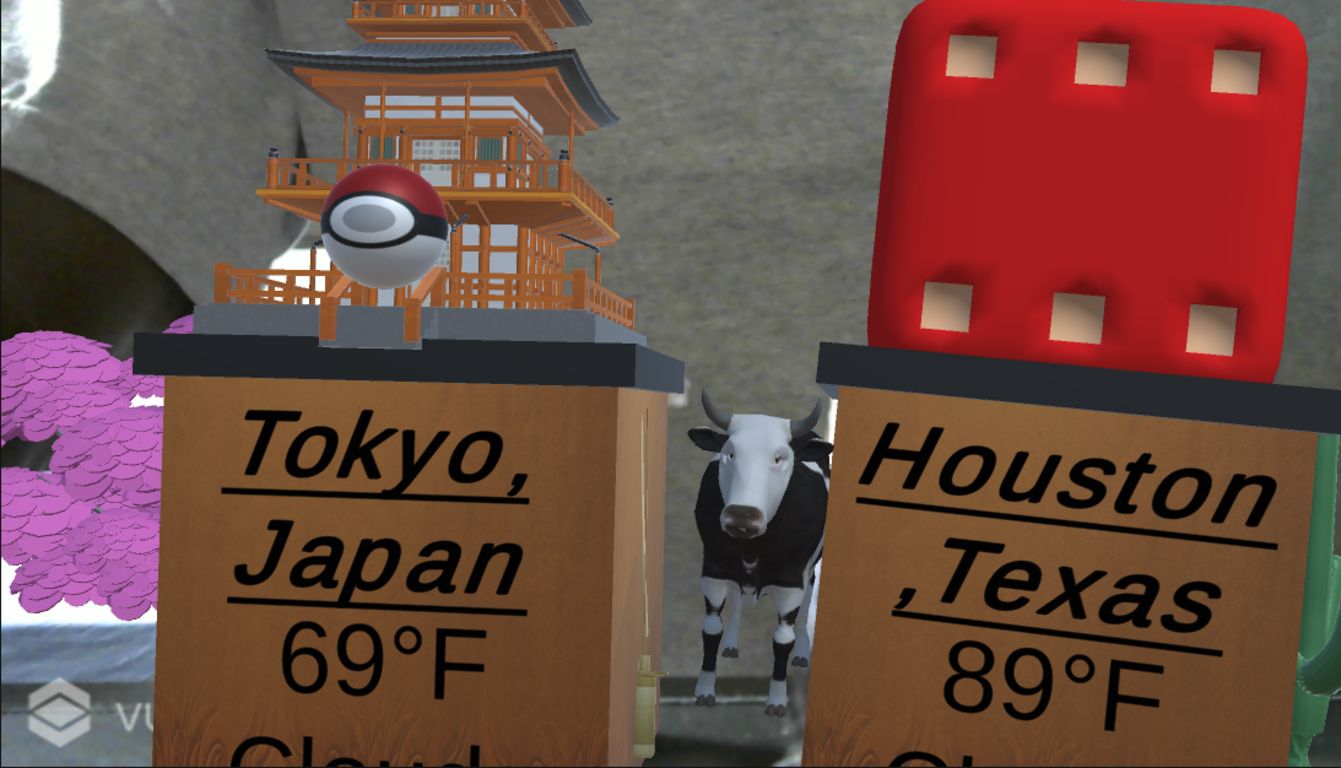
60% of the points on
the project is for creating a basic knickknack using the
mergecube marker with
3 unique
models from the web (remember to cite the creators)
2 unique
models that you create on your own (more on this below)
at least
one relevant, and not annoying, ambient sound
the frame rate should
remain high
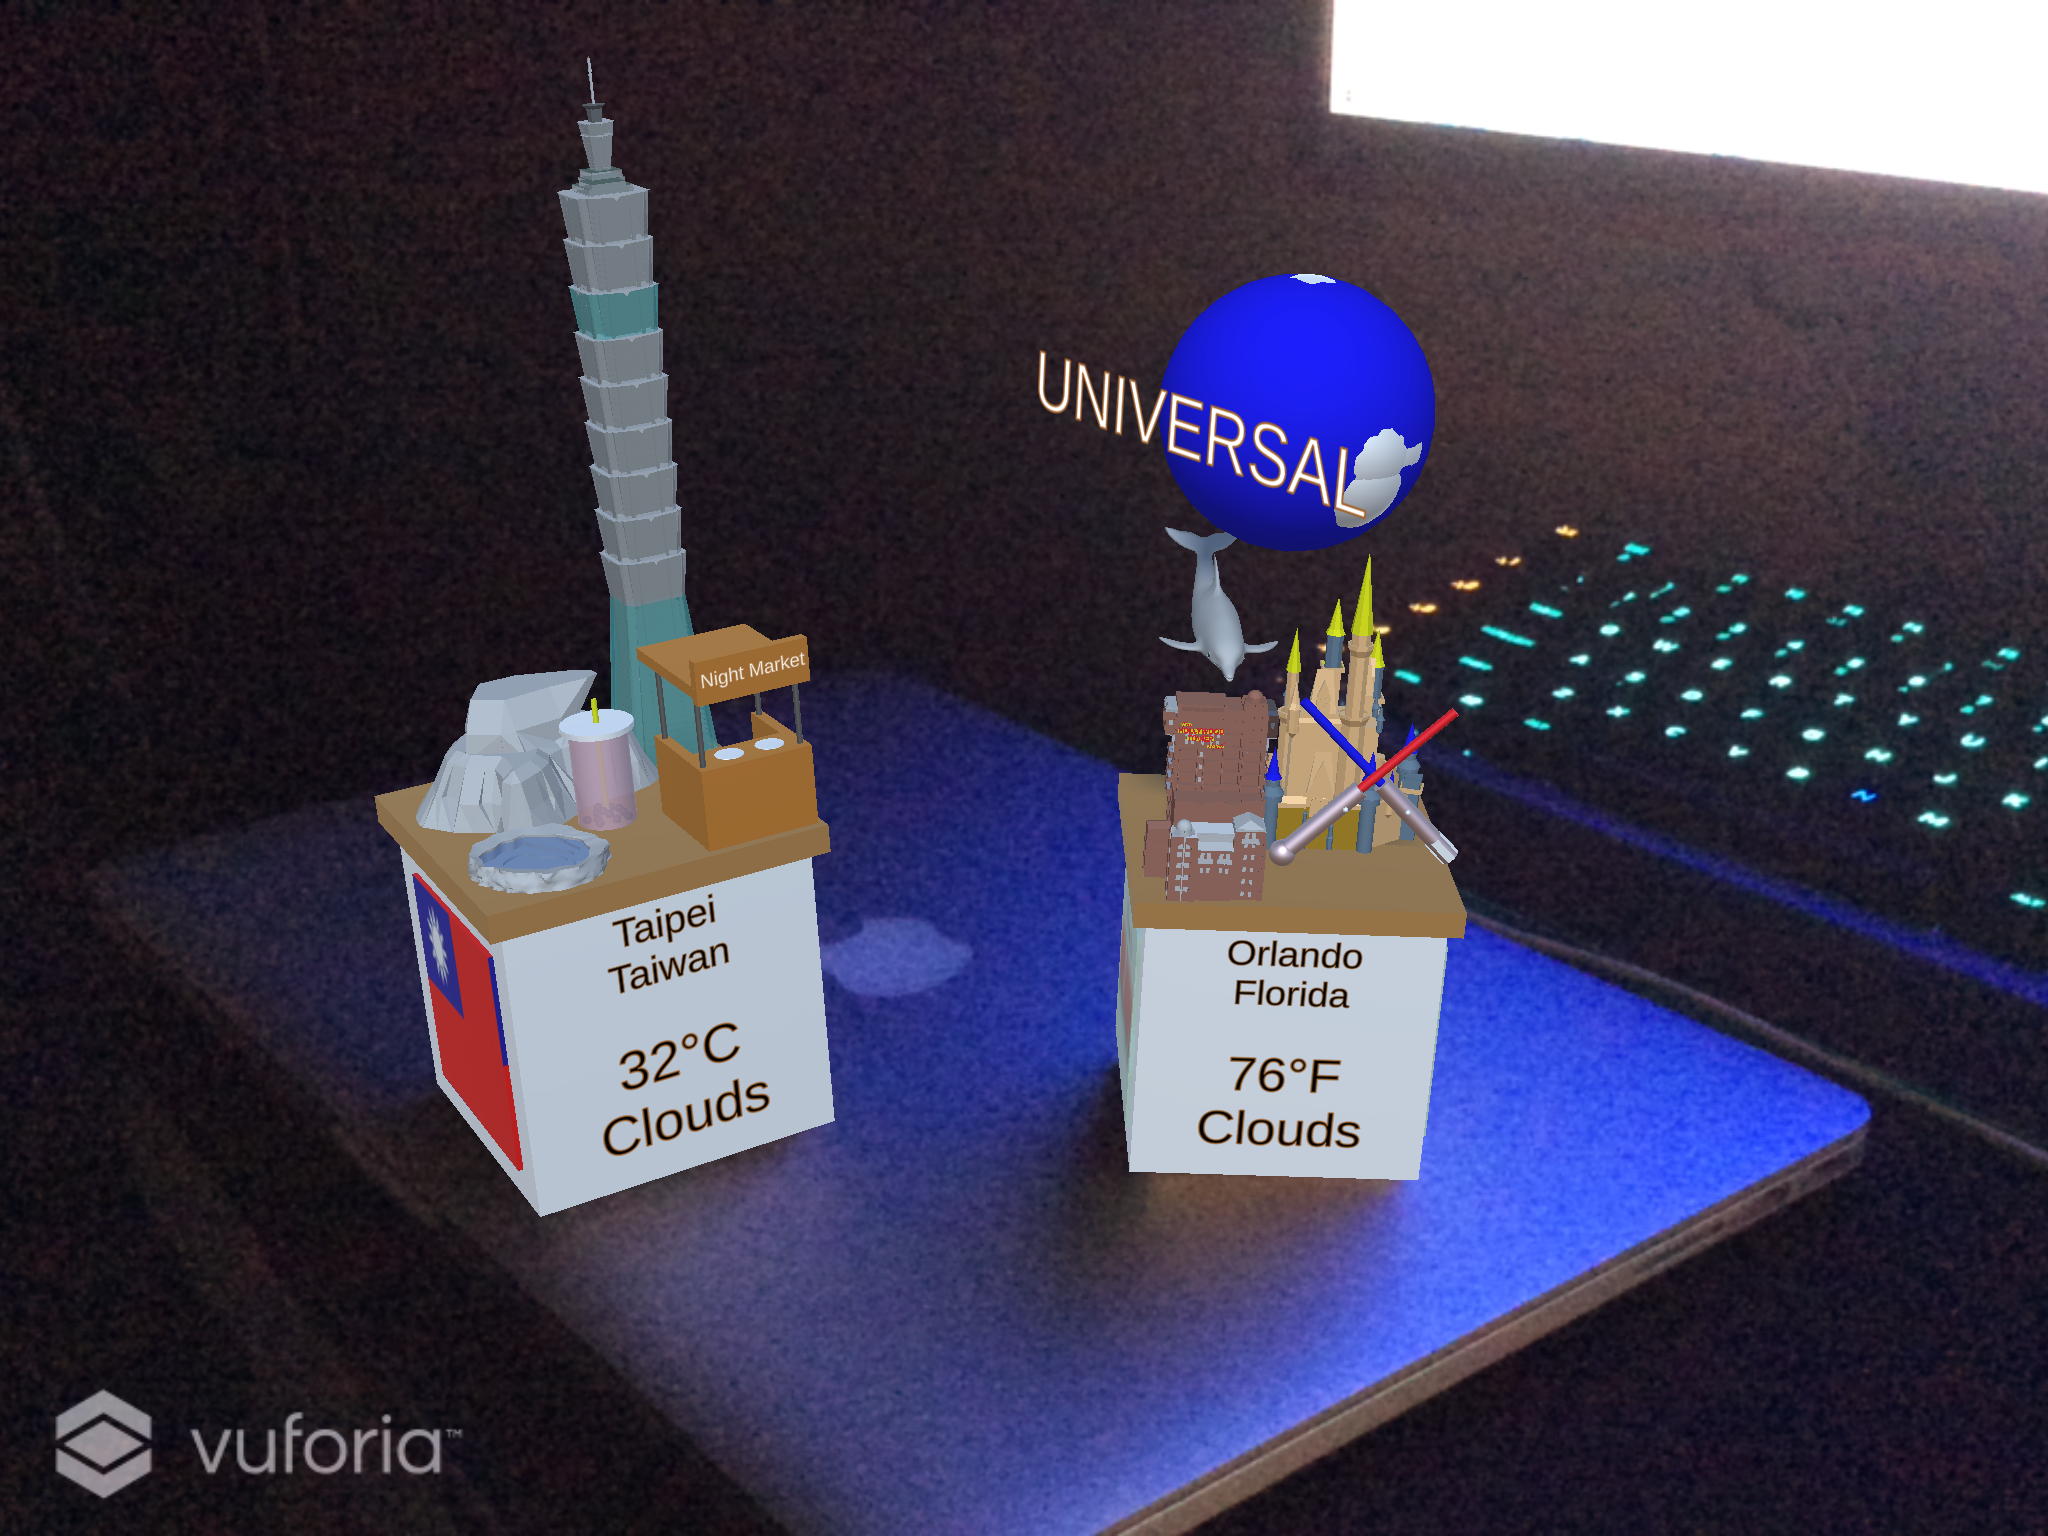
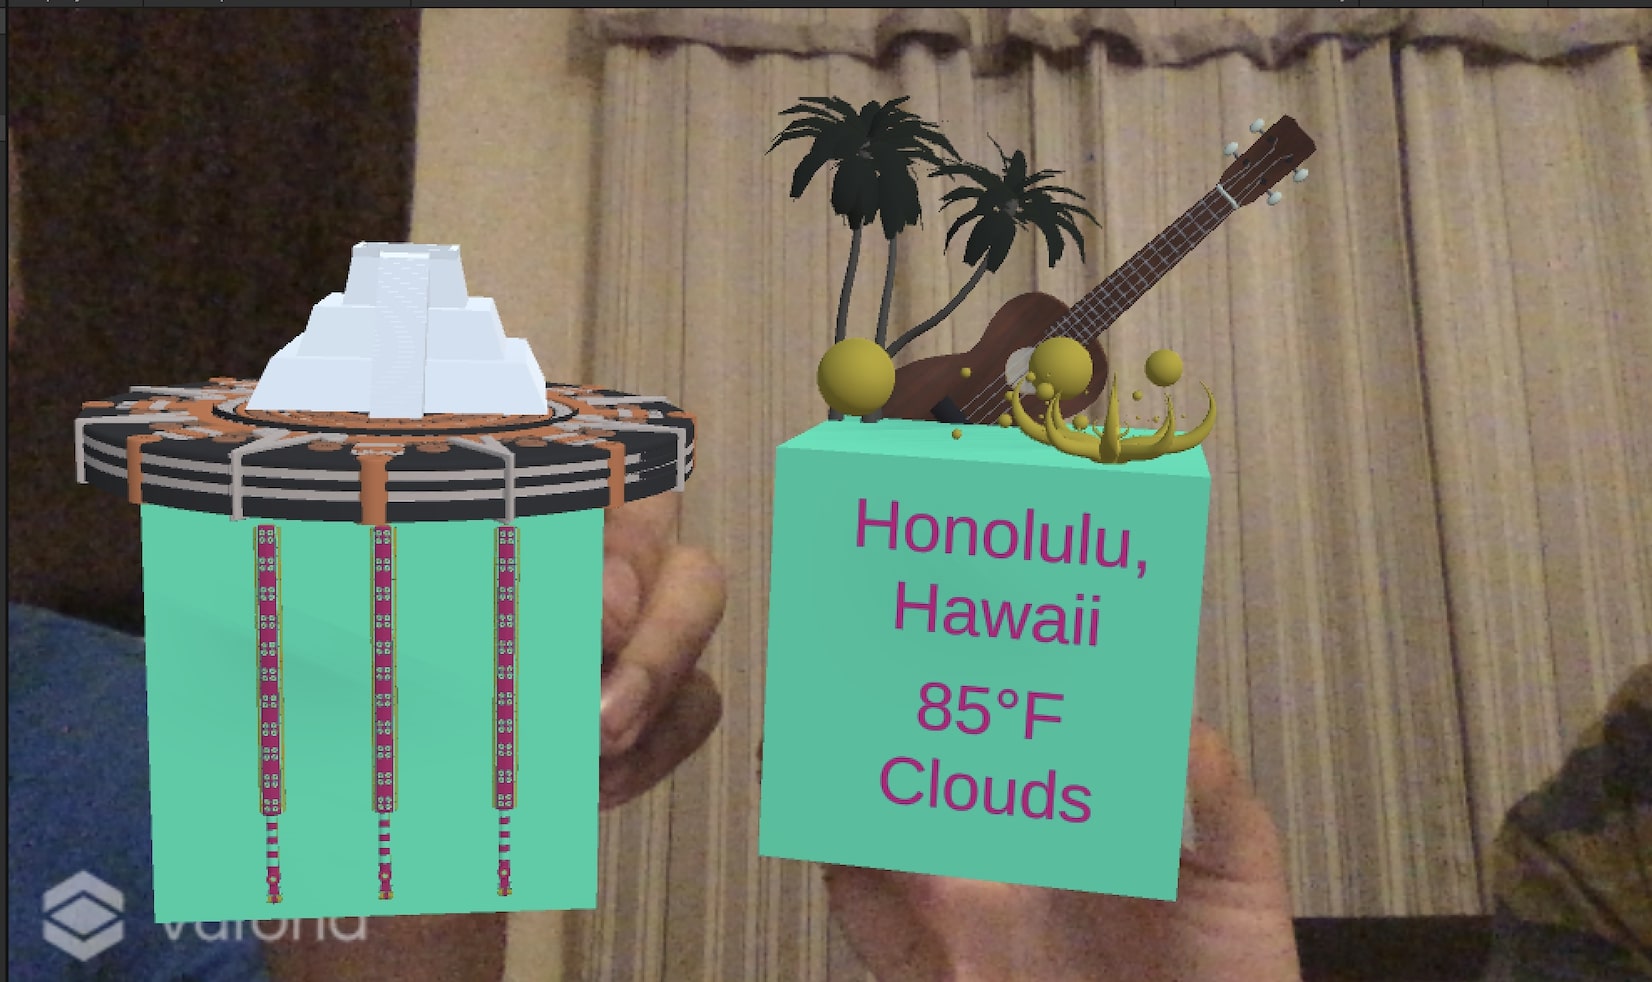
the weather for the
location should be given along with the temperature in
degrees F and it should update at regular intervals (e.g.
once every 10 minutes)
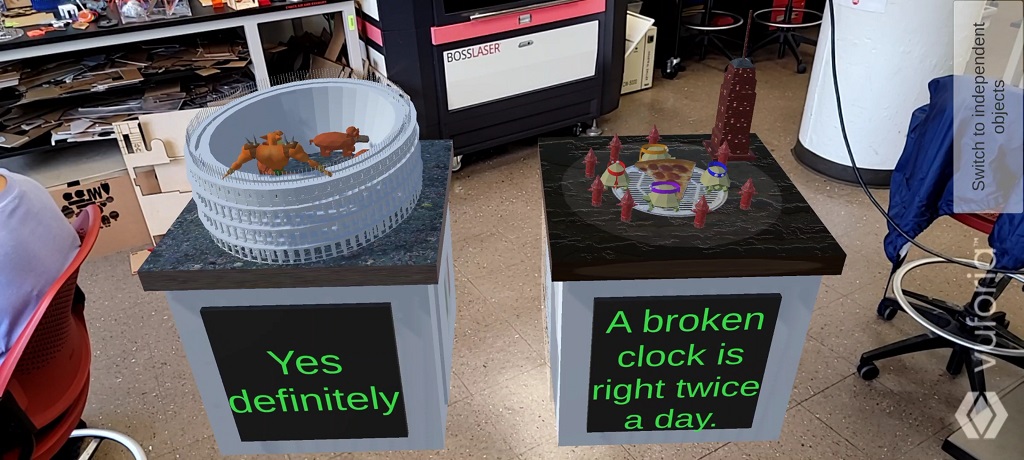
a magic 8-ball feature
that randomly gives the user one of the classic sayings when
they turn the knickknack upside down and then turn it back
right side up. The knickknack should make a non-annoying
sound when it has randomized a new saying as feedback
allowing the user to
view this through a webcam on their computer (or on a smart
phone)
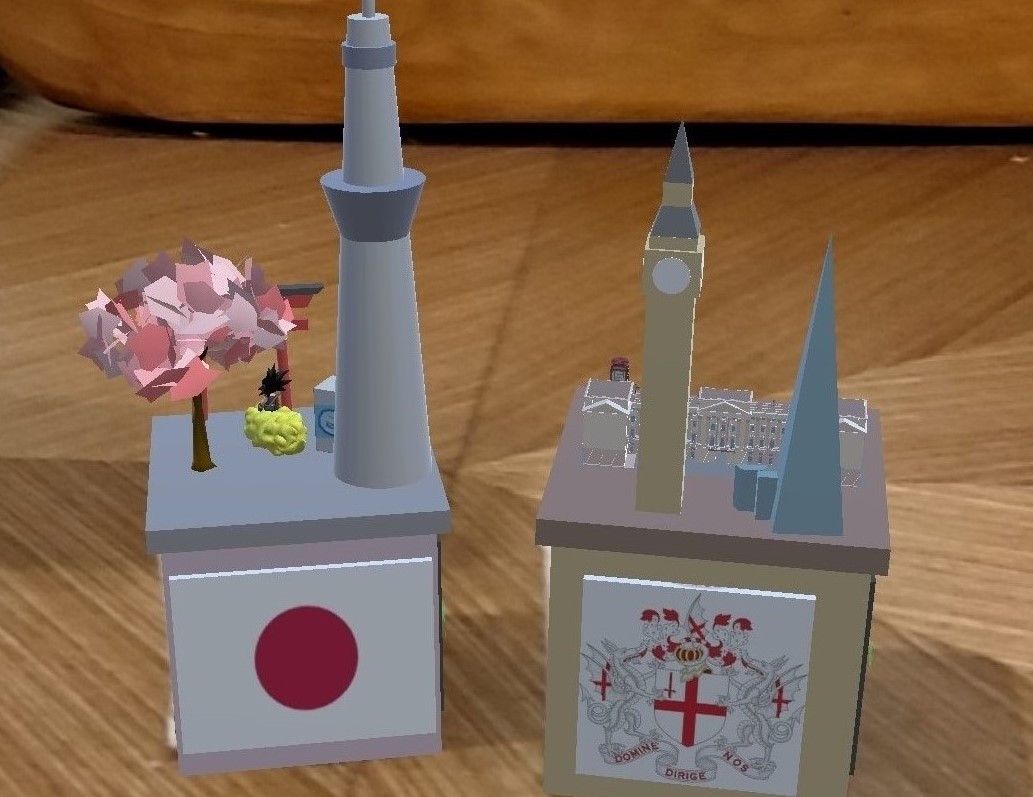
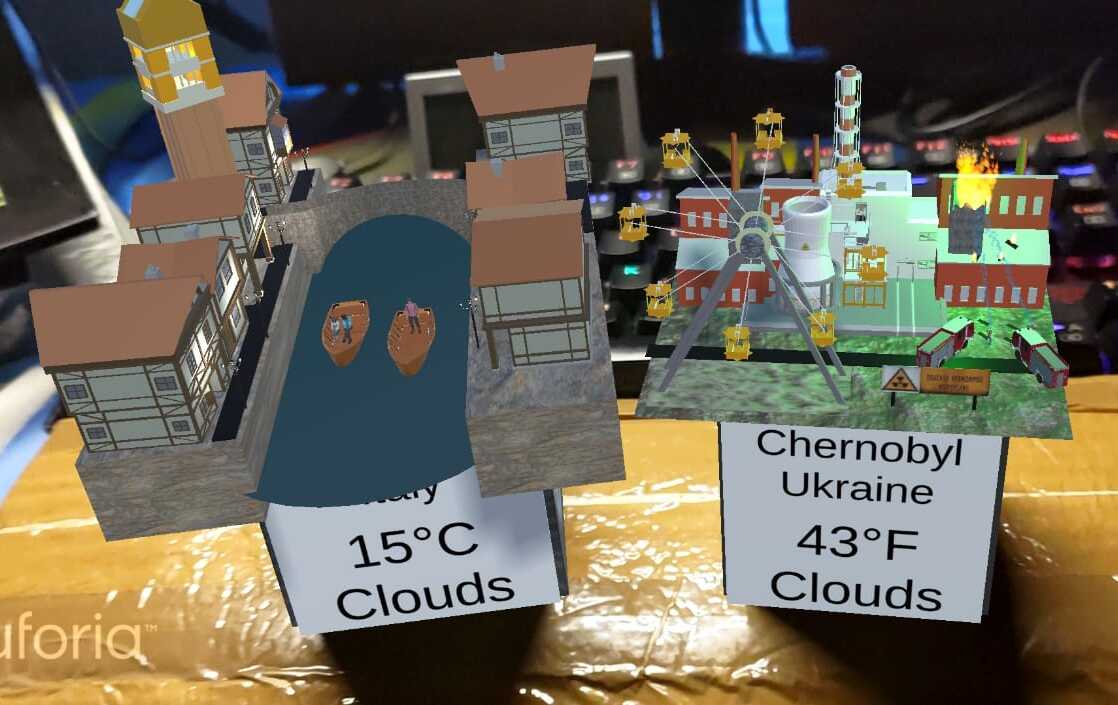
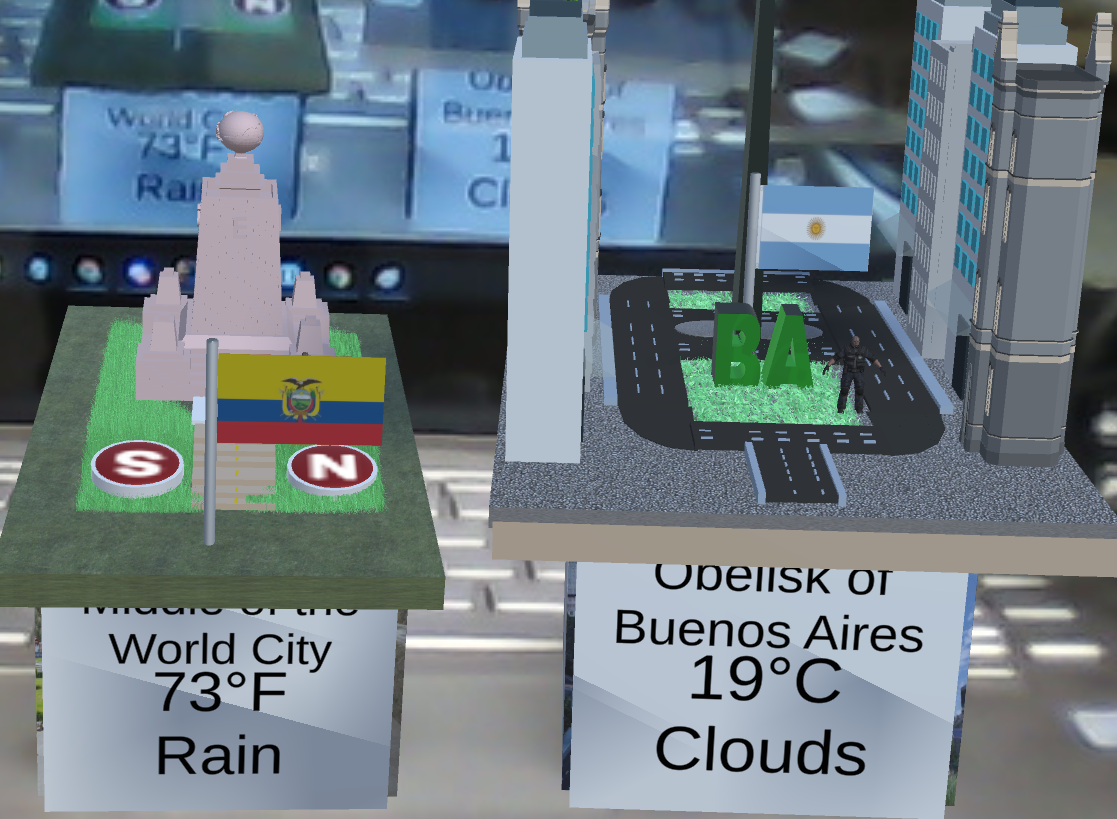
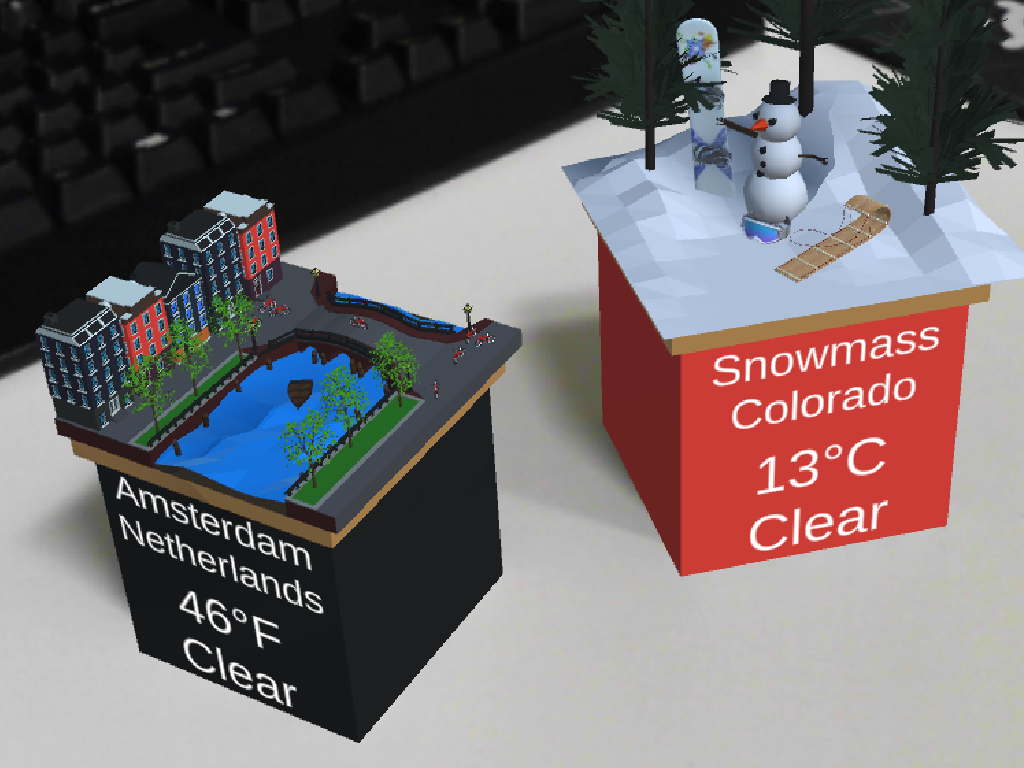
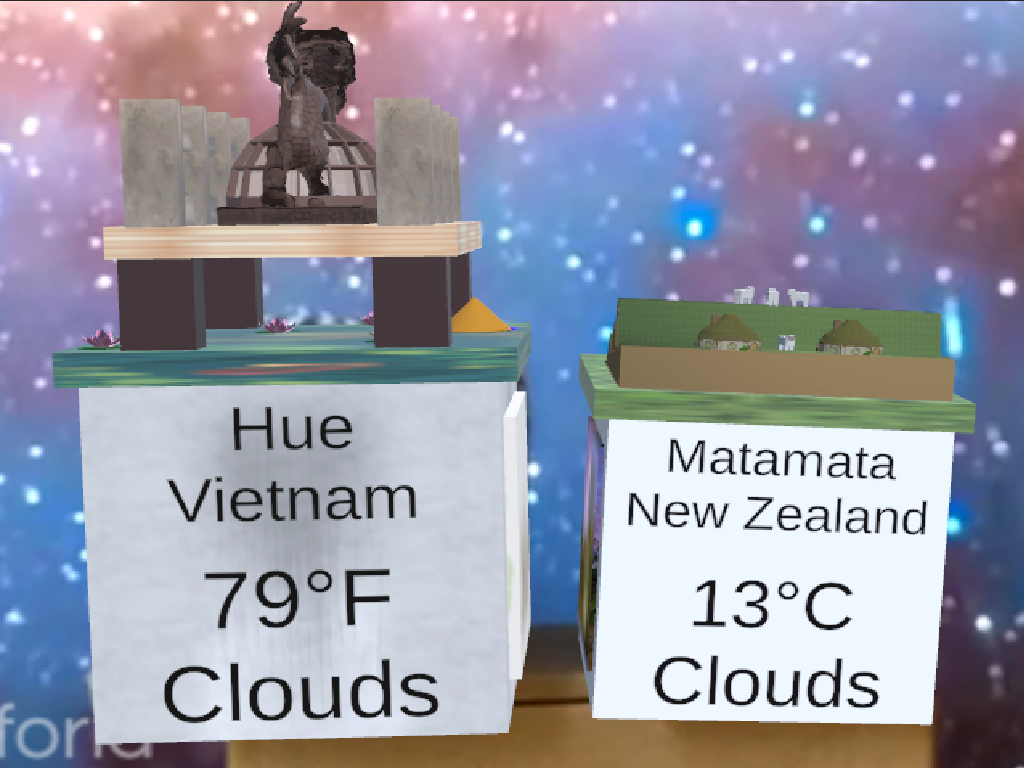
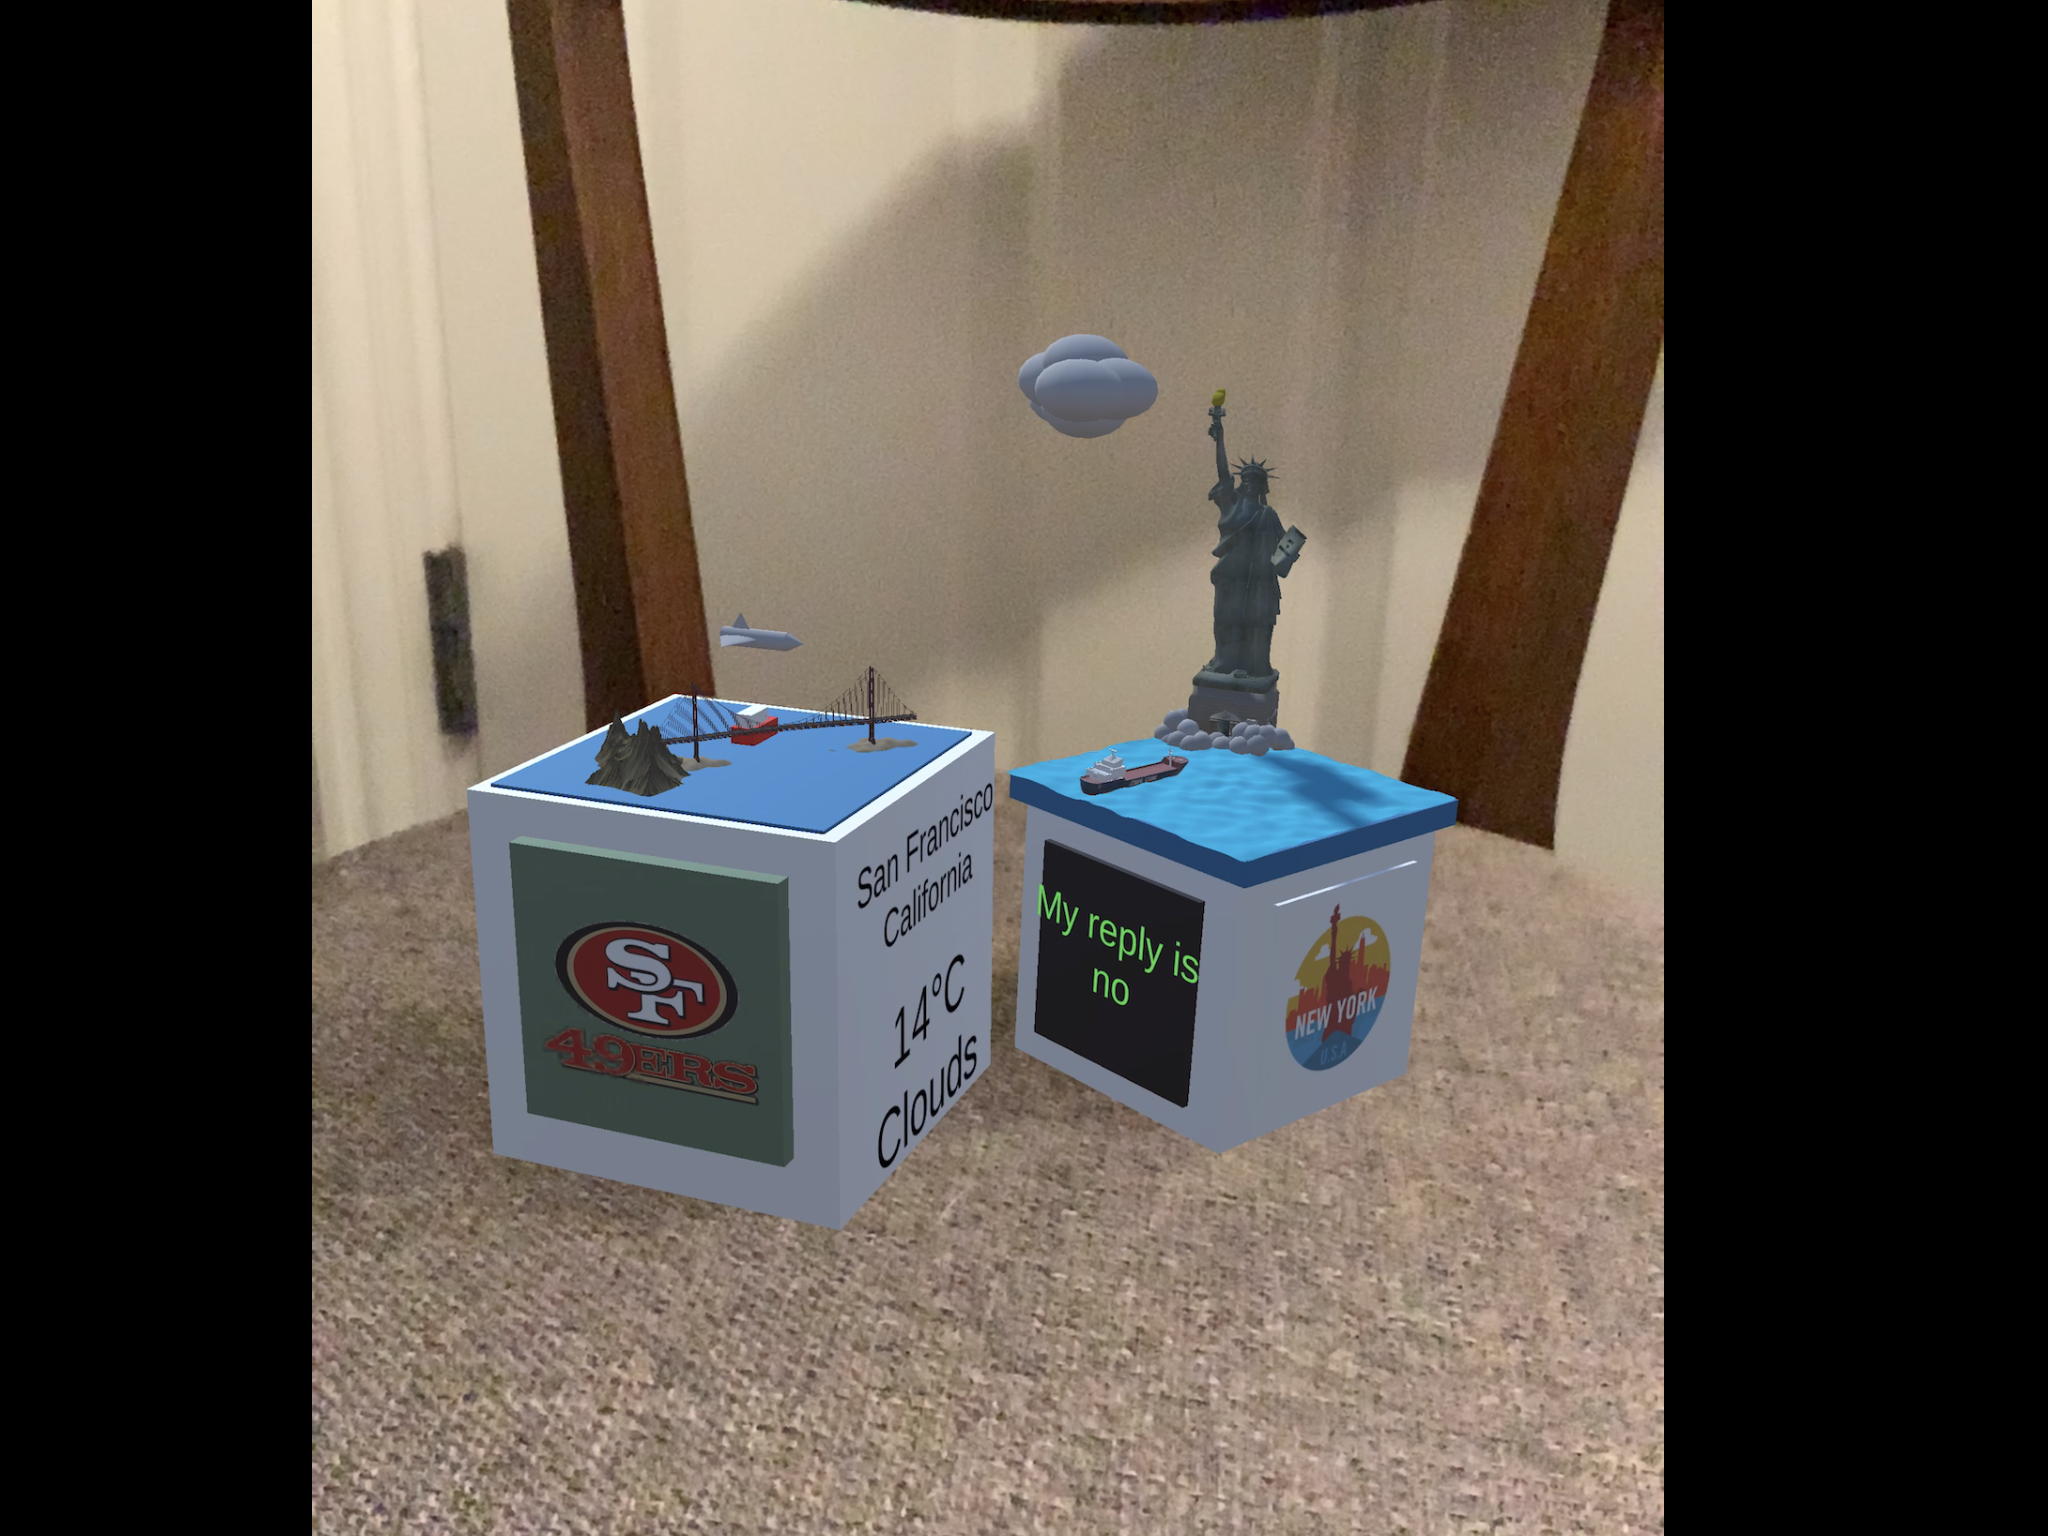
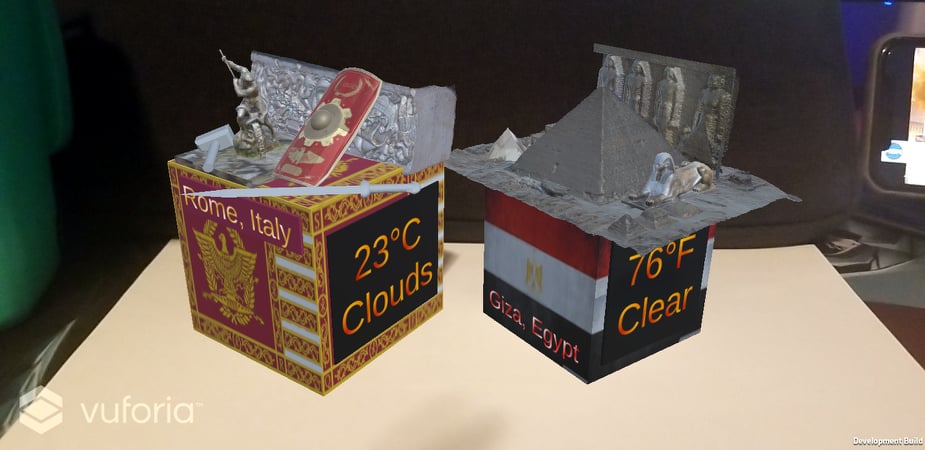
40% of the points on the project are for adding a second
knickknack using the classcube marker for a different location
where both knickknacks are visible and function simultaneously.
The knick knack for the second location should have
3 unique models from the web (remember to cite
the creators)
2 unique
models that you create on your own (more on this below)
at least
one relevant and not annoying ambient sound
the frame rate should
remain high with both visible at the same time
The weather for this other location should be given with the
temperature in C rather than F and
it should update at regular intervals (e.g.
once every 10 minutes)
creating a
set of modern magic 8-ball sayings to replace the traditional
ones. There need to be at least 10 of them and like the
original they need to be a mix of positive, neutral, and
negative, but they don't have to be in the same ratio as the
classic. They could be slang, or emojis, or in a language
other than English.
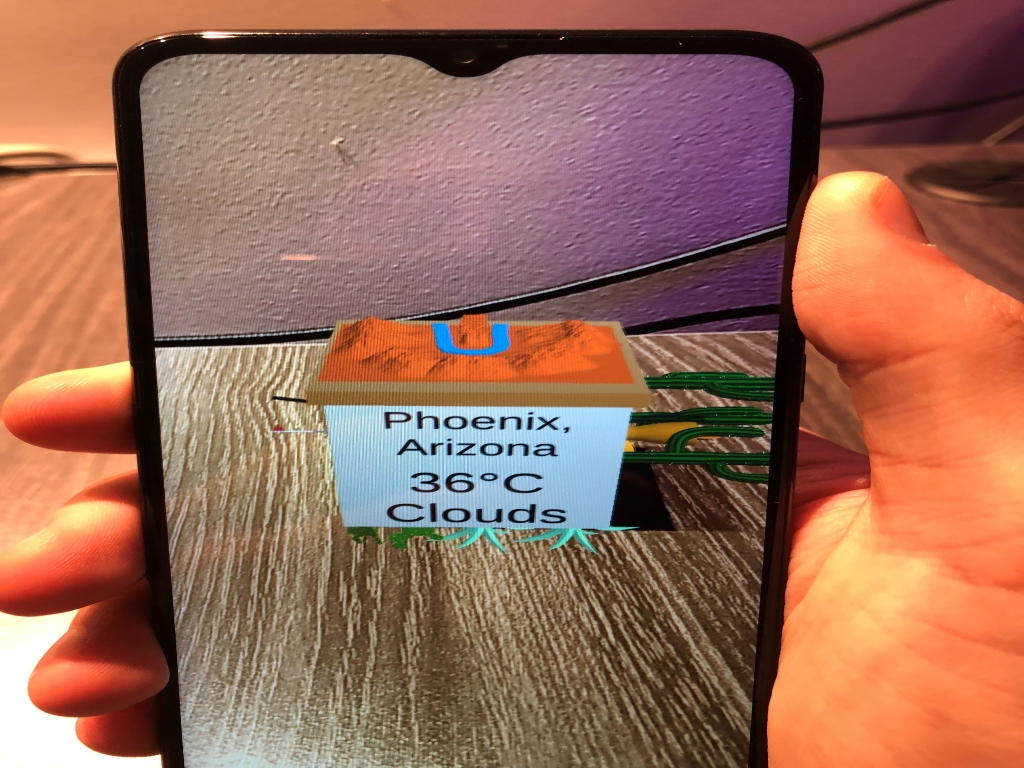
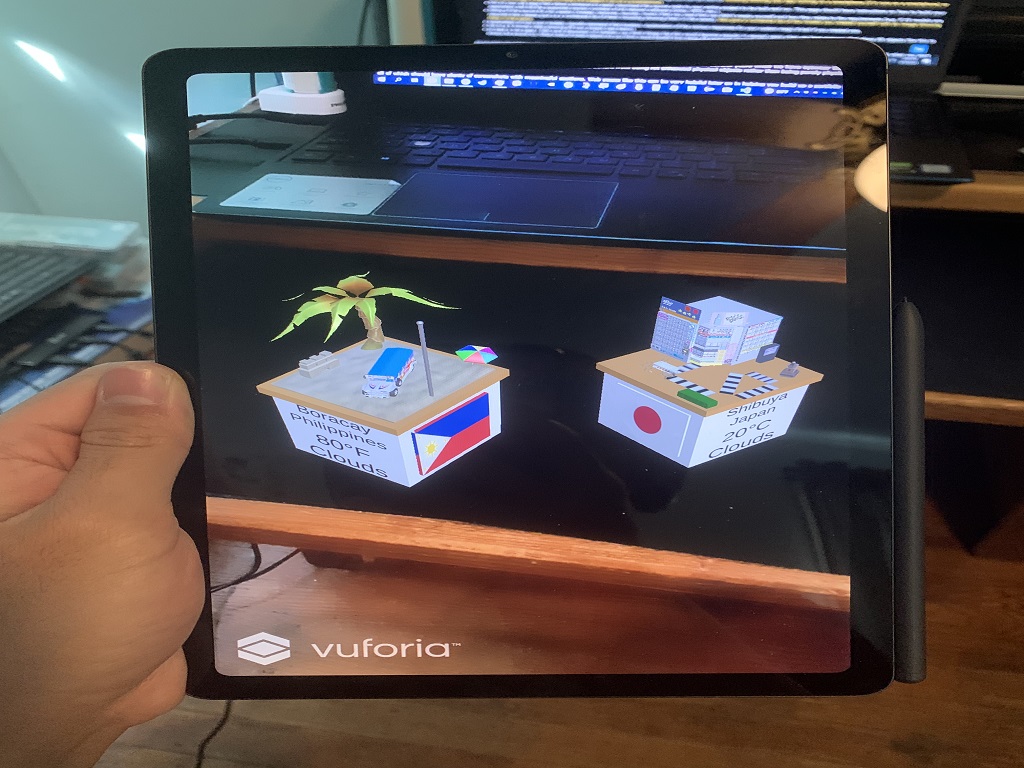
deploying
the app to an iOS or Android phone (a user should be able to
use their phone to view both of the fully functional
knickknacks at the same time)
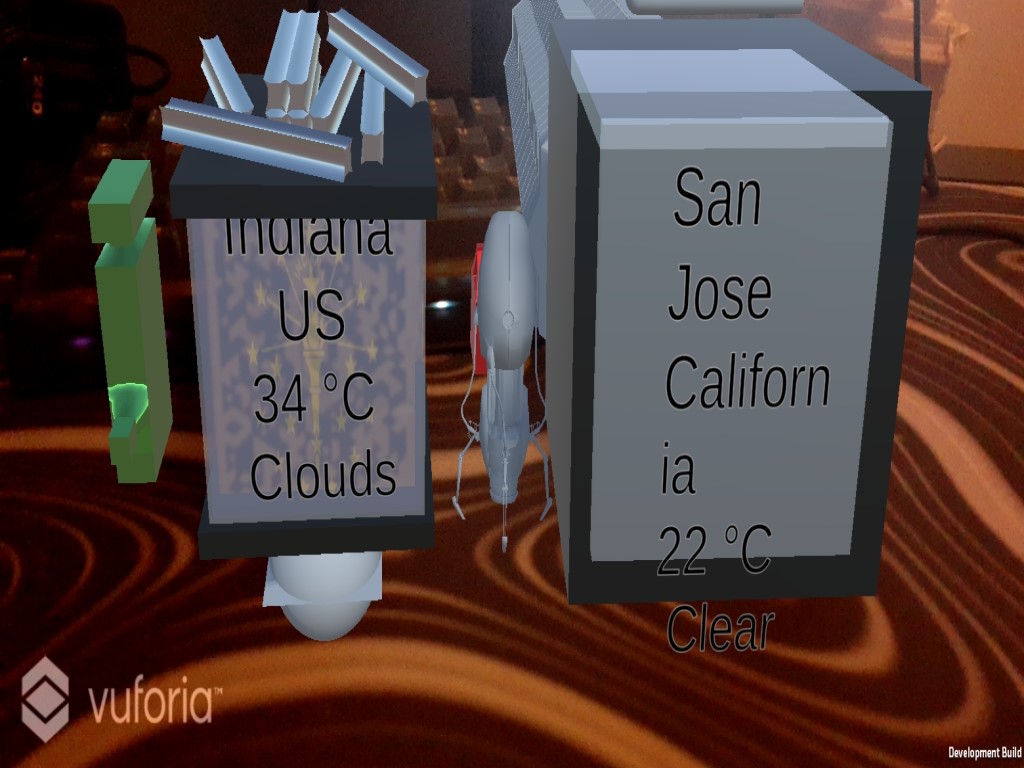
Graduate students in the class also need to be
able to ...
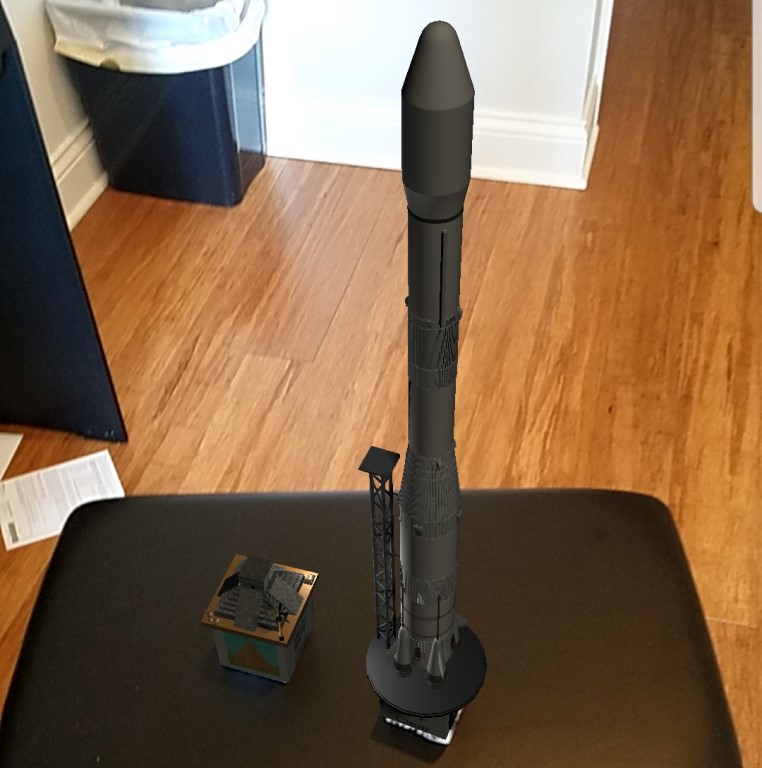
Create
another scene in your unity project that makes use of the
Ground Plane State and the Plane Finder (separate from the
scene with the markers above). Deploy your 2nd scene to an
iOS or Android phone and use the Vuforia Ground Plane to
position one of your knickknacks on the ground or floor
where the knickknack is 3 feet / 1 meter tall, to
experience the knickknack at a different scale.Be sure
to turn off 'Duplicate Stage' in the Plane Finder so you
can move your knickknack around when you tap on the screen
and not make multiple copies of it each time you click on
the ground.
For a classic Magic 8-ball the sayings are:
Positive:
It is Certain
It is decidedly so
Without a doubt
Yes definitely
You may rely on it
As I see it, yes.
Most likely
Outlook good
Yes
Signs point to yes
Unclear:
Reply hazy, try again
Ask again later
Better not tell you now
Cannot predict now
Concentrate and ask again
Negative:
Don't count on it
My reply is no
My sources say no
Outlook not so good
Very doubtful
Note that there is a very big difference between
getting something working and getting it working well. The first
is not that hard. The second takes much more time. You are
expected to have things working well.
Turning in the
Project You should create a GitHub page for
your project. You can integrate Unity with git so that it
will track all your changes, or just regularly push files
to git. The final project will need to be turned in via
git so we know the timestamp on the files, but it can be
also helpful to have regular commits in case something
goes wrong so you can get partial credit.Initially
this repository should be private to yourself, and then
you can make it public for turning it in.
There are
two due dates for the project.
The unity source and
application is due first. This will be turned in via
GitHub by making your repository public to at least
everyone at UIC. Be
sure to email the location of your repository to Andy
before the deadline.
The second deadline
is for the documentation.
You should create a public web page with multiple sections
(visible to anyone for at least the duration of the
course) that describes your work on the project. You can
host your web page at UIC(http://people.uic.edu),
GitHub,or the
provider of your choice, as long as it remains publicly
available to all. You can use any publicly available
templates as long as you cite them, or create your own.
This page should have several sections including:
introduction and
description of how to use your application and the
things you can do with it, including
showing your app running on a smartphone (if it runs
on a smartphone) or running through a webcam in unity
(if it doesn't run on a smartphone)
link to your git
page that allows someone to easily download the source
code to your entire project to be built and run. This
page should have instructions on how to build your
application and list the supported version numbers of
all relevant software (Unity, VRTK, etc.).
listing of the
source for any assets (models, textures, sounds, music)
that you used that you didn't create yourself and how
they relate to the requirements (e.g. if 15 models are
required then please give us a numbered list of them
including showing them in the scene). Also give a numbered list of the
models you created yourself with an image showing them
in the scene.
explanation of how
your models, sounds represent that location. explanation
of the various responses for your custom magic 8-ball if
you created one.
link to a 5 minute
video showing off your project (see below)
at least a one page
/ 500 word discussion of whether you think things
like this would become popular in several years
when we have eyewear that slows AR objects like
this to always be around us. What kinds of small
objects do you think would benefit from being AR
enhanced physical objects rather than being purely
physical.
all of which should haveplentyof
screenshots with meaningful captions. Web pages like this
can be very helpful later on in helping you build up a
portfolio of your work when you start looking for a job,
giving you something to point potential employers at, so
please put some effort into it.
FYI My sample scene included these resources:
UFO model by hana -
https://3dwarehouse.sketchup.com/model/273a556e078133532296d88107d065f6/UFO
UFO sound by Daniel Simion -
https://soundbible.com/2213-Alien-Spaceship-UFO.html
Cow Model by Max M -
https://3dwarehouse.sketchup.com/model/288b4047-1c6b-43e5-9b76-eb14ff9152fa/Cow
Roswell Logo from the Roswell New Mexico
site -
https://roswell-nm.gov/FormCenter/Convention-Civic-Center-9/Submit-a-Community-Event-53
You should also create a 5 minute YouTube video showing the
use of your application including narration with decent
audio quality. That video should be in a very obvious place
on your main project web page. Capturing video from a
smartphone is probably best, but you can also capture video
from a webcam. You can try to narrate while interacting but
you will most likely find its useful to do some editing
afterwards to tighten the video up. This video is helpful
for us to know which parts of your project work, and may be
useful in the future when you want to show off some of the
projects you did but you cant get the code to compile
anymore or you don't have the hardware handy.
Once you have your web page done, send the URL to
Andy and the TA
before the deadline. We will respond to this email as your
'receipt'.
We will be linking your web page to the course
notes so please send Andy a nice representative jpg
image/photo of your knickknack running, highlighting your
chosen location for the web. This should be named
p1.<your_last_name>.jpg and be roughly 1024 x 768 in
size.
Presenting the Project
An important part of creating AR applications is
getting feedback and using it to improve your design. This also
allows you to see how others approached the problem, and maybe
they solved some problems that you had issues with, and
vice-versa, so it helps everyone get better for the next
project.
We will be spending time in class for each person to show off
their work live either through streaming your phone to the wall
(preferred) or streaming your laptop viewing your knickknack
through a webcam.See the Week 5 nd 6 notes for details.
last update: 9/28/21
9/16/21 - clarified that people need to document their app
running on a phone if possible, or if not through a webcam in
unity
9/14/21 - clarified that people should also list the models
that they created themselves as part of the documentation.