Date
for telling me you in a 2 person group Friday September 24 at 9pm Chicago time Application Due Saturday October 16th at 9pm
Chicago time
Documentation Due Monday October 18th at 9pm Chicago time
This second project is focused on immersive
Virtual Reality at room scale. This project will give you some
experience with building virtual worlds for people to move
around in and interact with, seeing that world at both human
scale as well as other scales. It will also give you a chance
to experience the world that you create through physically
walking, and moving your head and hands to directly interact
with the space, as well as more mediated controls allowing you
to teleport or interact at a distance.
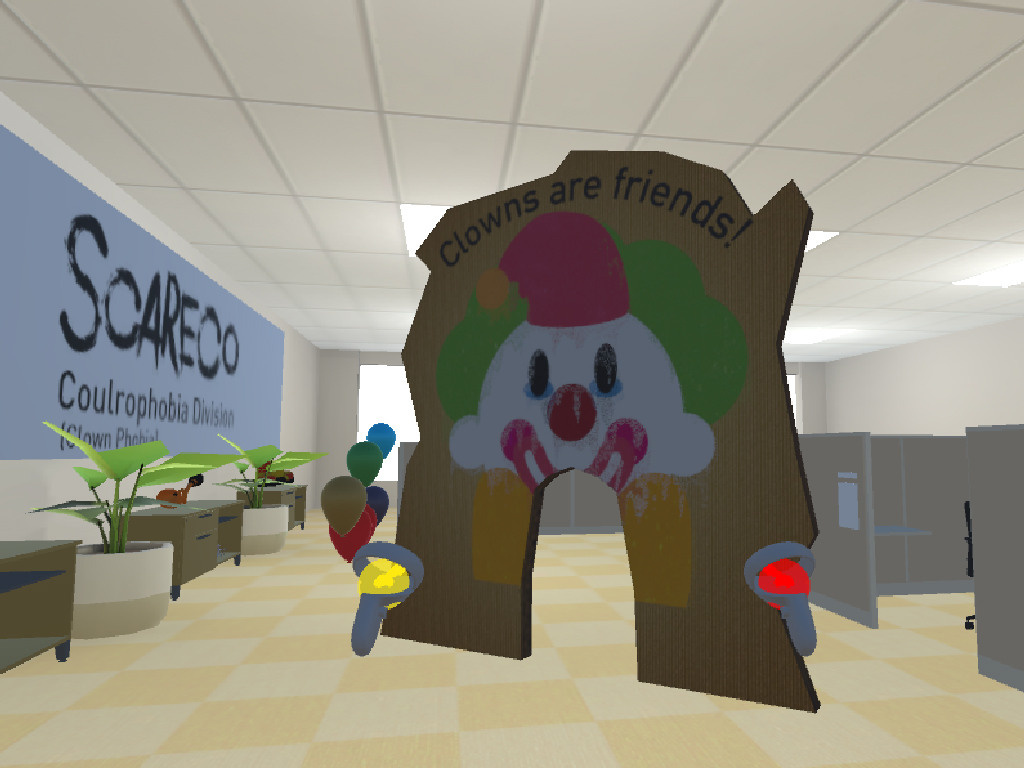
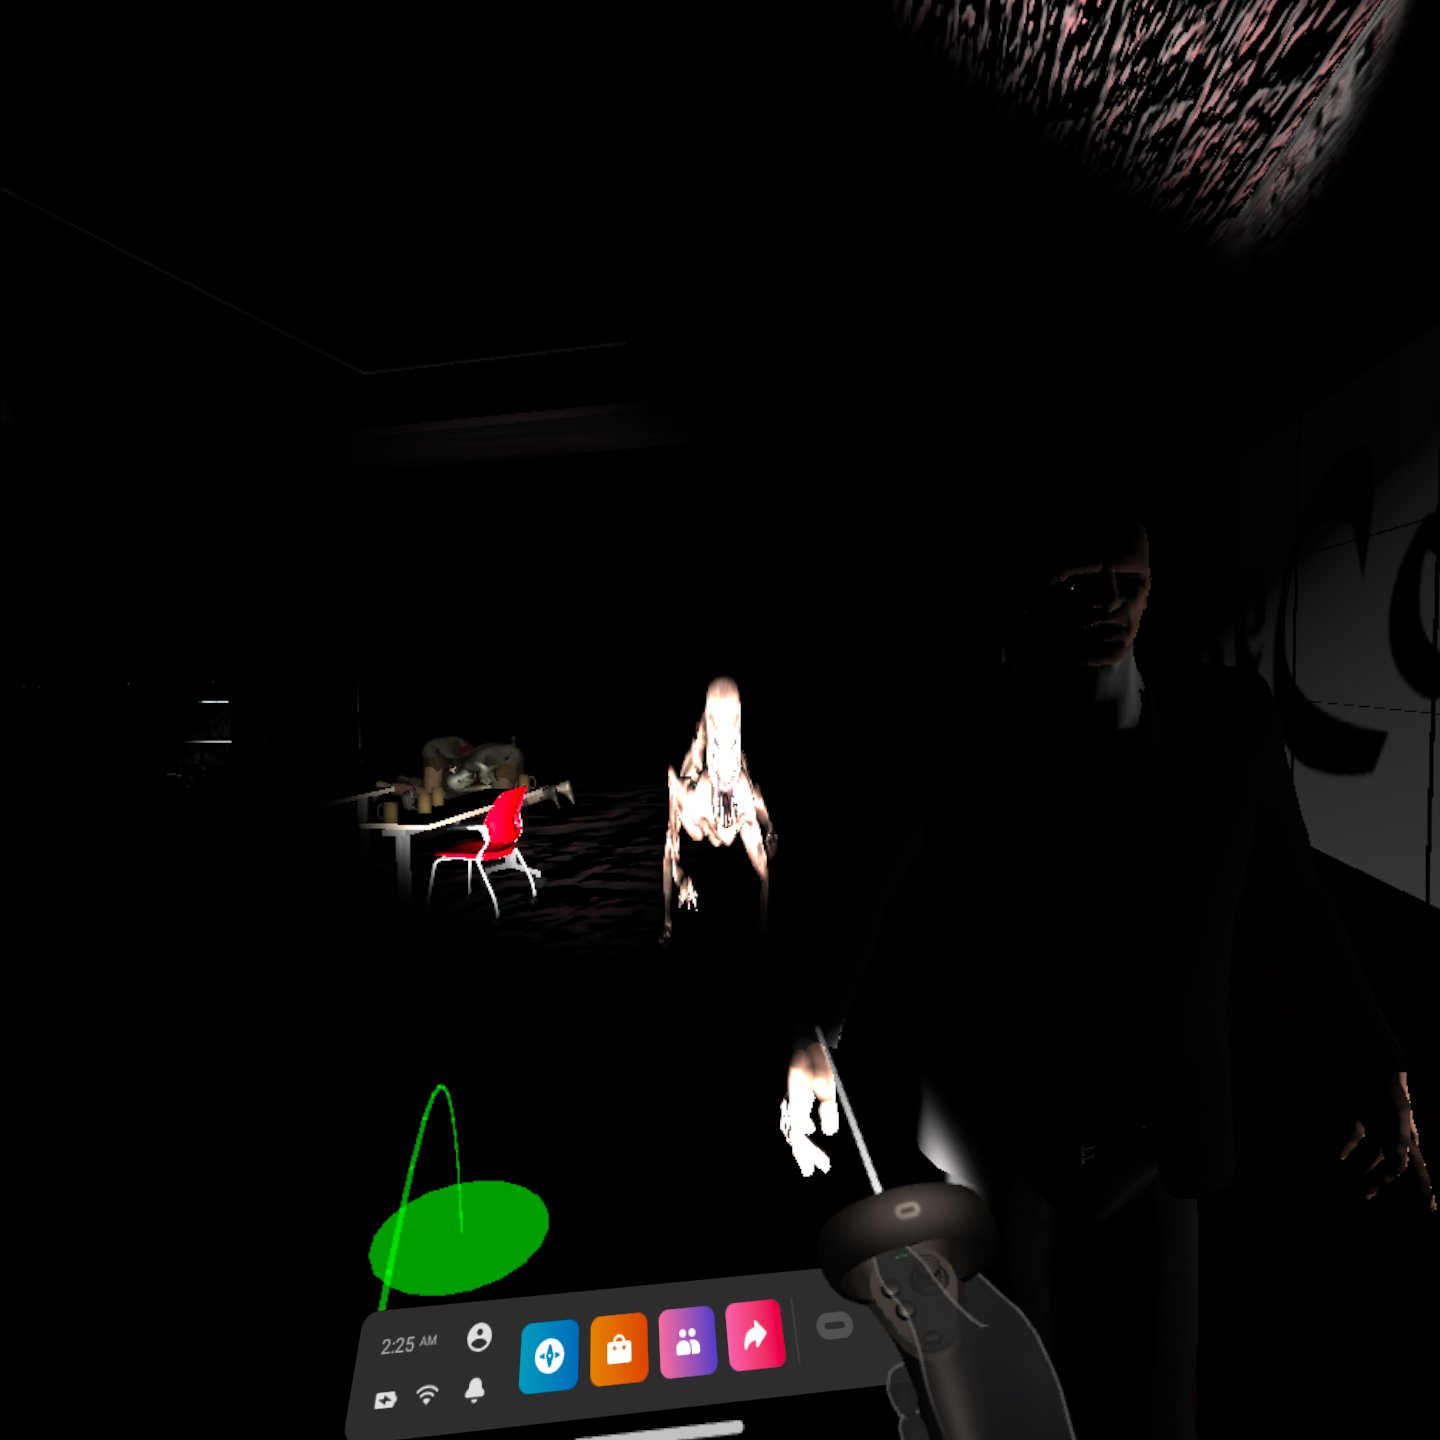
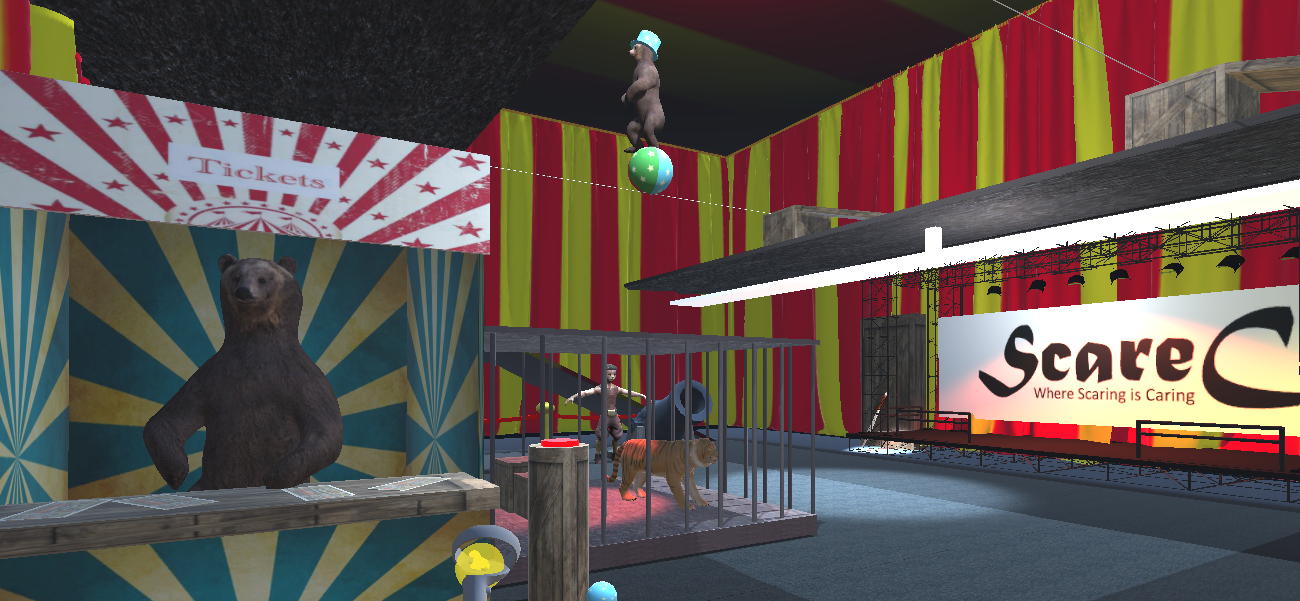
One fairly common 'serious' use of VR is to help
people deal with their fears, so we are going to explore that
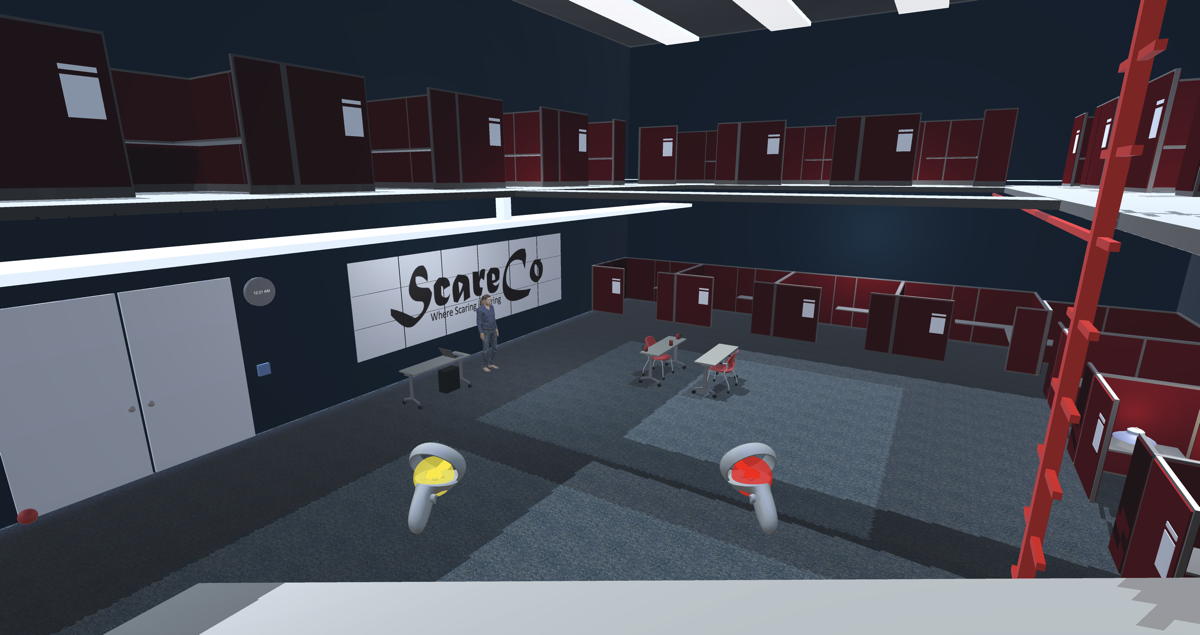
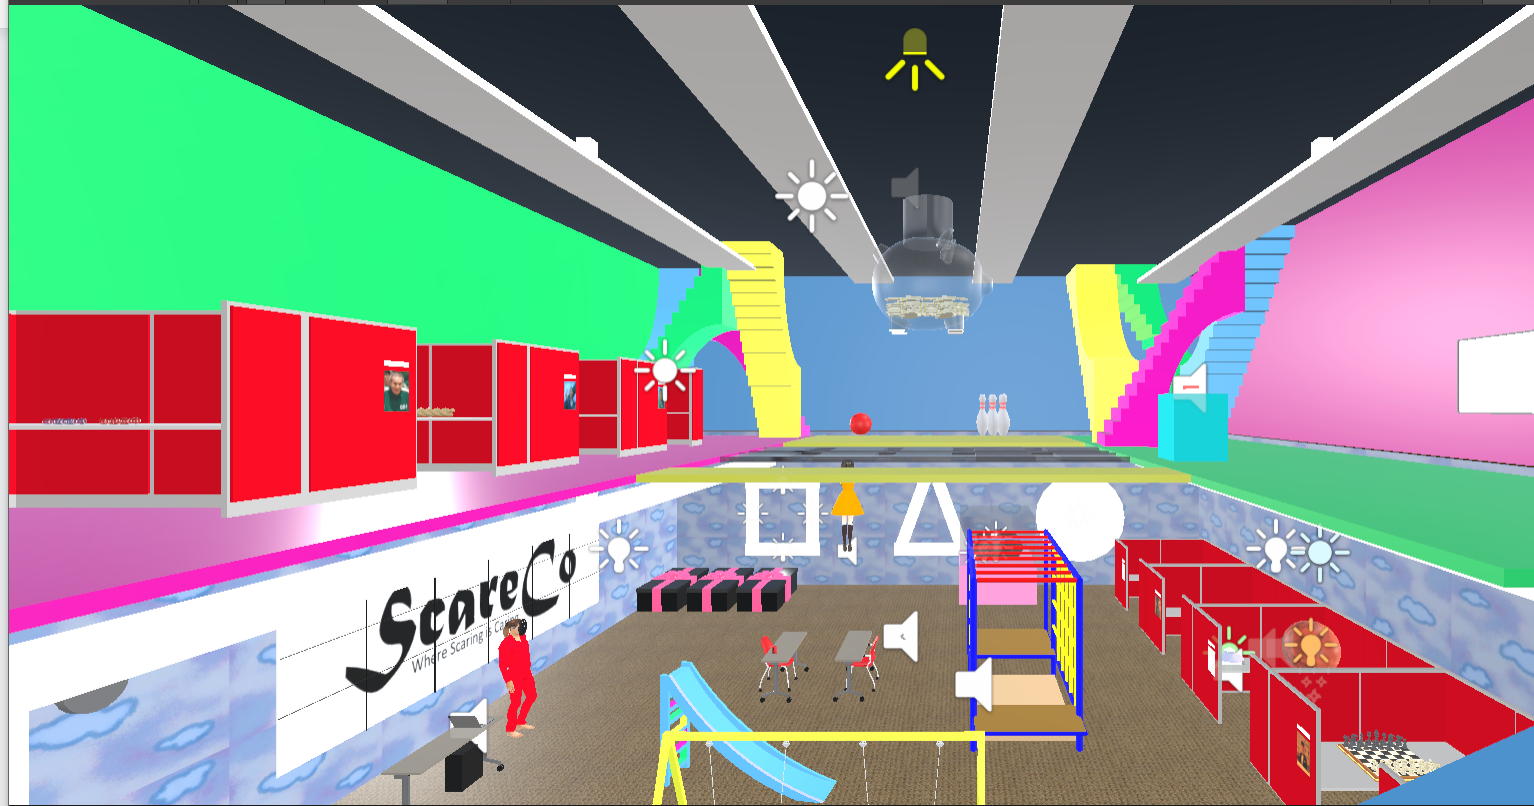
as you help design the new offices for ScareCo, a startup that
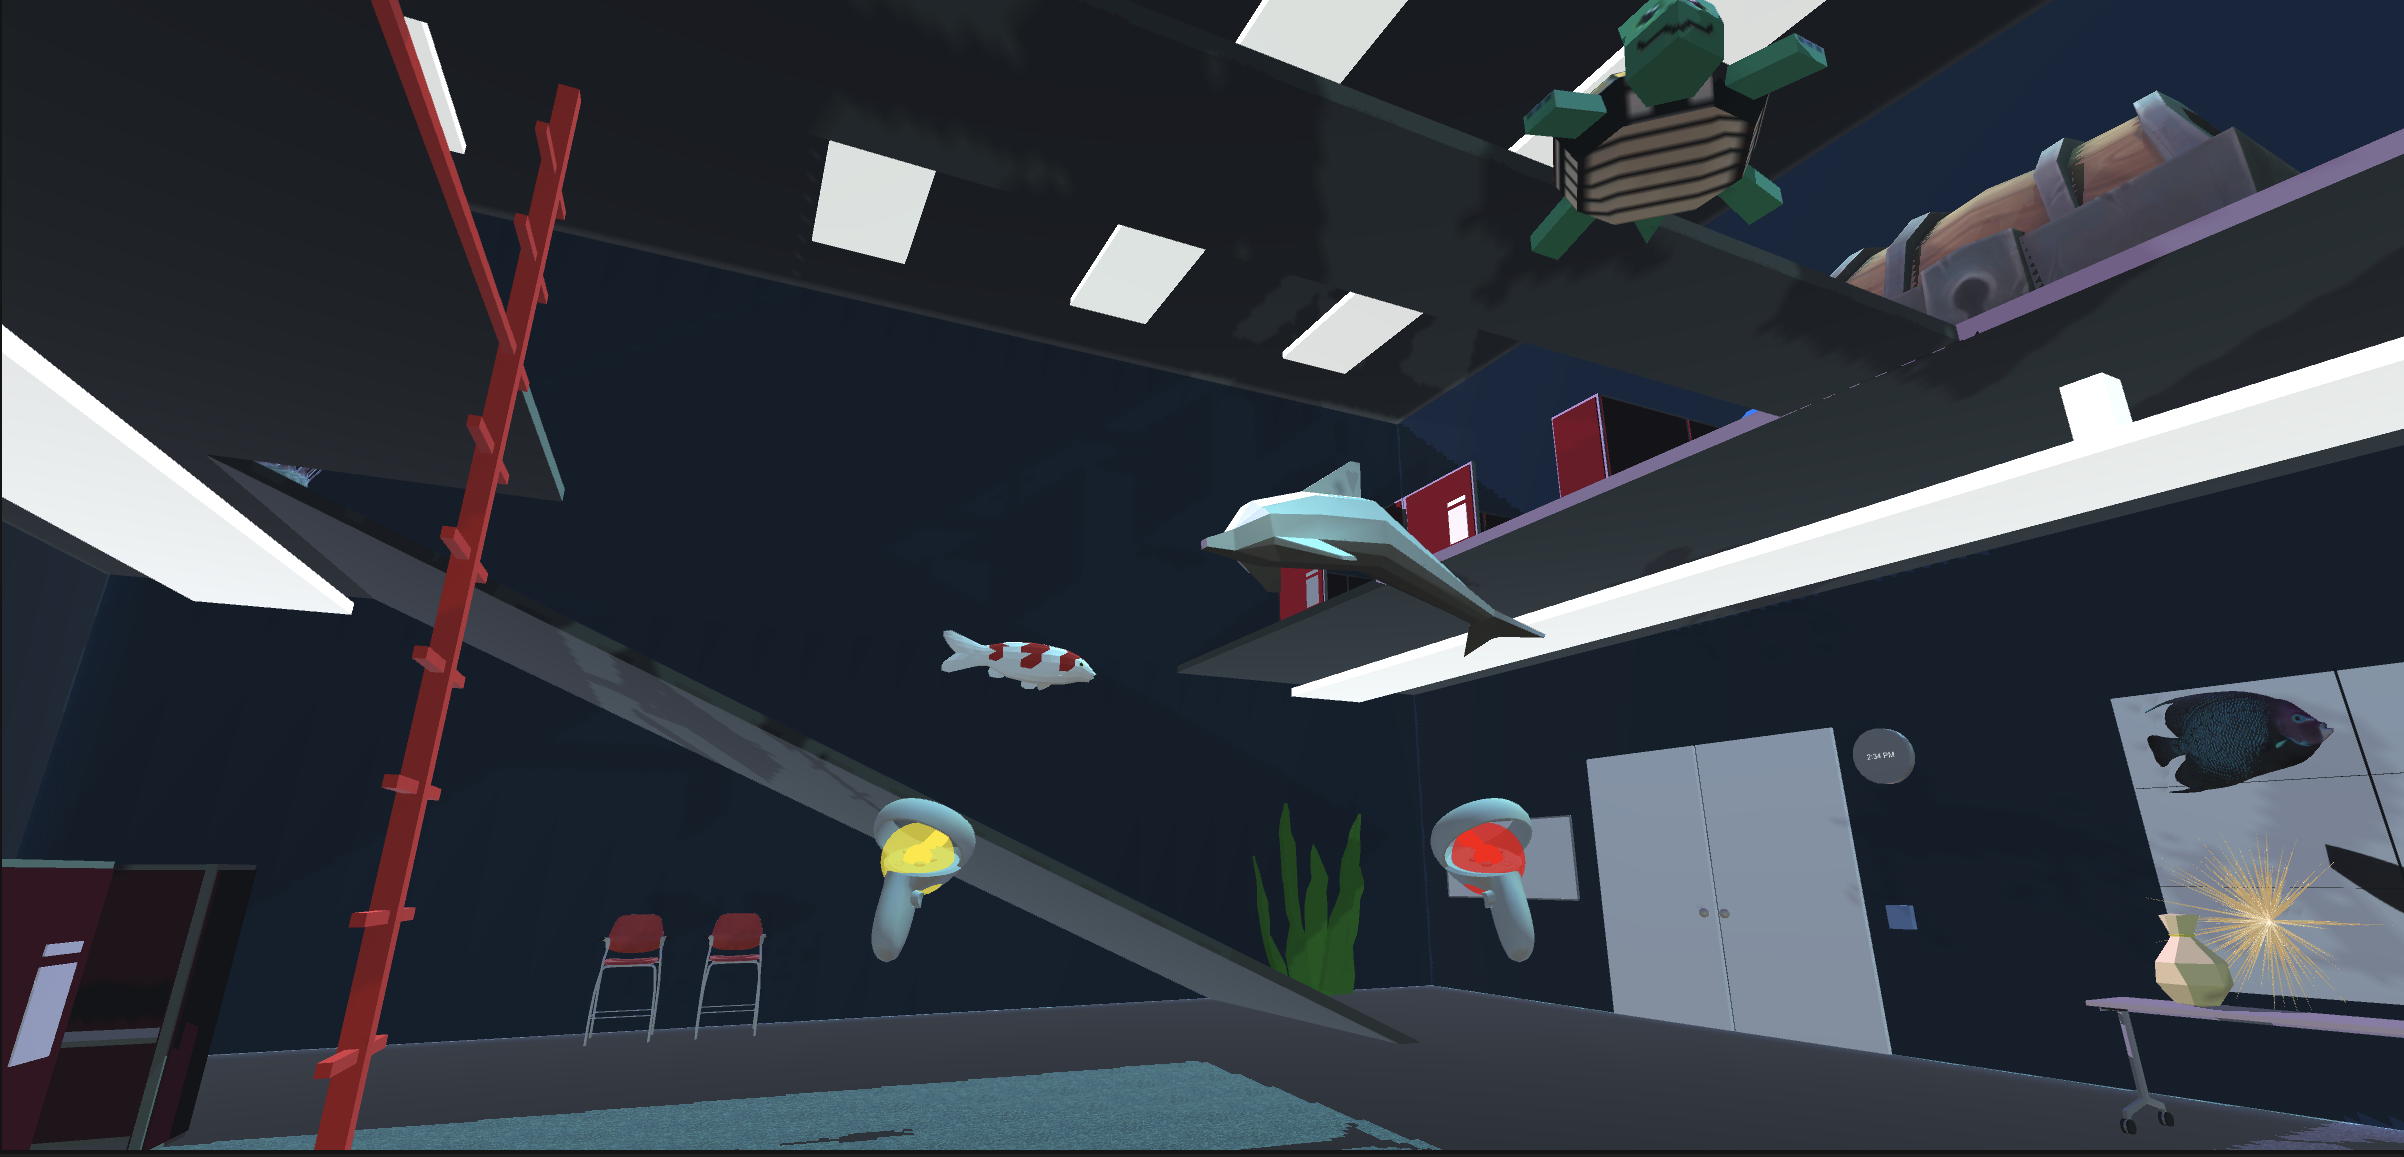
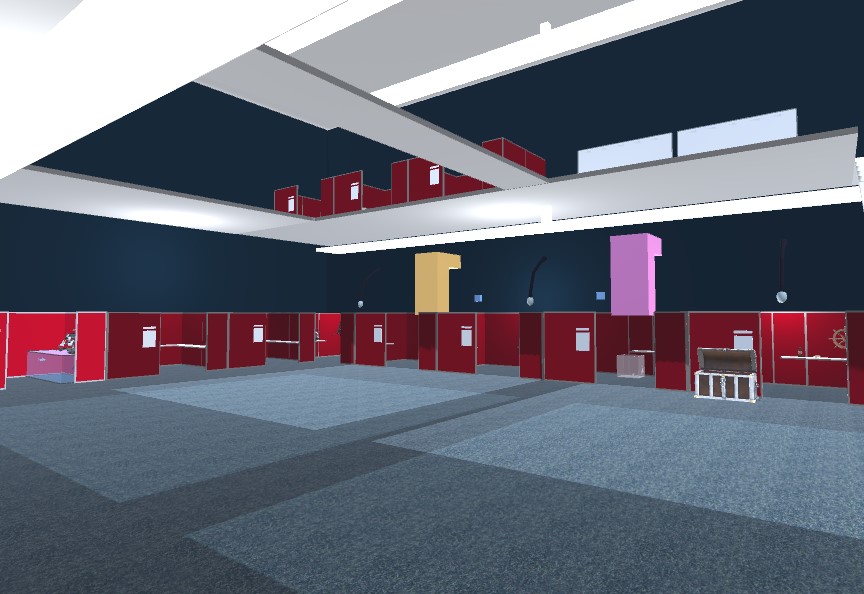
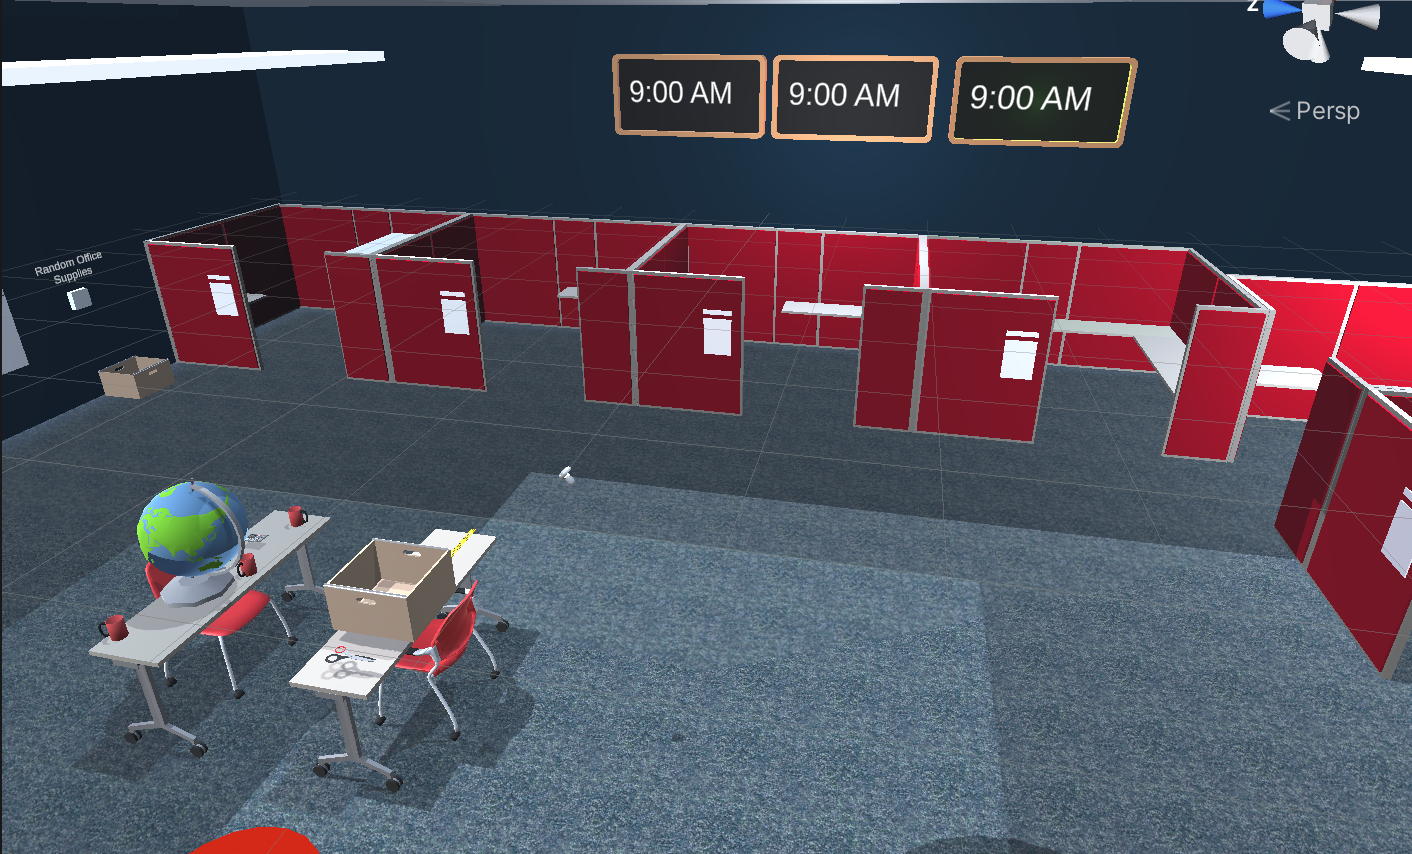
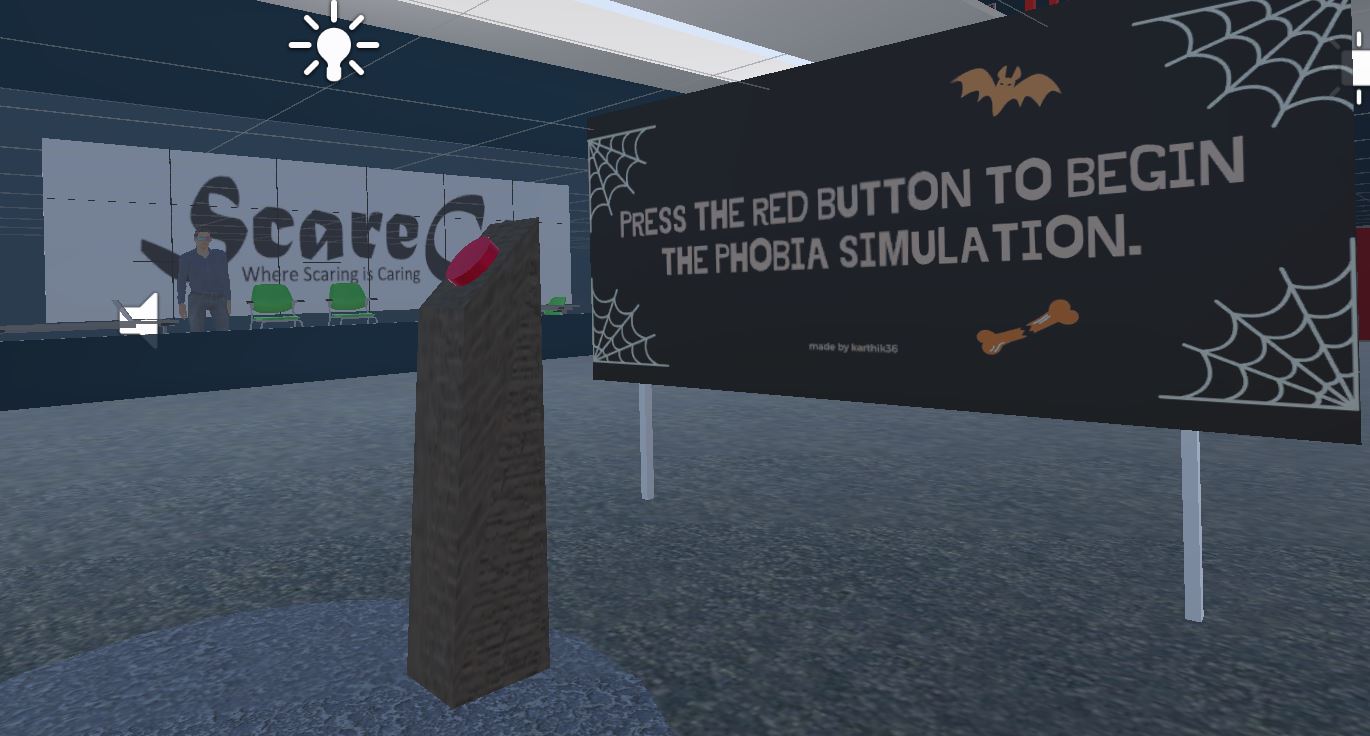
specialize in scaring people for fun and profit. I am
supplying you with a starter office space that can run by
default in the Oculus Quest headsets in the classroom and in a
desktop Unity simulator, allowing you to walk or teleport
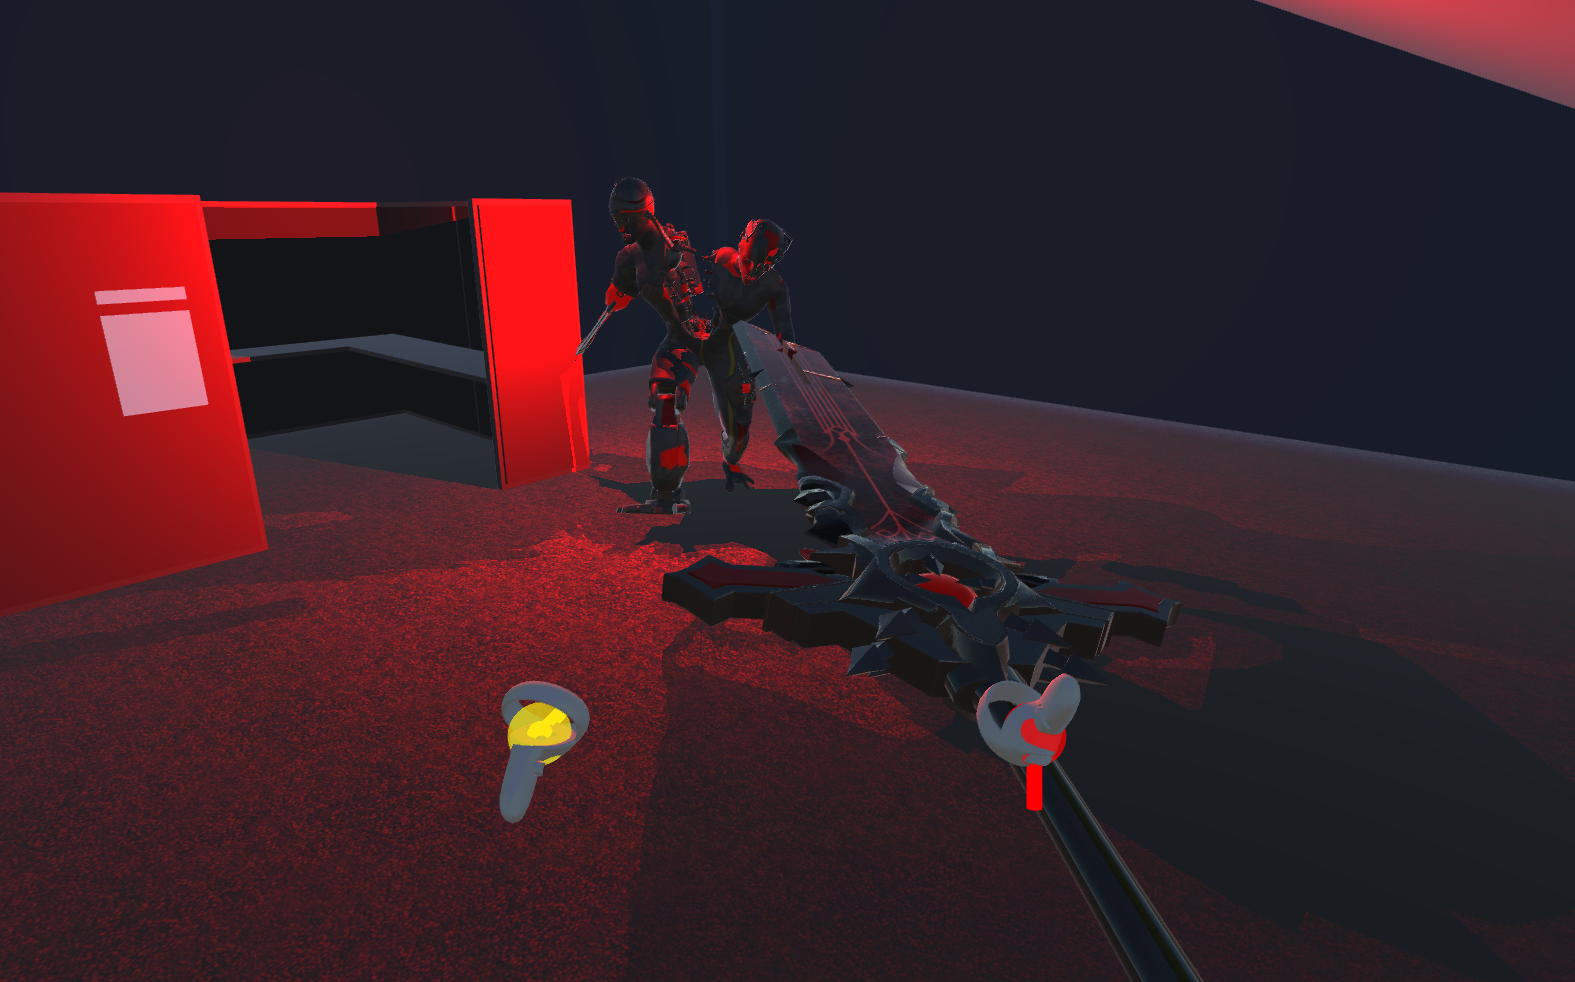
around the space, and interact with some of the objects. Your
job is to augment this space with additional models, sounds,
lights, interactives to set up the space to help a specific
client deal with their specific phobia.
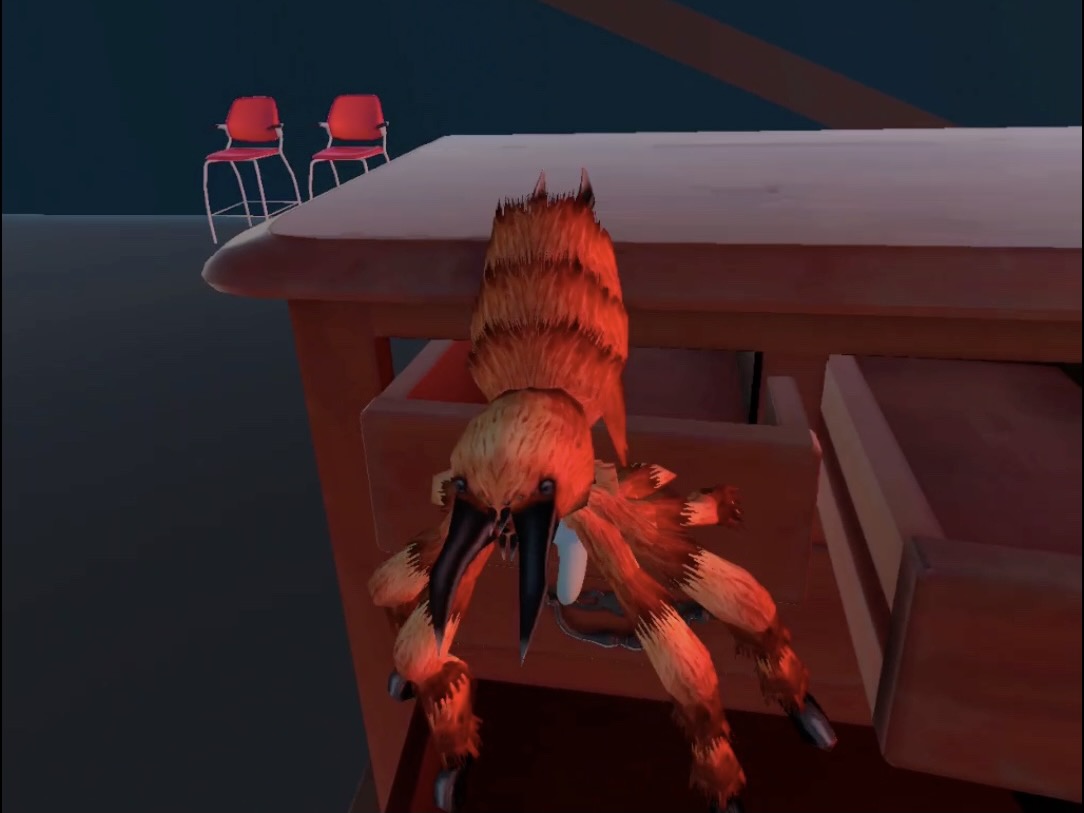
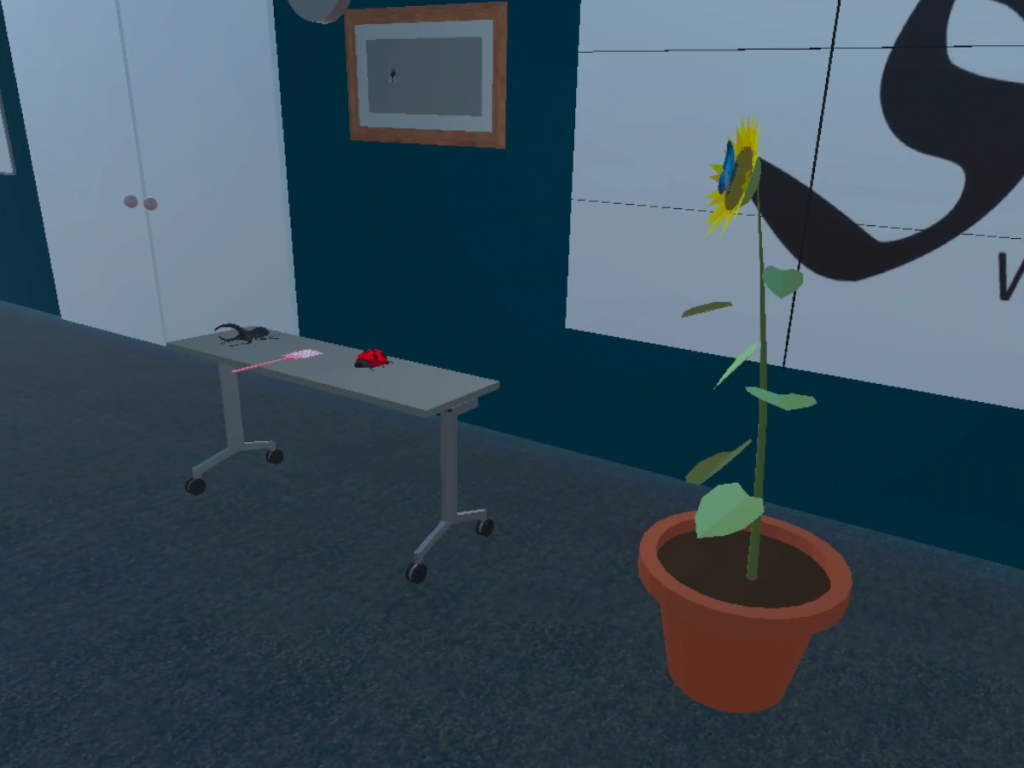
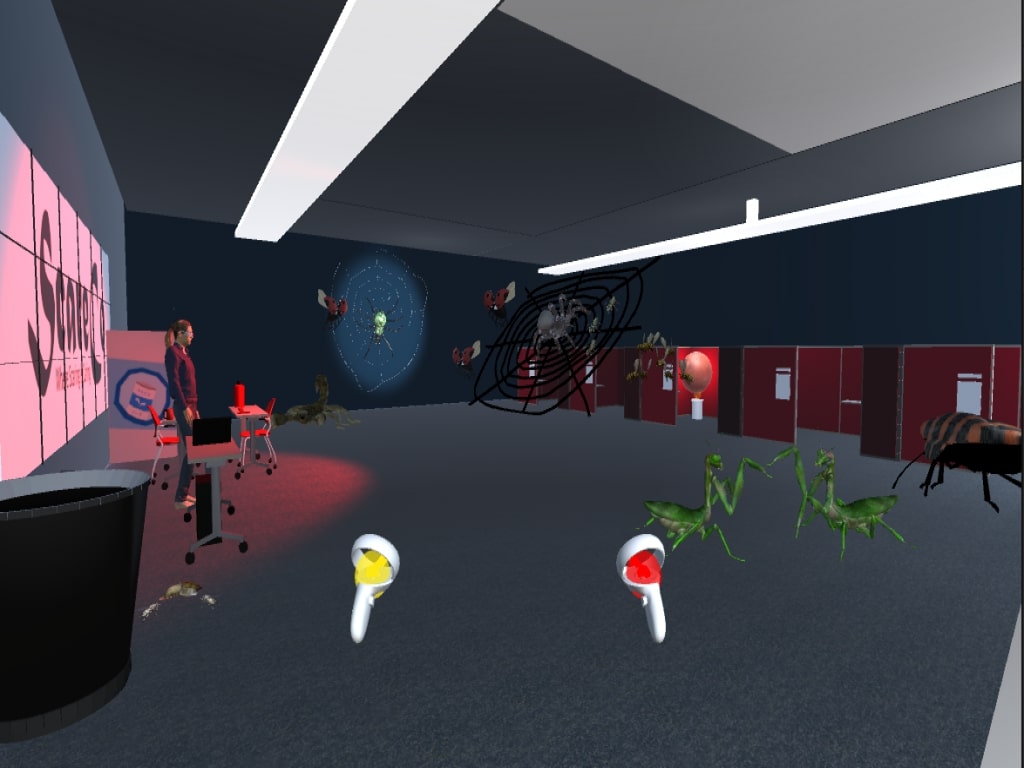
For example if the company was helping a person
with a fear of spiders they might put a really big inflatable
moving spider in the main area, or if they were helping a
person with a fear of heights they might make use of the
ladders and upper walkways to get the person moving at height,
or if they were helping a person with a fear of dodgeball they
could create a court in the main area with lots of angry red
balls flying around, or if its an issue with water they could
put a big tank in the space, or if its polka music there might
be musicians and giant accordions, etc, etc.
Implementing the
Project
You will be implementing the project in Unity 2019.4.28f1 (as
with Project 1) and VRTK version 4.
One of the biggest issues
over the last 30 years in VR development has been the lack of
standard higher level libraries, and the difficulty in getting
code to run across multiple platforms. Right now VRTK V4 is the
probably the best attempt at this, even though it has been in
beta for a couple years now. VRTK also has a very nice
simulator, letting you do a fair amount of development in Unity
itself without a headset. However you will need to test on a
real headset. Its impossible to create immersive worlds without
testing them immersively as they are so tied to how our bodies
inhabit and interact with space. Your projects will be graded
based on how they run in the Quest headsets in class, not in the
simulator so please give yourself enough time to test.
You should be familiar using
Unity and GitHub from Project 1. VRTK has a variety of
documentation on GitHub https://github.com/ExtendRealityLtd and
various good videos on YouTube here where the
braindump videos are live demonstrations of getting small
projects running in Unity. There is also a fairly active VRTK
community on Discord. Its important when you are looking for
documentation that you stick with the V4 documentation.
There is a very good starter
tutorial building a simple bowling game that I highly recommend
people go through. Because VRTK is designed to run on multiple
platforms there has been a lot of work abstracting concepts away
from particular hardware, so it can seem rather convoluted at
first, but once you get things running you get a feeling for how
things work.
We will be spending some
time in class helping people go through these tutorials and
helping people get things running on the headsets and in the
simulator.
Before
you try and open it you should install a recent version of
Blender - https://www.blender.org/ - on your computer
(2.93 is probably safe) as it can be helpful in importing
models into Unity
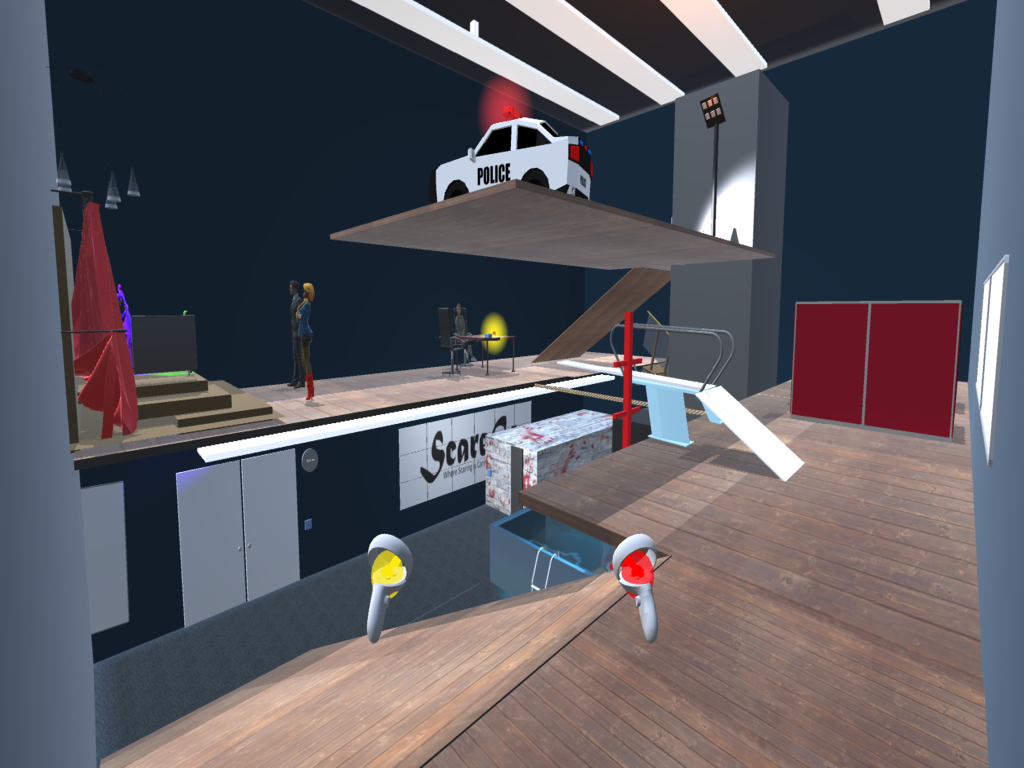
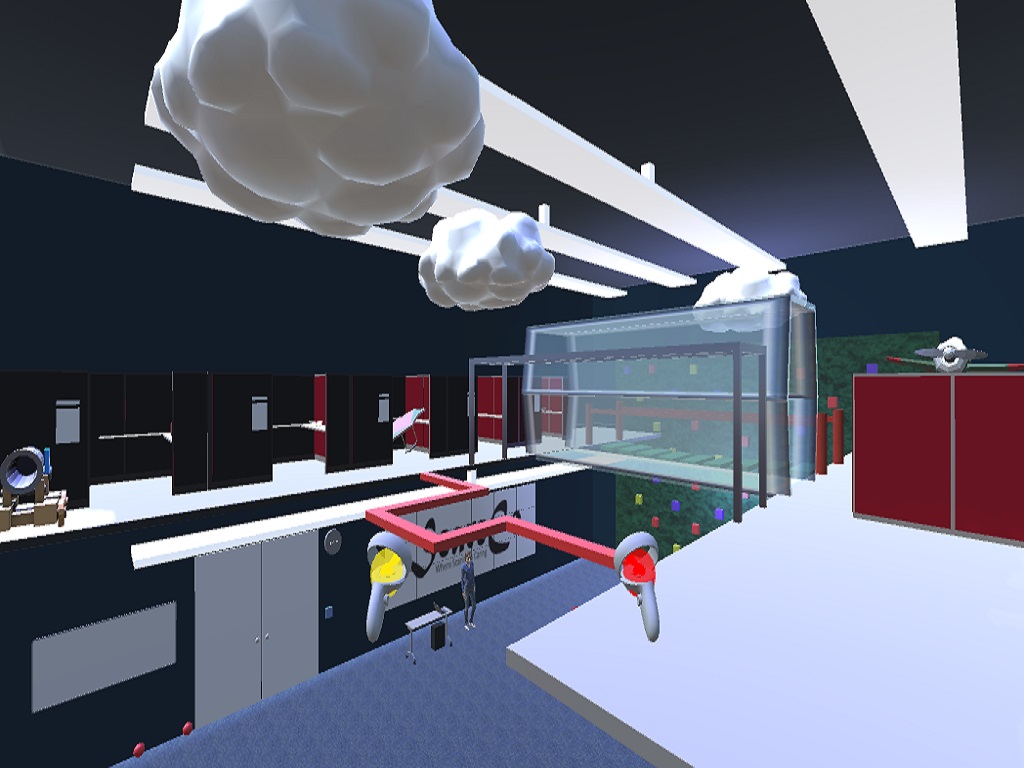
You can add this project to Unity Hub and take a
look at it in Unity. Grab the ScareCoOffices scene and drag it
to your hierarchy. Delete the default scene. When you play the
scene you should be able to move around with the WASD keys,
use the mouse to look around, use the Q key to teleport
around, use the E key to turn some of the lights on / off with
the switch by the door. You can use the 2 key and 3 key to
take control of the simulated left and right hand controls
respectively. If you place one of the simulated controllers
into one of the red balls or one of the mugs you can use the
left mouse button to pick them up. The 1 key takes you back to
controlling the player.
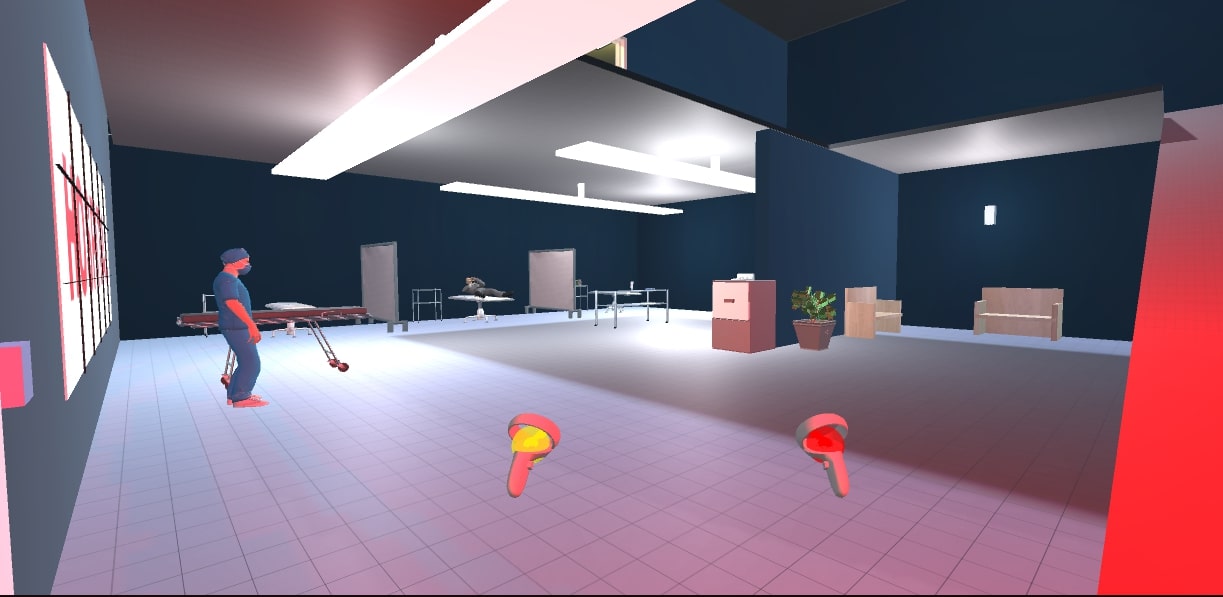
If you plug in one of the Quest headsets in the
classroom, switch the platform to Android, turn off the
CameraRigs.SpatialSimulator and turn on the
CameraRigs.UnityXR, you can build and run the same scene on
the headset and move around with your body and interact with
the real controllers.
The numbers below are for a single person
project. You can do Project 2 alone or in a 2-person team. If
you work in a 2-person team then all the requirements are
doubled (aside from the frame rate which remains the same).
60% of the points on the project is for creating
a basic scary scenario for one phobia in the space with
15 unique models from the web (remember to cite
the creators)
5 unique models that you create on your own
(more on this below)
at least 5 of the models need to have
appropriate physics and collliders
create a new appropriate
lighting scheme with at least 4 new lights for the room
the user should be able to physically move
around the space so make sure to leave enough room to walk,
and be able to teleport
at least 1 relevant ambient sound or piece of
music
40% of the points
on the project are for ...
the user needs to be able to interact with at
least 2 objects in the scene using their hand and have each
of those objects produce new objects (i.e. push a button on
a vending machine and a can pops out and rolls across the
floor, or pull a drawer open and a new spider jumps out
every 3 seconds, or a figure in a gym uniform keeps throwing
dodgeballs at you)
at least 2 of the models should be
animated and move, or move some of their parts
at least 5 of the models models with physics
need to be grabbable / droppable / tossable
at least 4 unique sounds that get
louder as you get closer, or that are triggered by
interacting with objects in the scene, or that sound when
objects hit other objects.
Graduate
students in the class also need to be able to ...
currently
the doors to the ScareCo offices are fake with nothing
beyond. Use VRTK's interactables to create a set of
similar doors that actually open and allow you to move
into a space beyond. Note this means you will need to
rebuild the big wall that the doors are currently in
front of. There is a nice VRTK 4 tutorial on creating a
door like in Half-Life Alyx that would be good to take a
look at.
create
some kind of space outside the doors. Maybe its a lobby
with elevators, maybe its a small outdoor area. This
area should make use of another 15 unique models from
the web
and in all these cases the frame
rate should remain high (at least 50 frames per second in
stereo on the Quest 1 headsets)
The phobias that you pick could be typical ones
like spiders, heights, talking to a group of people, or they
could be more entertaining ones like 'the 80s' or 'my cousin's
birthday party'. If your phobia is atypical then please check
with Andy first to make sure its OK. Your phobia and its scene
should also be PG rated and generally not offensive - VR can be
a great way to engage people in discussions about complex issues
but its very difficult to explore those issues in depth in a 5
minute presentation, so please keep your topic casual. Humorous
atypical phobias are encouraged. Your phobia needs to be
implementable within the given office area. The main open area
is a good place to deploy your phobia, but depending on what the
phobia is other locations in the office area are OK as well. You can not
change the basic structure and size of the room, though you
could raise the ceiling height if you want. You can put new
things in front of the walls, or hanging from the ceiling. You
can remove some of the cubicles if you want but the space
should still be able to function as an office. You can change
the colors and textures on most anything.
Be careful when you are collecting or creating
models for your space as the polygons start to add up and you
want to make sure you maintain a good interactive frame rate
in stereo on the Quest 1 headsets. For
measuring and documenting your frame rate we are going to
use the OVR Metrics Tool which is discussed here and
there is a nice YouTube video here. It
should be pre-loaded on the main classroom Quest and you
can see it as an overlay while you are testing your
application.
The models that you create on your own need to made of
multiple geometric parts and should look like what they
represent but do not have to be AAA game quality. The laptop
on the front desk is a typical example - its made of multiple
simple parts, is the right shape and size, has decent colors.
Also, keep in mind that your objects can be at
different scales - some of them might be the size of tables
that help fill the space but others might be smaller objects
on a table, but they all need to be visible at some point
(i.e. they could be hidden in drawers). You also want to
encourage the user to look around, so the ceiling and the
floor are also good places to put objects.
Avoiding some common problems:
make
sure that one of the two CameraRigs.SpatialSimulator
and CameraRigs.UnityXR are on and the other is off
depending on whether you want to run in the headset or
the simulator. If both are on then things get very
confused.
be
sure you are using Unity 2019. Unity 2020 changes a
lot of things on the VR side and breaks a lot of
things on the VR side.
make
sure your Build Platform is set to Android for
deploying on the Quest
in
Player Settings make sure you are NOT using the XR
Plugin Management at the bottom of the big list of
settings. You want to make sure Virtual Reality
Supported is checked at the bottom of the Player
settings. Also Make sure that Oculus is in the list of
Virtual Reality SDKs, and that V2 Signing (Quest) is
checked.
in
Player Settings, under Other Settings make sure that
Vulcan is NOT in the list of Graphics APIs. Make sure
that the Minimum API level is Android 4.4 KitKat.
some
models come with built in cameras. These can confuse
unity, so be sure to remove or deactivate them.
make sure you have blender installed
so that the tables and chairs are correctly
converted and become visible in the scene. If you
install blender later you can re-import those models
within Unity.
this one could have a couple
possible causes - the effect is that you see a lot
of warnings in the simulator because the VRTK
libraries do not completely compile and you can't
use the left mouse button to grab a red ball or a
mug. One possible cause is: having a space in the
path to get to the project, i.e. /new folder/ and
the alternative possible cause is having too long a
path to get to the project.
if unity is not letting you upload
your project to the headset, you may want to check
and see if there is another copy of Project 2
already there. If that is from another user then
sometimes unity doesn't want to overwrite it,
especially if you haven't given it a new name, so
you may want to manually delete that older version
on the headset.
Getting your Unity project to run on the Quest headset:
- connect the Quest headset to your laptop via a suitable
USB cable (one that passes data)
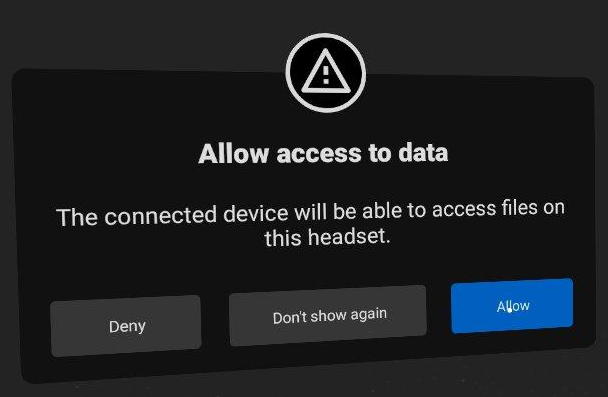
- put on the Quest headset and use the controllers to tell
the Quest to accept the PC connection and always allow
that connection.
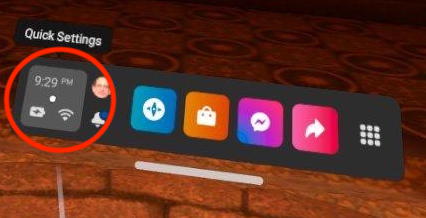
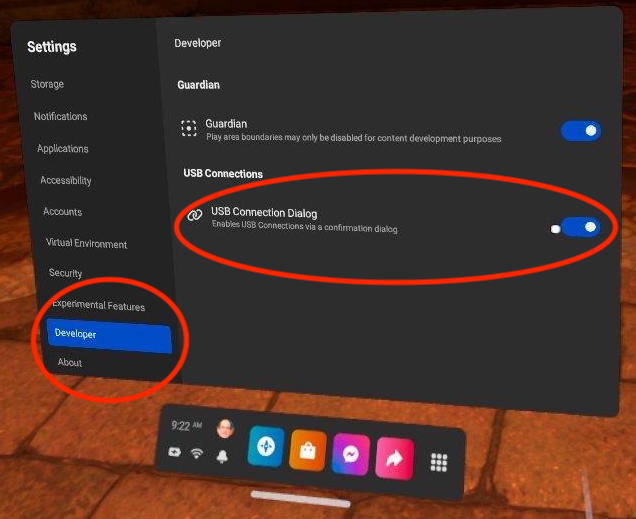
If you don't see that appear in the Quest then you should
make sure that developer mode is on. It should be on for
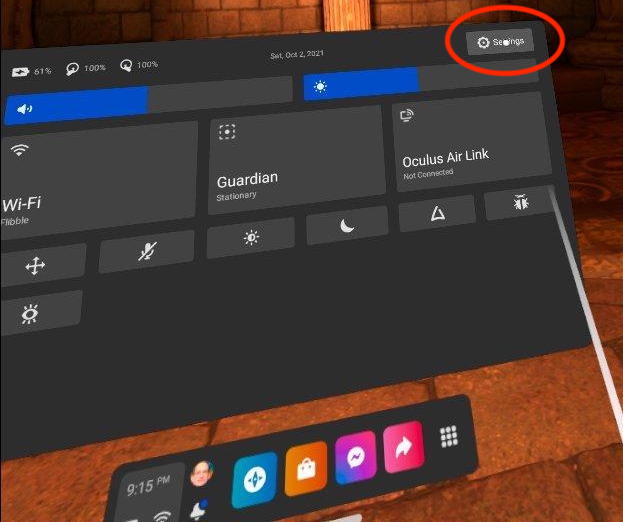
all the evl headsets. Click on the Quick Settings menu on
the left side of the thin menu, then click on the settings
menu on the upper right, then scroll down in the menu on
the left to Developer and turn on the USB Connection
Dialog.
- in your Unity project hierarchy make sure:
- you have CameraRigs.UnityXR ENabled
- you have CameraRigs.SpatialSimulator
DISabled
- under Unity Build Settings make sure:
- you are building for the Android
Platform
- the particular Quest you connected
should show up under the Run Device list of compatible
connected devices. If the Quest headset does not show up
in the list you may need to unplug and re-plug the USB
cable and again tell the quest to accept the connection to
the laptop
you may want to save the project and restart unity to make
sure Unity reconfigures itself appropriately
- click on Build and Run
it may take a while (5-10 minutes) the first time while
Unity converts all the assets to a form suitable for the
Quest. Next time it will be faster.
- disconnect the USB cable from the Quest (so you don't
pull your laptop off the table, or trip on the cable while
in VR)
- put on the Quest headset and grab the two controllers
- make sure you have enough space around you so you wont
hit anything or anyone
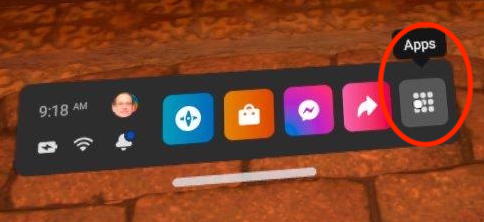
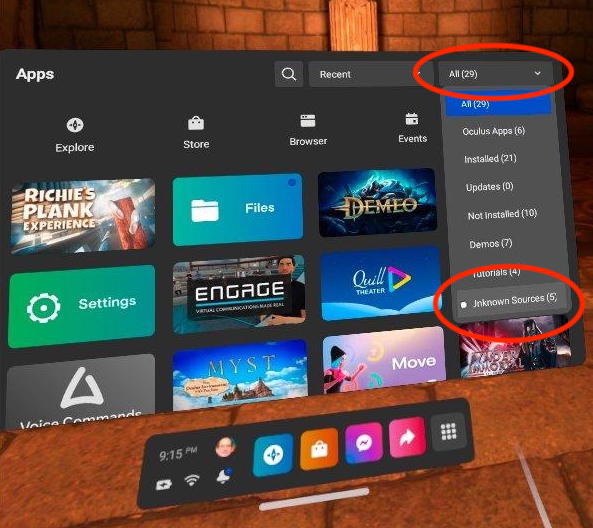
- click on the application menu (9 dots in a grid on the
right of the thin menu) then in the upper right of the big
menu click on all Applications, then Unidentified
Developers at the bottom of the list and click on your
application to start it
Once your application is running:
- make sure your hands / controllers are tracking
- make sure you can physically turn around and walk around
and the world reacts correctly. If not you may still be
running the simulator configuration and you need to go
back to Unity and make sure you are only running the XR
Camera Rig.
The Quest has Stationary (sitting in a chair) or Room
Scale (walking around) tracking. While you can test in
Stationary mode, the app will be demonstrated and
evaluated at Room Scale in the classroom so you should do
a fair amount of testing in that mode.
If you want to remove your project from the Quest then you
can go back to Apps / Unidentified developers and find
your application. If you click on the kebab 3-dot menu to
the right you can uninstall the application.
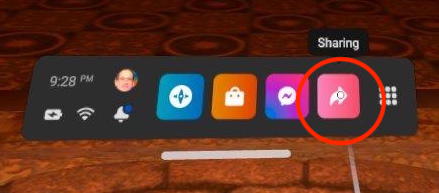
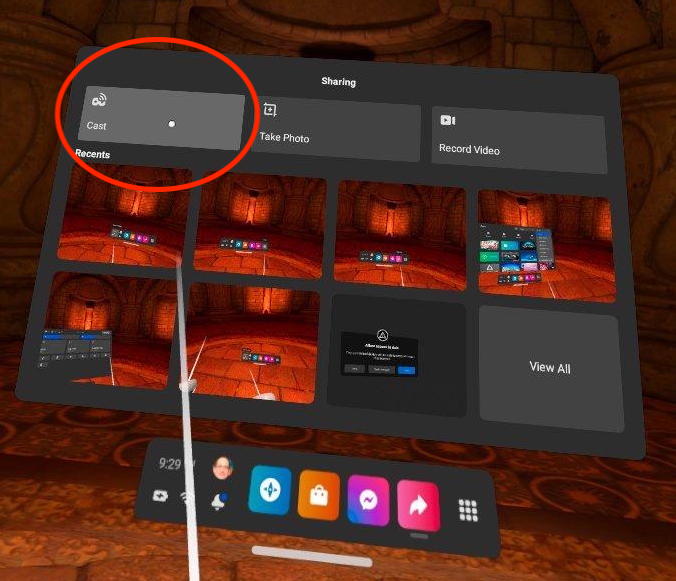
If you want to cast your application to one of the walls
in the classroom (or to your phone) to show your work to
others then go to the Sharing menu on the right side of
the thin menu, then choose Cast from the upper left of the
Sharing Menu, and then pick the destination device. The
headsets should all be on the evl-class wireless network
giving them access to the Chromecast. You can check by
clicking on the Quick Settings on the left as before.
If you want to take screenshots on the quest for your
documentation you can quickly press the Oculus button on
the right controller and then press any button on the left
controller. You will see a dialogue telling you that a new
photo was added to the collection. If you connect the
Quest to your computer and you have allowed Unity to
install apps on the Quest then you should be able to see
the files on Windows, or use Android File Transfer
(https://www.android.com/filetransfer/) on the mac. You
can see all the snapshots under Oculus/Screenshots/
Turning in the
Project You should create a GitHub page for
your project. You can integrate Unity with git so that it
will track all your changes, or just regularly push files
to git. The final project will need to be turned in via
git so we know the timestamp on the files, but it can be
also helpful to have regular commits in case something
goes wrong so you can get partial credit.Initially
this repository should be private to yourself, and then
you can make it public for turning it in.
Note that there is a very big difference
between getting something working and getting it working well.
The first is not that hard. The second takes much more time.
You are expected to have things working well.
There are
two due dates for the project.
The unity source and
application is due first. This will be turned in via
GitHub by making your repository public to at least
everyone at UIC. Be
sure to email the location of your repository to Andy
before the deadline.
The second deadline
is for the documentation.
You should create a public web page with multiple sections
(visible to anyone for at least the duration of the
course) that describes your work on the project. You can
host your web page at UIC(http://people.uic.edu),
GitHub,or the
provider of your choice, as long as it remains publicly
available to all. You can use any publicly available
templates as long as you cite them, or create your own.
This page should have several sections including:
introduction and
description of how to use your application and the
things you can do with it. What is the phobia you are
working with? How would this space help a person work
through that phobia?
link to your git
page that allows someone to easily download the source
code to your entire project to be built and run on the Quest. This page should
have instructions on how to build your application and
list the supported version numbers of all relevant
software (Unity, VRTK, etc.).
listing of the source for any assets
(models, textures, sounds, music) that you used that
you didn't create yourself. and a list of which models
satisfy which project requirements (e.g. if 15 models
are required, or 5 need to be grabbable, then please
give us a numbered list of them including showing them
in the scene)
show a screenshot, or several,
showing your app running in the headset with the
frame rate showing and describe how the frame rate
changes in different areas of your scene or during
different activities
link to a 5 minute
video showing off your project (see below)
at least a one page
/ 500 word discussion of how viewing and
interacting with your world is different in the
simulator and the headset.
all of which should haveplentyof
screenshots with meaningful captions. Web pages like this
can be very helpful later on in helping you build up a
portfolio of your work when you start looking for a job,
giving you something to point potential employers at, so
please put some effort into it.
My sample scene
included these resources:
UFO model by hana -
https://3dwarehouse.sketchup.com/model/273a556e078133532296d88107d065f6/UFO
UFO sound by Daniel Simion -
https://soundbible.com/2213-Alien-Spaceship-UFO.html
Cow model by Max M -
https://3dwarehouse.sketchup.com/model/288b4047-1c6b-43e5-9b76-eb14ff9152fa/Cow
Roswell Logo from the Roswell New Mexico
site -
https://roswell-nm.gov/FormCenter/Convention-Civic-Center-9/Submit-a-Community-Event-53
bounce sound by Mike Koenig -
https://soundbible.com/1120-Bounce.html
Mars Texture from NASA -
https://nasa3d.arc.nasa.gov/detail/mar0kuu2
Typing on Keyboard sound -
https://soundbible.com/358-Typing-On-Computer-Keyboard.html
Office chairs and tables -
https://www.allsteeloffice.com/design-resources/resources/2d-3d-models?brand=Allsteel
avatar idle animation from Mixamo.com
You should also create a 5 minute YouTube video showing the
use of your application including narration with decent
audio quality. That video should be in a very obvious place
on your main project web page. Capturing video on the
classroom PC while interacting with one of the headsets
would be best (and get you the most
points), but you can capture interaction from the
desktop simulator. You can try to narrate while interacting
but you will most likely find its useful to do some editing
afterwards to tighten the video up. This video is helpful
for me to know which parts of your project work, and may be
useful in the future when you want to show off some of the
projects you did but you can't get the code to compile
anymore or you don't have the hardware handy.
Once you have your web page done, send the URL to
Andy before the deadline. I will respond to this email as
your 'receipt'.
We will be linking your web page to the course
notes so please send Andy a nice representative jpg
image/photo of your application running highlighting your
chosen phobia for the web. This should be named
p2.<your_last_name>.jpg and be roughly 1024 x 768 in
size.
Presenting the Project
An important part of creating VR applications is getting
feedback and using it to improve your design. This also allows
you to see how others approached the problem, and maybe they
solved some problems that you had issues with, and vice-versa,
so it helps everyone get better for the next project.
We will be spending time in class for each person or group to
show off their work live using one of the Oculus headsets
streaming to the big classroom wall. Well before your
presentation you should move a copy of your code including the apk file over to the
class VR PC. On the Desktop there will be a CS428 Fall 2021
folder. Make yourself a new folder in there named with your
name, download a copy of your code in that folder. Load up
your project in Unity and make sure it runs in the headset
before your time to present so we can move quickly through the
presentations without having to wait for Unity to convert the
files.
See the Week 9 and 10 notes for details on the
in-class presentations.
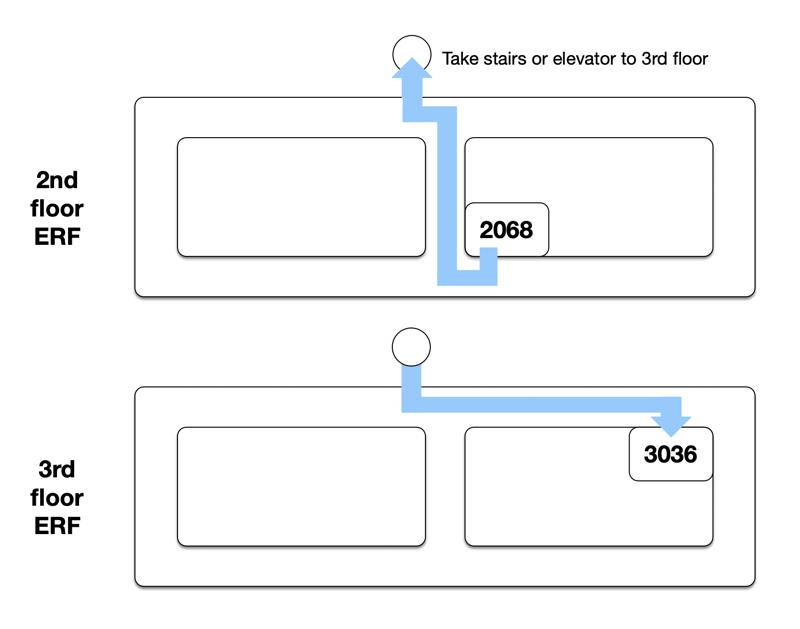
last update: 10/20/2021
- added map to 3036
10/18/2021 - removed the fps screenshot requirement since
there isnt an easy way to do that these days
10/16/2021 - added in GitHub links
10/7/2021 - added some more notes on uninstalling apps
10/5/2021 - added new warning about directory paths affecting
your ability to grab in the simulator
10/4/2021 - added in the presentation slots
9/30/2021 - added instructions for getting your app running on
the Quest
9/22/2021 - fixed GitHub link to the VRTK Bowling Tutorial