sources include: James Helman's Siggraph '93 Applied VR course notes, Dennis Proffitts '94 Developing Advanced VR Applications course notes, Lou Harrison's Siggraph '97 Stereo Computer Graphics for Virtual Reality notes, and the IRIS Performer guide.
We are going to spend some
time talking about the human visual system.
The eye has a bandwidth of
approx 1 gigabyte per second - much greater than the other
senses. Any AR or VR systems we create should try to match or
exceed what the human body can perceive.
Temporal Resolution
The real
world doesn't flicker. Classic theatrical films flickered and
CRT displays flickered because the image is constantly being
refreshed. Most modern displays also need to be refreshed
regularly to keep energy flowing to the various elements. If the
image isn't refreshed fast enough, we perceive flickering. Some
people can perceive flickering even at 60Hz (the image being
refreshed 60 times per second) for a bright display with a large
field of view but most people stop perceiving the flicker
between 15Hz (for dark images) and 50Hz (for bright images). LCD
panels tend to have 60hz or 120hz refresh rates these days
(though manufacturers often claim to have higher rates. Direct
view LED tiles have similar rates.
Note that
this is the rate that the hardware refreshes, which is (mostly)
independent from the rate the graphics are being refreshed. We
are at the point now that HMDs, like TVs, and phones generally
have sufficient hardware refresh rate, though more exotic
technologies for AR are still catching up. Making sure the
graphics refresh fast enough will always remain an issue.
Luminance
The eye can
detect an amazing range of 10^14 (10-6 to 108
cd/m2) in luminance, but we can only see a range of
100:1 at the same time. The size of our pupil automatically
adjusts to the amount of light available, allowing us to shift
our window of much narrower range of luminance detection across
a much larger range. If we spend 30 minutes dark adapting we can
dramatically increase our vision at the low end.
The human eye
is sensitive to ratios of intensities not absolute magnitude.
Brightness = Luminance^0.33. To make something appear n times
brighter the luminance must be increased by n^3.
Colour
Most perceptual processes are driven by intensity not colour. The human motion system is colour blind, depth perception is colour blind, object recognition is colour blind.
but uniquely coloured objects are easy to find
Today's displays still can
not reproduce the full colour spectrum that human beings can
see, but the range increases every year, and with the new focus
on OLED displays, high contrast displays, and direct view LED
displays the coverage is getting much better.
Ditto the notes above on
regrading for the display device and its location.
Field of View
Each eye has
approximately 145 degrees horizontal (45 degrees towards the
nose and 100 degrees to the side) and 100 degrees vertically (30
degrees up and 70 degrees down)
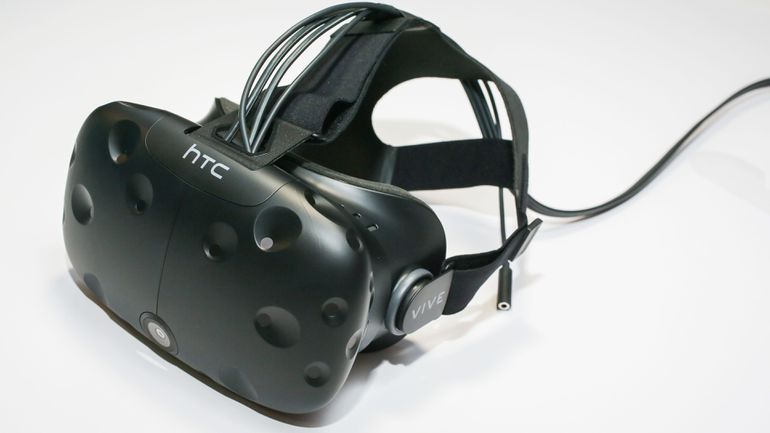
Current VR
headsets like the VIVE and Quest 3 have 110 degree FoV, which
are getting close to matching human field of view. Higher end
displas like the Valve Index are pushing 120 degrees.
AR headsets
currently have much smaller fields of view which limits their
ability to combine real and augmented content as you can only
see the augmented content within a window within your field of
view.
Google Glass
display had FoV of 15 degrees monoscopic in the corner of your
vision
Microsoft HoloLens has a 30 degree horizontal and 18 degree
vertical FoV with HoloLens 2 improving to 43 degree horizontal
and 29 degree vertical.
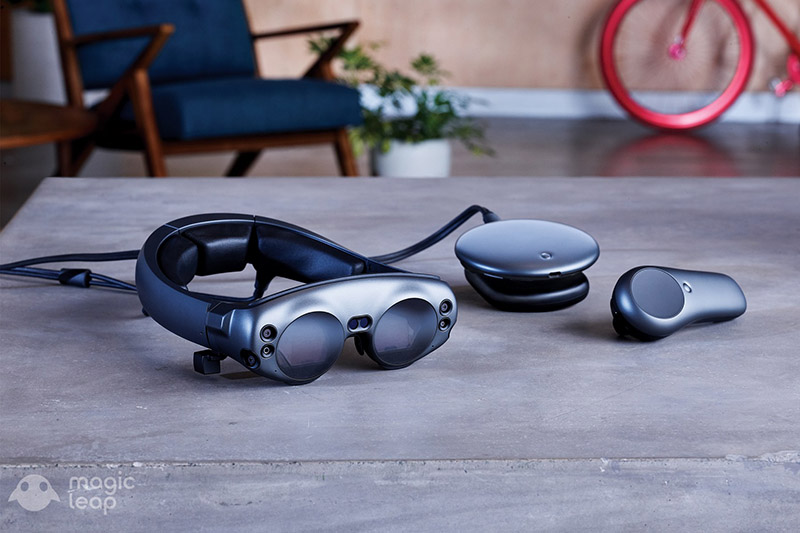
Magic Leap One has a 40 degree horizontal and 30 degree vertical
FoV
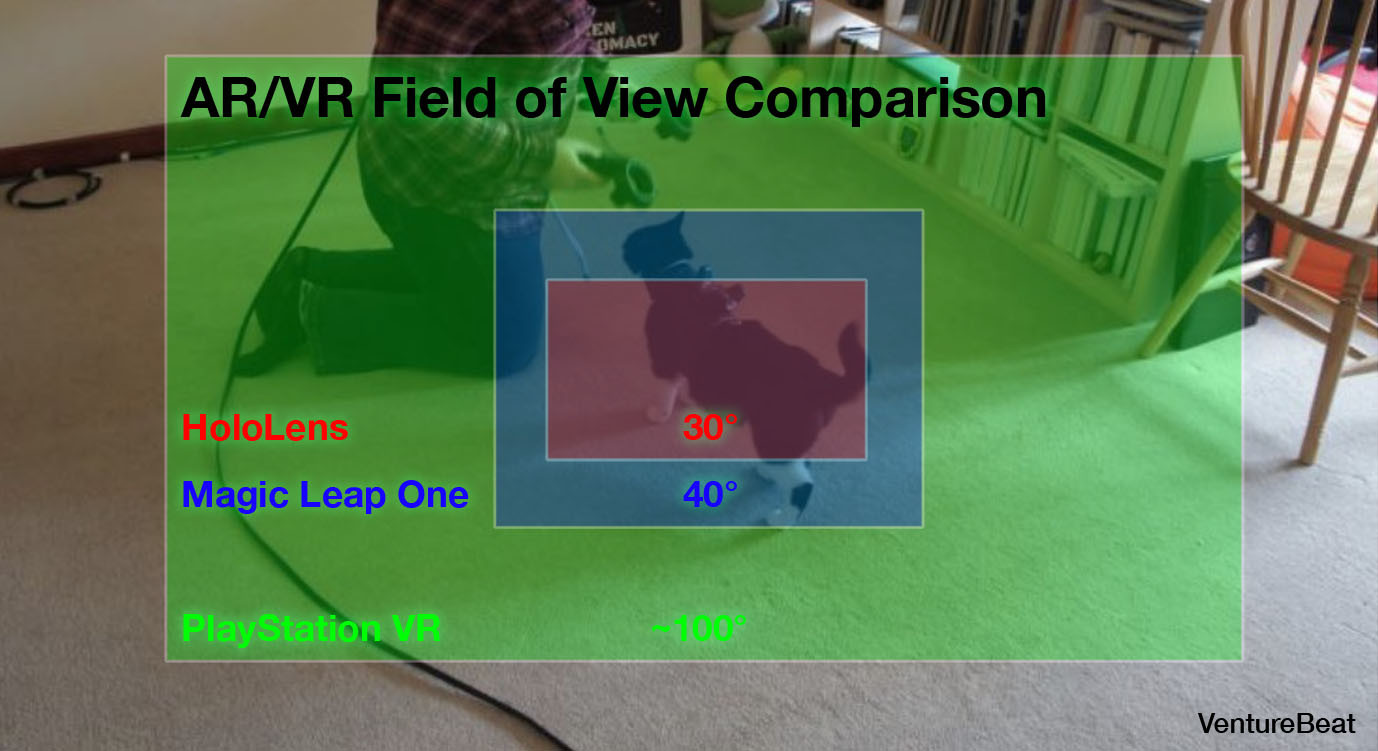
image from
https://venturebeat.com/2018/07/31/magic-leap-ones-field-of-view-leak-signals-another-ar-disappointment/
When you are
holding your phone or a tablet the FoV depends on how close you
are holding the screen to your face - the closer to your face
the more the screen fills your vision.
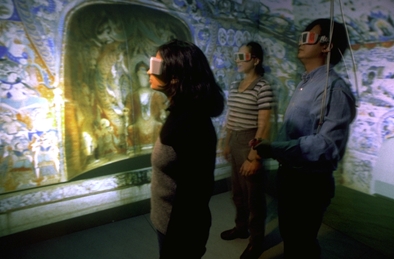
With human
scale systems like the CAVE and CAVE2, or even a planetarium
dome, the field of view depends on the size and location of the
physical displays and the type of 3D glasses used - 6 sided
CAVEs surrounded the users with screens, but the glasses
typically don't cover the complete field of view (roughly 120
horizontal and 90 vertical).
Visual Acuity
We often
encounter visual acuity as measured with a Snellan Chart at the
doctor's office where correct vision is described as being 20/20
(20/X where this viewer sees at 20 feet detail that the average
person can see at x feet, 20/200 is legally blind). If you are
metricly minded then the fraction is 6/6. https://en.wikipedia.org/wiki/Snellen_chart.
Back in the
90s our monitors at normal distance were 20/40, HMDs were
20/425, BOOMs were 20/85, and the original CAVE was 20/110.
Our current
consumer HMDs are around 20/60 with a wide variety of lens
distortion effects to give us a wider field of view, while most
of our laptops and phones have so many pixels that they give us
better than 20/20 across a small range of our vision.
Overview of How the Eye Works
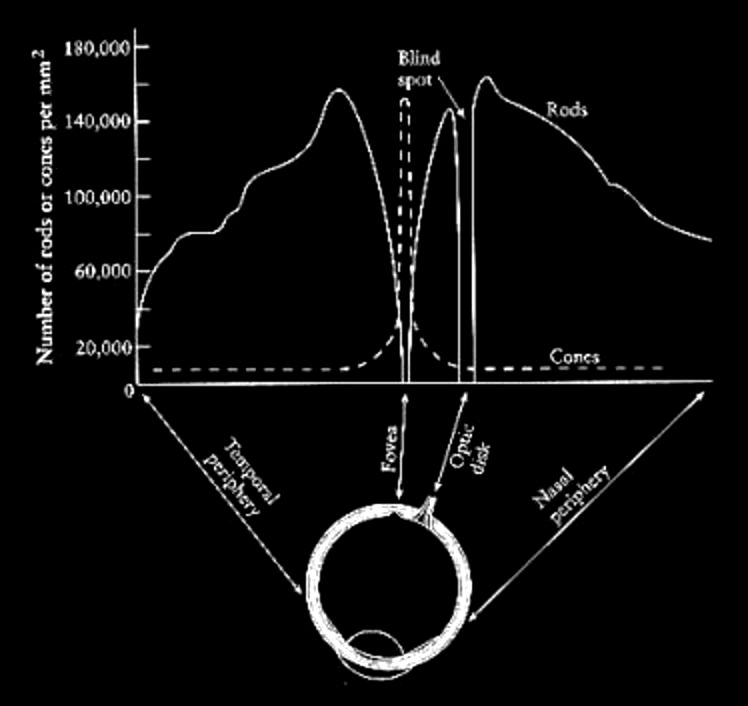 Bill Sherman's diagram of the human eye |
Human eye has 2 types of
photosensitive receptors: cones and rods cones
The cones are highly
concentrated at the fovea and quickly taper off around
the retina. For colour vision we have the greatest
acuity at the fovea, or approximately at the center of
out field of vision. Visual acuity drops off as we
move away from the center of the field of view. The rods are highly concentrated 10-20 degrees around the fovea, but almost none are at the fovea itself - which is why if you are stargazing and want to see something dim you can not look directly at it. |
What happens when we walk from a bright area into a
dark area, say into a movie theatre? When we are outside the
rods are saturated from the brightness. The cones which
operate better at high illumination levels provide all the
stimulus. When we walk into the darkened theatre the cones
don't have enough illumination to do much good, and the rods
take time to de-saturate before they can be useful in the new
lower illumination environment so we cant see very well. It takes about 20 minutes for the rods to become
very sensitive, so dark adjust for about 20 minutes before
going stargazing.
Since the cones do not
operate well at low light intensities we can not see colour in
dim light as only the rods are capable of giving us
information. The rods are also more sensitive to the blue end
of the spectrum so it is especially hard to see red in the
dark (it appears black).
In VR where the programmer
has total control of the visuals this means taking into
account how long it will take a person to be able to see
something in a dark area after being in a bright one, and how
bright a scene can be after being in a dark one without
blinding the user.
In AR this means we need to
be careful how bright the computer graphics are, and we need
to take into account the current conditions (is it a bright
sunny day, is it overcast, is it dark) so the generated
graphics are visible and comfortable, not hidden and not
blinding.
There is also the optic nerve
which is 10-20 degrees away from the fovea which connects your
eye to your brain. This is the blind spot where there are no
cones and no rods. We can not see anything at this point and
our brain compensates by filling in that part of our vision
with surrounding colours and simple patterns.
This page has a nice simple visual to help you see the location of both of your blind spots and gives a hint at the amount of processing the brain is doing to the information coming from your eyes: https://medicine.yale.edu/lab/mccormick/seminars/vision-fun-1/slide2/
Here is a nice page on colour
blindness:https://www.color-blindness.com/ishiharas-test-for-colour-deficiency-38-plates-edition/
8 percent of men
1 percent of women
Chromatic Vision Simulator is
a nice phone based tool for simulating what colour blind people
see. Its free and available at http://asada.tukusi.ne.jp/cvsimulator/e/
Just as in the real world where we make sure that traffic lights work for colour blind people, we need to make sure that our VR and AR worlds work as well. You should make sure that the worlds you create work for color blind people.
In general it
is a good idea to give the user control over colors, text size,
contrast and brightness etc. in VR and AR just like it is a good
idea to do this on a smart phone or a laptop to enable more
people to use your hardware and software.
One
of the major takeaways from this is that as our display
technology gets better and better we will increasingly be
running into the limitations of the human eye rather than the
limitations of the display technology - just as we are on our
smartphone and laptop screens.
Another
major takeaway is that as we are creating worlds, in the case of
VR, where we can take total control of various senses , this
allows us to get a better understanding of how those senses
operate, alone and together, and the more we understand, the
less likely we are to make people sick, and the more likely we
are to give them richer experiences that take advantage of all
the relevant senses.
One of the most important things in VR, and increasingly in AR,
is creating an artificial world with a sense of depth.
Real World Depth Cues
Photography, Computer graphics give 1,2,3,4
Interactive computer graphics, and monoscopic AR (hand held smartphone or tablet) adds 5
VR gives and stereoscopic AR adds on 5,6,7
some specialized multi-plane displays and light field displays
can give 8.
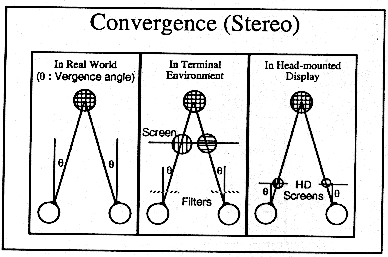
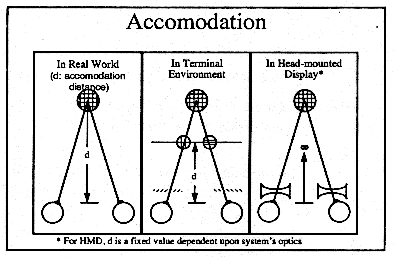
In VR, as in stereo movies or stereo photographs, the brain is getting two different cues about the virtual world. Some of these cues indicate this world is 3D (convergence and stereopsis). Some of these cues indicate that the world is flat (accommodation). The eyes are converging depending on the position of the virtual objects floating in front of or behind the screen, but the eyes are focusing on the flat screen. This can lead to headaches, or more serious forms of simulator sickness, but in general its not a serious problem, especially if you are doing it for only a couple hours at a time.
For most
people VR 'works' and virtual objects appear to be the correct
size because they 'trust' convergence more than they trust accomodation (focus on the
screen), but some people trust
accomodation more, and for them the virtual objects are always
on the projection plane and generally the wrong size.
If we start
thinking about wearing AR glasses (which could potentially
become VR glasses whenever we wanted) all the time then we may
run into more issues.
Note
there are some potential issues of having young children seeing
this kind of mediated 3D and research is ongoing there in terms
of whether it can alter the normal development of their vision.
Most of the current headsets are for 12 or 13 year olds or older
to be safe.
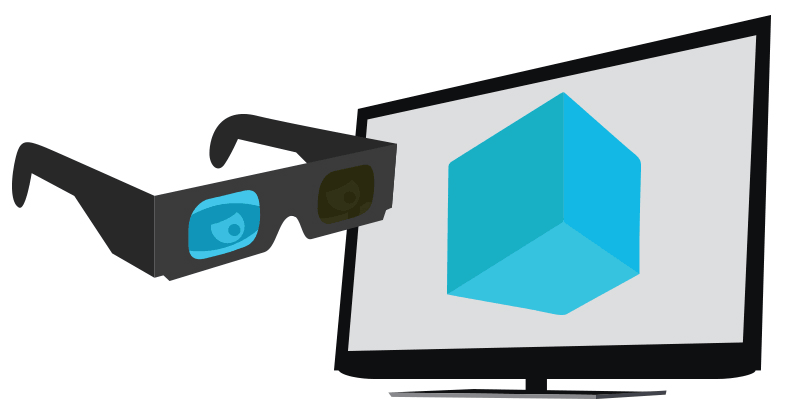
How to Generate and View Stereo Images
We have stereo vision because each eye sees a slightly different image. Well, almost all of us (90-95%) do.
Presenting
stereo imagery through technology dates back to the mid 1800ds.
Here is a stereoscope from the early 1900ds.
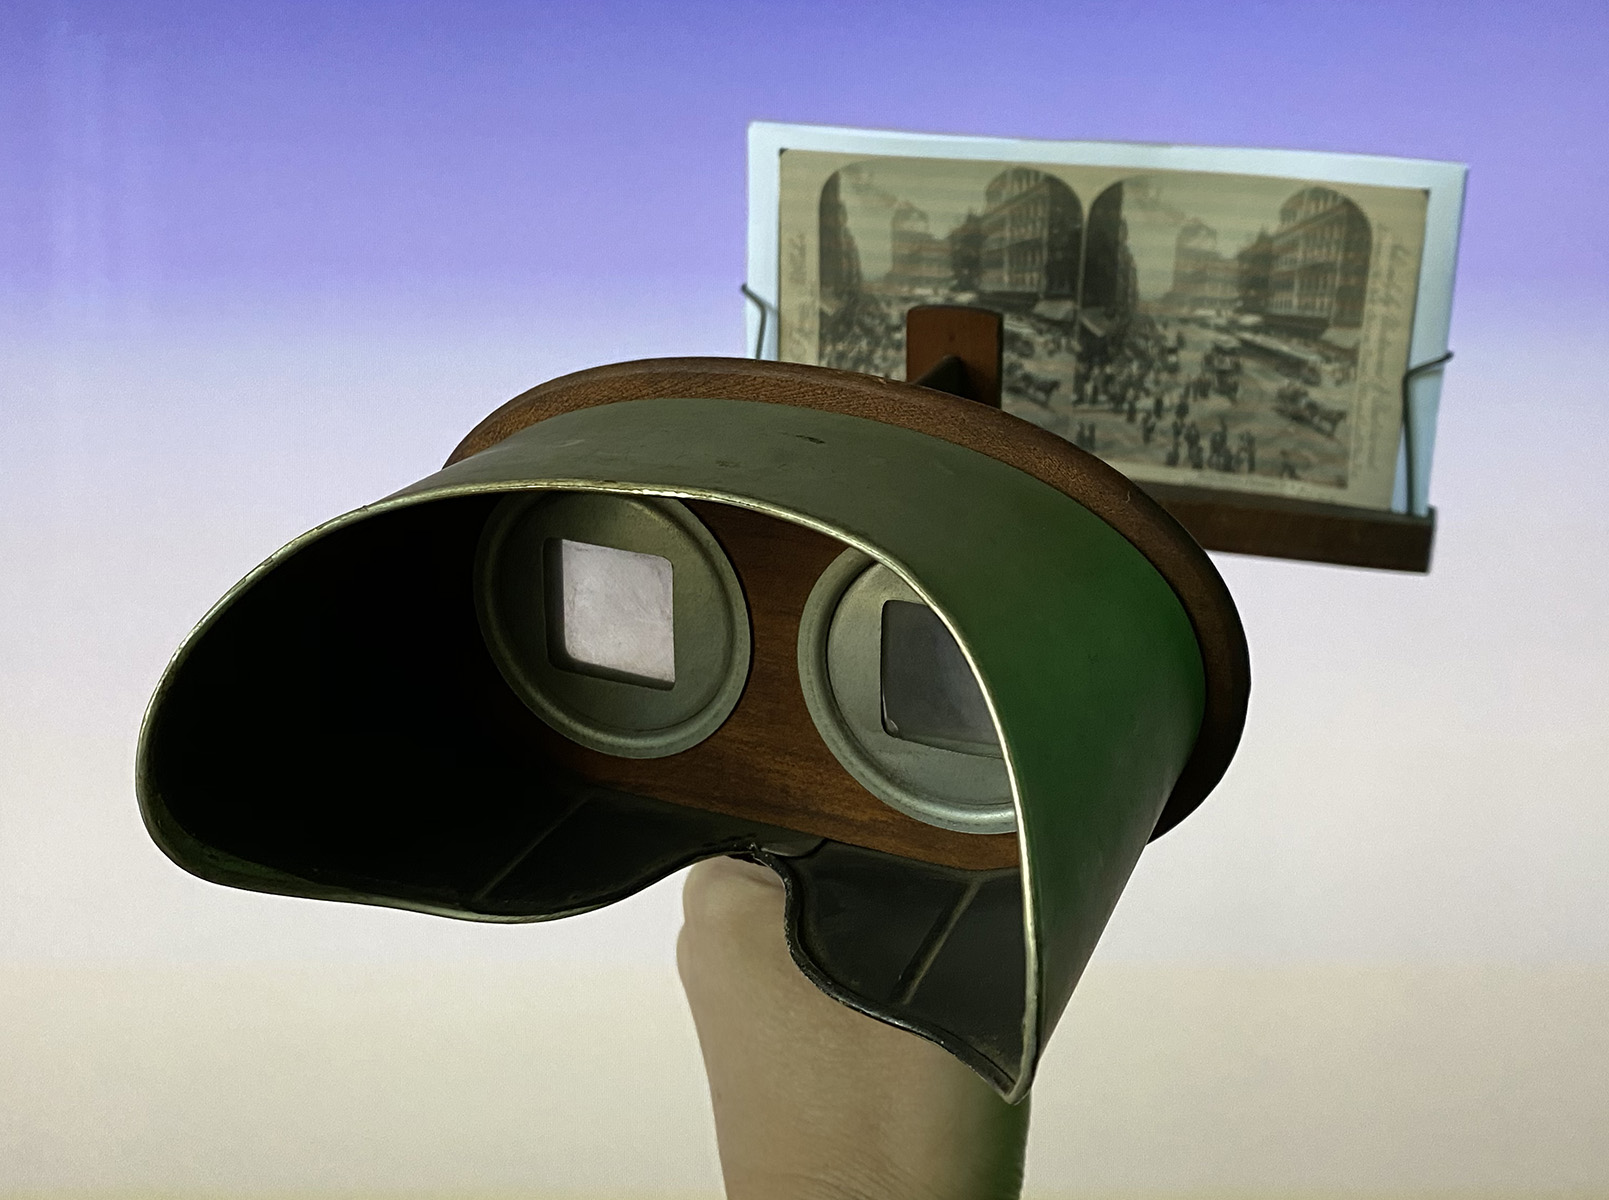
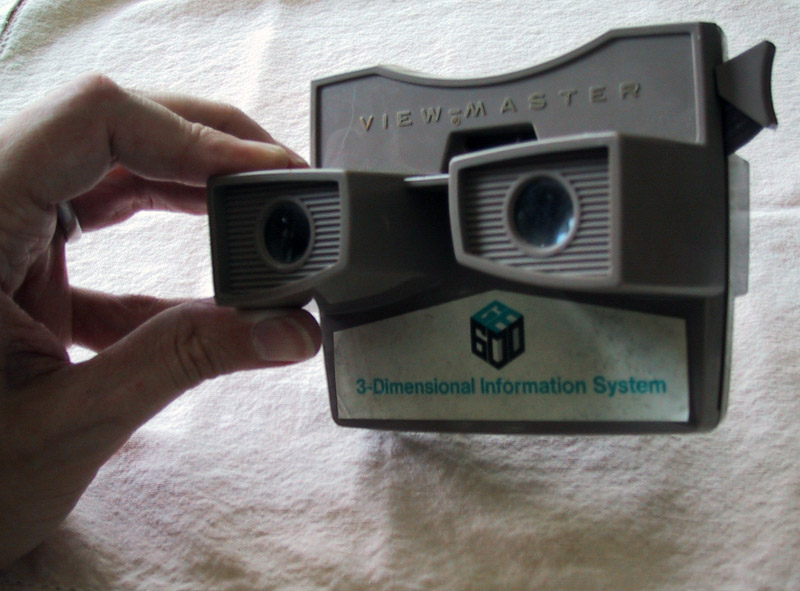
As a kid you may have had a View-Master(tm) and saw the cool 3D
pictures. Those worked exactly the same way as the stereoscope.
Your left eye was shown one image on the disc, while your right
eye was shown a different image. These images were typically
taken with a pair of identical cameras with identical settings
sitting horizontally next to each other, or two images taken by
the same camera that is quickly moved horizontally. Often
cameras, especially film cameras, were too large requiring a
series of mirrors to get their lenses close enough to mirror
human vision.

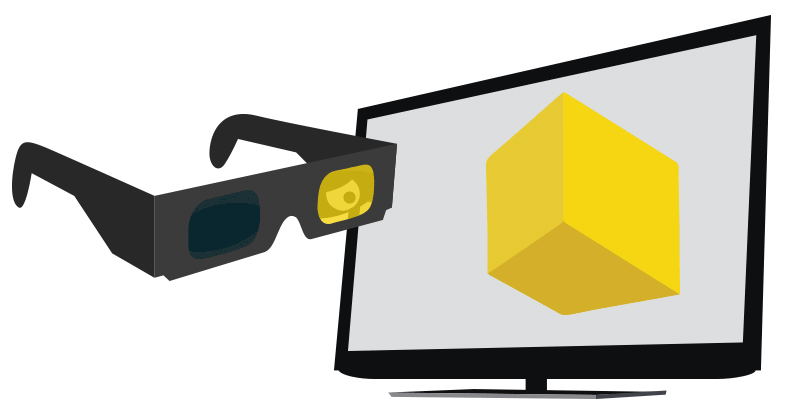
As a kid you
might have read some 3D comics which came with red/ blue
(anaglyphic) glasses, or you might have even seen a movie with
the red/blue glasses (maybe down at U of Chicago's Documentary
Film Group with films like 'House of Wax' or 'Creature from the
Black Lagoon' or 'It Came from Outer Space'). You can either use
2 synchronized projectors each with a black and white print of
the film for one eye, one projector with a red filter and one
with a blue filter, or, less expensively, you can have one
projector with the red and blue on a single color print of the
film , which is why this would become popular at second run
theatres.

If you have a pair of red/cyan glasses and a correctly calibrated display then this image will become 3D.) The coloured lenses make one image more visible to one of your eyes and less visible to your other eye, even though both eyes are viewing both images.
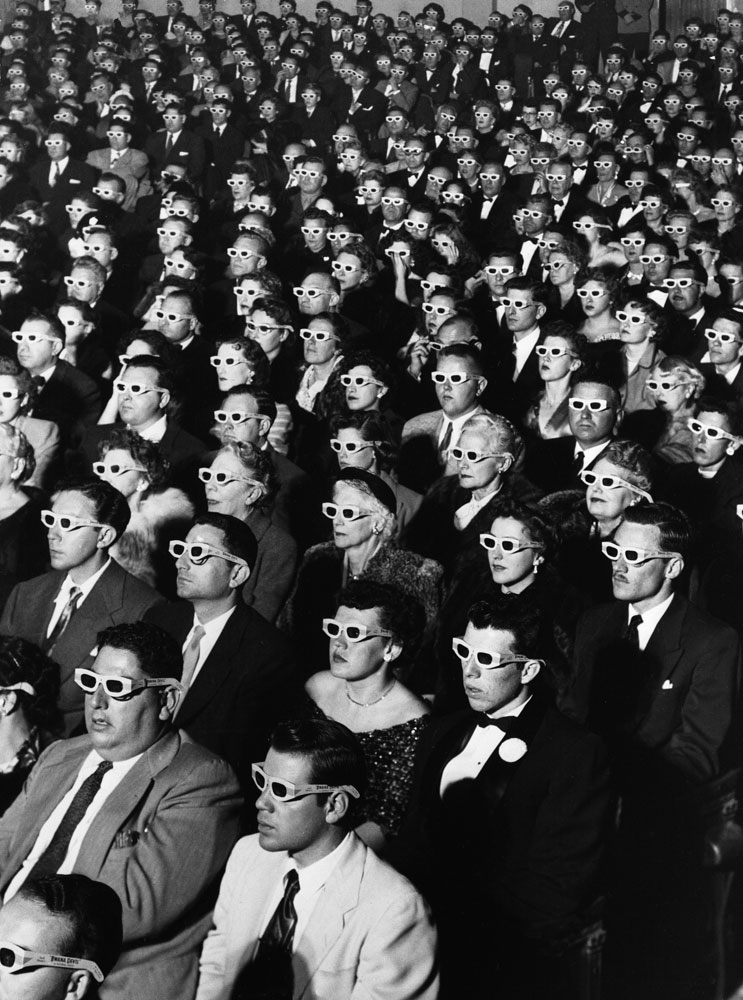
What people
saw in the theatre back in the 1950s, including that photo above
from Life magazine, was closer to the image below, using 2 synchronized projectors each with a black
and white print of the film for one eye, each projector with a
different polarizing filter, and each person in the audience
wearing polarized glasses. This is basically the same
technology as when 3D movies came back in the 1980s and when
they came back again in the early 2000s. Now we have digital
projectors so the image is much more stable and we don't have
film breaks so the final stereo effect is much cleaner but the
core technology is identical.
Today we can also put
polarizing material on the front of our flat panel displays in
alternating horizontal lines of the left and right eye images,
so a single video (in color or black and white) can contain
imagery for both eyes, though in half resolution each. This is
how evl's CAVE2 creates stereo.

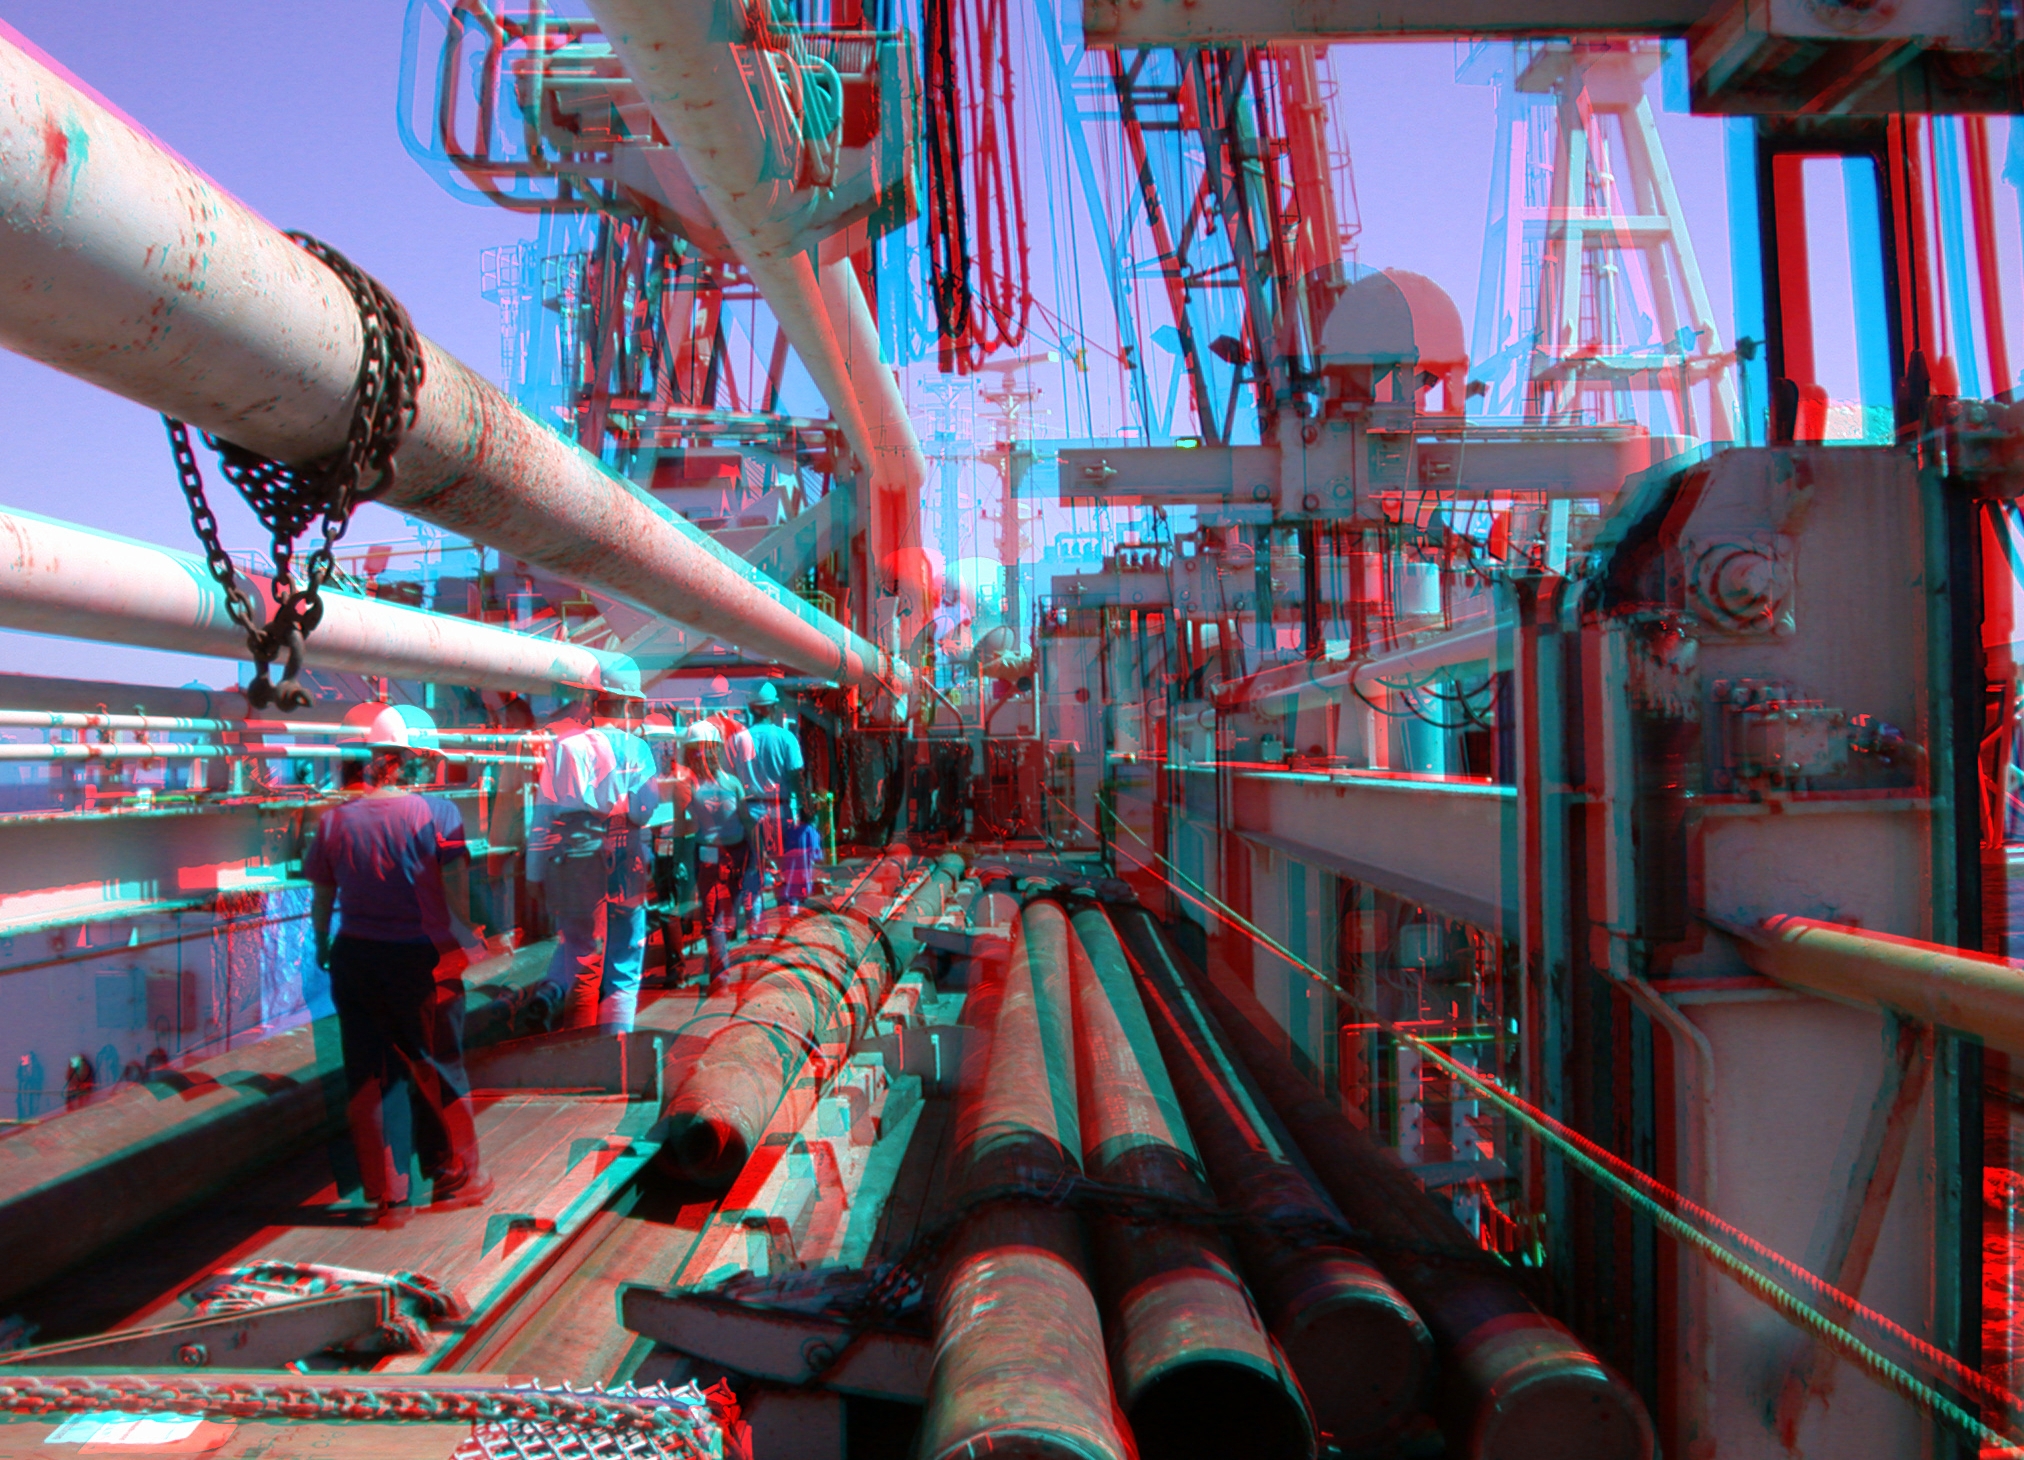
here is
another red/blue image from an Ocean Going Core Drilling ship.
The red/blue or red/cyan trick works ok for greyscale images
(like old movies or black and white comics) but has a hard time
with color. Other color variants have been used over the years.
and here is a nice movie on
youtube https://www.youtube.com/watch_popup?v=MQEkFppWaRI
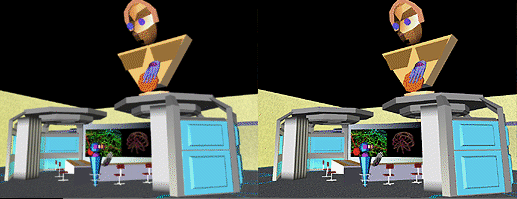
Another inexpensive way to show stereo imagery is to draw two slightly different images onto the screen (or onto a piece of paper), place them next to each other and tell the person to fuse the stereo pair into a single image without any additional hardware. This is easy for some people, very hard for other people, and impossible for a few people.
Some of these
images require your left eye to look at the left image, others
require your left eye to look at the right image (cross-eye
stereo).
To see the pictures below as a single stereo image look at the left image with your right eye and the right image with your left eye. If you aren't used to doing this then try this: Hold a finger up in front of your eyes between the two images on the screen and look at the finger. You should notice that the two images on the screen are now 4. As you move the finger towards or away from your head the two innermost images will move towards or away from each other. When you get them to merge together (that is you only see 3 images on the screen) then all you have to do is re-focus your eyes on the screen rather than on your finger. Remove your finger, and you should be seeing a 3D image in the middle.
Passively polarized stereo - https://en.wikipedia.org/wiki/Polarized_3D_system
As mentioned
above, in the 1950s when stereo films like 'Creature from the
Black Lagoon' were shown theatrically, the theatres did not use
red/cyan. They used a system pretty much identical to what 3D
movies used in the 80s and in the 2010s - passive polarization.
In this case one projector shows the left eye image with a
polarizing filter. A second synced projector shows the right eye
image with a different polarizing filter. The screen preserves
polarization and the viewers wear lightweight polarized glasses
that allow the correct image through and not the wrong one.
This same
technique can be used on flat panel displays where a layer is
added on top of the display with lines of alternating
polarization matching up with the rows of pixels below. The same
lightweight glasses are used but now one eye only sees the even
lines of the display while the other eye only sees the odd
lines. This has the disadvantage of cutting your vertical
resolution in half.
An alternative approach for both projectors and flat panels is
to use Active Stereo - https://en.wikipedia.org/wiki/Active_shutter_3D_system
In active
stereo the projector or the panel shows the image for the left
eye, then black, then the image for the right eye, then black,
and then repeats. The viewer wears slightly heavier glasses with
LCD shutters the turn either clear or opaque and the shutter for
the appropriate eye is open when the display shows the image for
that eye. This requires the display to also talk to the glasses
(usually via IR) and for the glasses to be powered through a
cable or batteries.
To
make sure your visuals look good, its very important to keep in
mind what kind of display you will be using, the space that it
will be used in, who will be using it, and what kinds of things
they will be doing - are these designers interacting with a new
car model, or museum visitors exploring an ancient site?
Projection-based
systems, even modern laser based 4K ones, can give much larger
borderless fields of view, but typically need to be in dimly lit
or dark rooms. If the system is front-projection then how close
will the user be able to get to the display before they begin to
cast shadows on the screen? If its rear-projection from behind
the screen then how much space are you prepared to waste behind
the screen. Modern short throw and ultra-short throw projectors
allows the users to get much closer to the screens than earlier
projectors.
Large flat
panel displays have a different problem - they are designed for
on-axis TV viewing and the further you are off-axis (horizontal
or vertical) increases the chance that you will see degraded
colour / contrast / stereo vision. They also tend to have
borders which can be distracting when they are tiled. They are
also thin so you cant stand on them without breaking them so its
hard to make floors out of them.
Head mounted
VR displays avoid issues of dark rooms and off-axis viewing but
you still need enough space for the user to move around in, and
you need to make sure the user doesn't hurt themselves while
moving around without seeing the real world.
Head mounted
AR displays allow the user to see the real world, making them
safer than VR displays, but as these displays may be used in a
dim room or in bright sunlight the graphics need to be visible
across that wide range of use cases, similar to how you want to
be able to use your phone or smart watch in a variety of
settings, so the contrast and brightness ranges need to be
greater than for displays that are only used indoors, and the
brightness and contrast of the display need to match the real
world behind the graphics.
Some Terminology
Interocular Distance - the distance between the
viewer's left and right eyes, usually about 2.5 inches - in
order for virtual objects to appear to have the exact correct
size the AR or VR system needs to know your specific
interocular distance. https://en.wikipedia.org/wiki/Interpupillary_distance
note that there can
be good reasons to change the interocular distance if you are
looking at very small things or very big things, i.e. back in
2006 we helped out with the NASA STEREO project using two
satellites ahead and behind the earth in its orbit to take
stereo movies of the sun, and on the other end of scale we work
with biologists that take stereo images of cells.
Stereo
Window (Plane) - the point at which there is no difference
in parallax between the two eye views - usually at the same
depth as the monitor screen or the projection surface. HMD
optics create their own projection plane, commonly about 1-2
meters away from the user. Looking at things on the plane is
most comfortable since convergence and accommodation are both
correct, but there is no stereo effect there. Often the subject
of a stereo photograph or movie is placed on the plane with
other elements in front or behind to heighten the 3D effect.
Homologous
Points - points which correspond to each other in the
separate eye views (e.g. the tip of a person's finger, or a
person's left pupil)
Horizontal Parallax - when the retinal images of an
object fall on disparate points on the two retinas, these
points differ only in their horizontal position (since our
eyes are at the same vertical position). The value given by R
- L. Note that this is obviously true for stereo movies, but
in full VR you may be tilting your head (and your two eyes
along with your head) so the 'horizontal' part refers to the
line between your eyes defining horizontal and vertical.
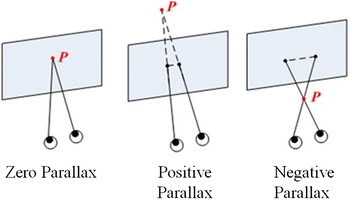
Positive Parallax -
the point lies behind the stereo window - in the Creature from the Black
Lagoon image, the background is far from the camera and has blue
to the right of red for homologous points
Zero
Parallax - the point is at the same depth as the stereo
window - in the
Creature from the Black Lagoon image, the base of the
fossilized hand is at zero parallax and there is no red / blue
disparity.
Negative
Parallax - the point lies in front of the stereo window -
in the Creature from the Black Lagoon image, the fingers of the
fossilized hand are near to the camera and have red to the right
of blue for
homologous points like the fingertips
Vertical
Displacement - vertical parallax between homologous
points relative to the line that the two eyes form - this should
be zero in a correctly calibrated setup. Our eyes and brain can
actual handle a certain amount of vertical parallax but it gets
uncomfortable.
Interocular
Crosstalk (Ghosting) - when one eye can see part of the
other eye's view as well, reducing the effect of the stereo
imagery - Crosstalk should also be zero in a correctly
calibrated setup, but this can be hard to achieve, especially in
scenes with very high contrast.
<image from
https://jivp-eurasipjournals.springeropen.com/articles/10.1186/s13640-017-0210-5>
off-axis projection
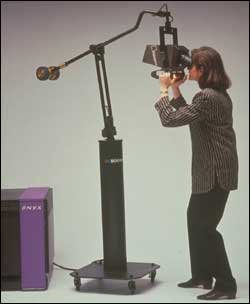
In an HMD or the boom, the screens in front of each user's eye move with the user - that is the screens are always perpendicular to the eye's line of site (assuming the eyes are looking straight ahead). This allows the traditional computer graphics 'camera paradigm' to be extended so that there are 2 cameras in use - one of each eye.
In the CAVE,
Fish Tank VR, or any large screen VR, this is not the case. The
projection planes stay at a fixed position as the user moves
around. The user may not be looking perpendicular to the screen
and certainly cant be looking perpendicular to all of the
screens in the CAVE simultaneously - in this case 'off-axis
projection' is used, and the math/geometry is a bit more complex
to be more general, though still something that someone with a
knowledge of computer graphics from CS 425 could implement.
Stereo Visuals for Multiple Viewers
With head
mounted displays for AR or VR there is a single user looking at
the display. With room scale or spatially immersive displays
like CAVEs there are typically multiple users, but usually only
one user being head tracked. This means everyone is seeing
through this one person's eyes, meaning the farther you are
standing form this person the less correct the visuals are. The
visuals are also moving based on that tracked person's
movements, so if that person is moving around a lot the visuals
are moving around a lot.
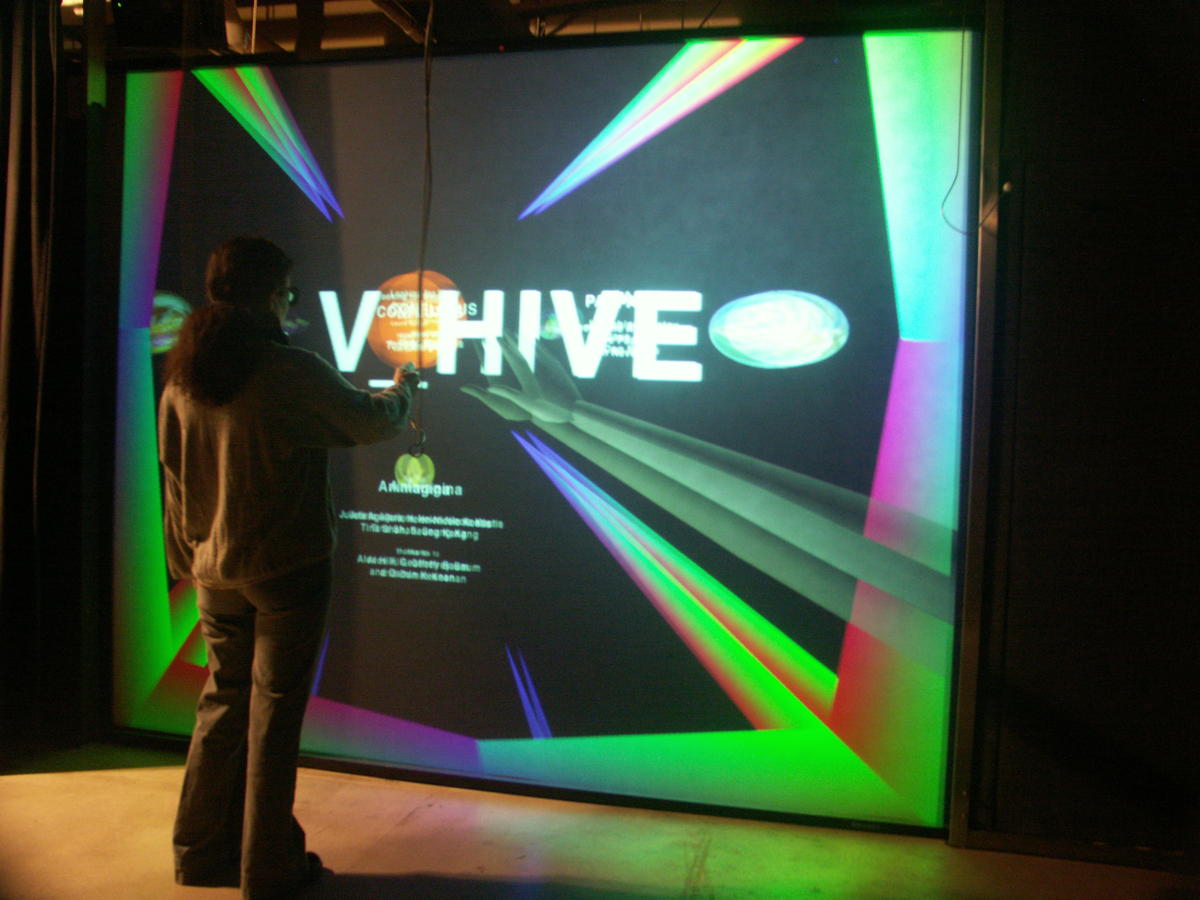 |
For a single large screen the users are all typically looking at the (single) screen so head tracked stereo visuals are reasonably correct most of the time. |
|
In a more immersive multi-screen setup like a classic CAVE with a front, left, and right walls, and a tracked user looking at the front wall, the imagery on the left and right walls will be monoscopic as the tracked user's eyes are in line towards those walls. In full 6 wall CAVES with a tracked user looking at the front wall this means that stereo on the back wall is reversed, which is uncomfortable for anyone looking in that direction. While correct for the one tracked user, this 'correct' head tracking can cause issues for groups of users. |
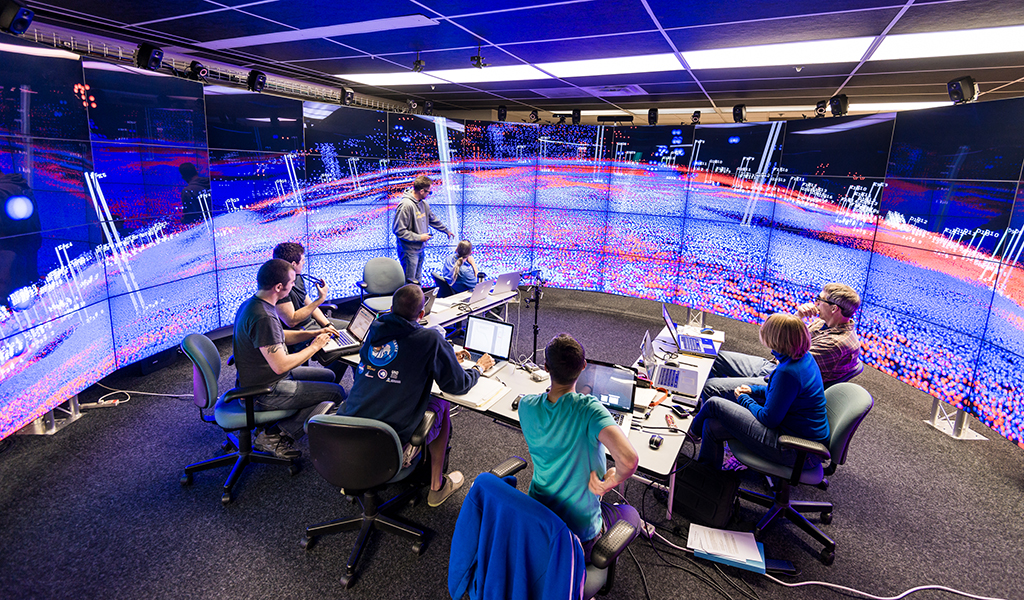 |
One solution is to use the tracked user's head position to generate (rotated) tracked user eye positions independently for each wall to maintain correct stereo on the assumption that the tracked user's eyes are 'looking at' each wall simultaneously. This is slightly less correct for the one tracked user, but much more comfortable for everyone else who don't have stereo disappearing or reversing as the tracked user moves and turns. |
Updating Visuals based on Head Tracking
Naively we would like to update the graphics every frame in order to use the most recent head (eye) positions.
Since there will be jitter in the tracker values and latencies in getting information from the tracking hardware to deal with, this may result in the computer generated image jittering.
One way to
avoid this is to only update the image when the head has moved
(or rotated) a certain amount so the software knows that the
motion was intentional.
Another common option is to interpolate between the previous and current position and rotation values in order to smooth out this motion. This results in smoother transitions, and minimizes tracker error, but will also increase the lag slightly.
Another option is to extrapolate into the future by predicting how the user is going to move in the next couple seconds and proactively render for the position you believe the user will be in since people typically do not move their heads too abruptly.
How to generate Graphics Quickly
Naive Approach
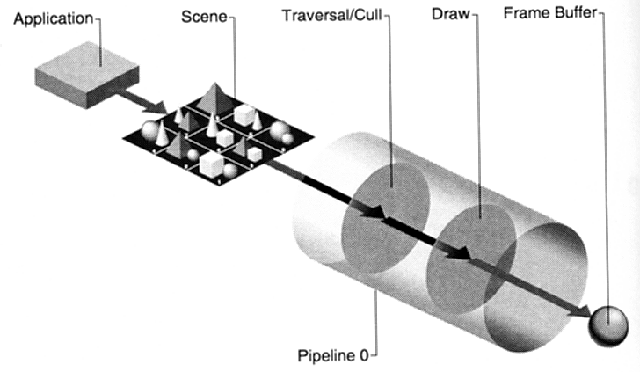
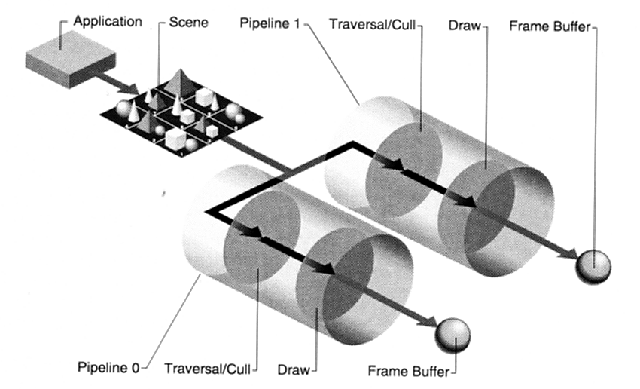
In the 1990s Silicon Graphics
(the folks who created GL, OpenGL, and would go on to found
nVidia) optimized graphics through a pipelined approach (image
from SGI Performer manual) and overlapping different parts of
the pipeline.
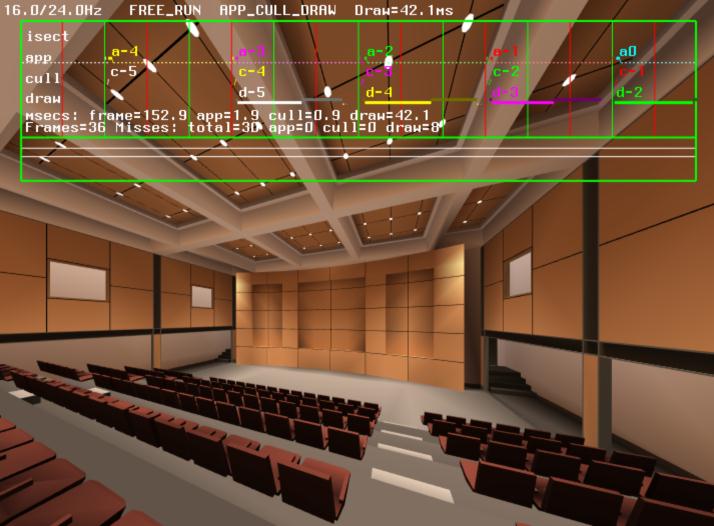
and then it helps to have
tools to help visualize how long each part of the process takes
and where improvements can be made.
The following image show
a-application, c-cull, d-draw in the same color for the same
frame, e.g. when its drawing frame 5 its culling frame 4 and
doing the application phase of frame 3. In this case the
application is spending almost all its time drawing, so it has
time to do more application work or culling which might improve
the overall experience.
Unity has a similar tool with
its Profiler - https://docs.unity3d.com/Manual/ProfilerWindow.html
While in videogames it is
good to maintain a particular frame rate, in VR and AR it is
much more important to do that.
Current game engines are
pretty good at optimizing what is drawn based on where the user
is in the scene. If you create your own software from scratch
you will need to take care of those things.
Models can be replaced by models with less detail
3D models of far away objects can be replaced by texture mapped billboards
The horizon can be moved in - moving in Z-far and perhaps covering this with fog
A less complex lighting model
can be used
Simulator Sickness
2 things are needed: a functioning vestibular system (canals in the inner ear) and a sense of motion
Symptoms: Nausea, eyestrain, blurred vision, difficulty concentrating, headache, drowsiness, fatigue
These symptoms can persist after the VR experience is finished.
Causes: still unknown but one common hypothesis is a mismatch between visual motion (what your eyes tell you) and the vestibular system (what your ears tell you)
Why would this cause us to become sick? Possibly an inherited trait - a mismatch between the eyes and ears might be caused by ingesting a poisonous substance so vomiting would be helpful in that case.
bright images are more likely to cause it than dark ones
wide field of view is more likely to cause it than narrow field of view
HMDs are more likely to cause it than projection systems
low resolution, low frame rate and high latency are also likely causes
Another hypothesis deals with the lack of a rest frame. When a
user views images on a screen with an obvious border that border
locates the user in the real world. Without that border the user
loses their link to the real world and the affects of motion in
the virtual world are more pronounced.
Current HMD
environments default to allowing the user to walk around a
physical space but then use teleporting rather than controller
based 'flying' common in first person shooters to move larger
distances. This is primarily to reduce the chances of people
getting sick. Current HMD environments also often stop drawing
graphics in the periphery when the user is using a joystick to
move quickly through the space to reduce the chances of
simulator sickness.
Fighter pilots have 20 to 40 percent sickness rates in flight simulators - but experienced pilots get sick more often than novice pilots.
In a rotating field when
walking forward, people tilt their heads and feel like they are
rotating in the opposite direction. Here is a physical version
but you can do the same thing with just computer graphics
https://www.youtube.com/watch_popup?v=WP9Edx7--PU
If a person is walking on a treadmill holding onto a stationary bar and you change the rate the the visuals are passing by, it will feel to the person like the bar is pushing or pulling on their hands.
Open fields are less likely to cause problems than walking through tight tunnels; tunnels are very aggressive in terms of peripheral motion. This doesn't mean that you should not have any tunnels, but you should be careful how much time the users spend there and how fast they are allowed to move through them.
Its easy (and fun) to induce vertigo. Most people really seem to enjoy jumping off of high places and falling in VR.
With VR, you very likely have visuals covering the user's field of view, like a child up close to the TV, and you have a full array of special effects to chose from. Choose carefully.
Link to that part of the
episode - the content is regularly removed and comes back
under a different link - warning - watching this full screen can
cause issue for some people.
Project 1 presentations
last revision
1/15/2024