online, you can click here to see some images created by members of the Electronic Visualization Laboratory here at UIC. Each lecture has a different set of images (collect em all!)
various spaces (coordinate systems) involved: The texture map is a 2D image. It is mapped onto a 2D polygon (or set of 2D polygons) and then displayed on a 2D screen. The texture, the polygon(s) and the screen all have their own coordinate systems.
Texture
in (u,w) coordinates
Polygon in (s,t) coordinates
Polygon in (x,y,z) coordinates
Screen in (x,y) coordinates
s
= f(u,w)
t = g(u,w)
u
= j(s,t)
w = k(s,t)
What
we want are linear equations of the form:
s = A * u + B
t = C * w + D
to make s and t functions of the texture space. By mapping the four
corners of the texture space to the four corners of the object we get
the values for A, B, C, and D in these equations. The inverse of these
equations gives the mapping from object space to texture space.
When doing the scan conversion of the polygon onto the screen the pixels at the corners of the polygon are mapped onto the corners of the texture
Each pixel (in the screen space) can now be related to one or more texels (in the texture space.) This allows the pixel value to be determined by averaging one or more texel values
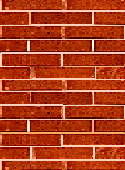
Textures can usually be defined to either repeat or clamp at the edges to determine what happens if the texture is not 'big enough' to cover the object (that is if the pixel coordinates transformed into (u,w) coordinates falls outside the space occupiend by the texture.
If the texture repeats then the same texture pattern repeats itself over and over again on the polygon (useful for woodgrain floors or brick walls or stucco walls) where a very small texture can be used to cover a very large space, or the texture can be told to clamp at the edges.
Several algorithms for doing this including
Catmull : continue to subdivide the object until the subdivided component is within a single pixel. Object decides what pixel is going to be - can cause problems
Blinn & Newell : maps each pixel from screen space to object space to texture space.
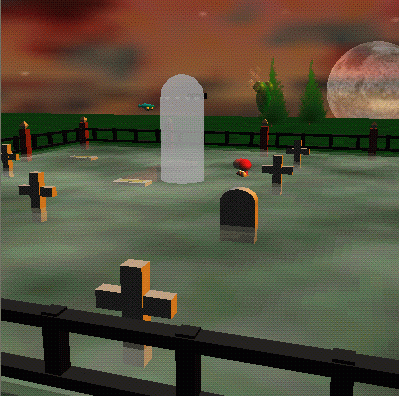
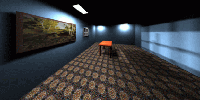
So lets look again at this scene:
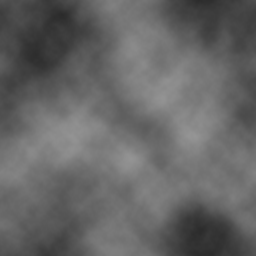
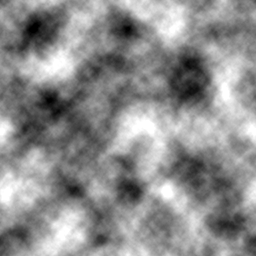
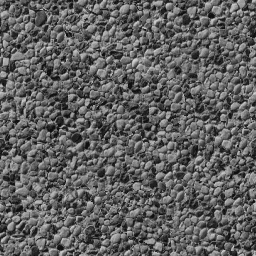
Here are all the textures in use in the scene:
![]()
The lighting algorithms discussed last time worked on each object separately. Objects were not able to affect the illumination of other objects. This is not terribly realistic. In the 'real world' objects can cast shadows on other objects.
We have used visible surface algorithms to determine which polygonal surfaces are visible to the viewer. We can use similar algorithms to determine which surfaces are 'visible' to a light source - and are therefor lit. Surfaces which are not visible are not lit.
ambient light will still affect all polygons in the scene but the diffuse and specular components will depend on whether the polygon is visible to the light.
So far we have assumed that objects are all opaque, but many objects in the 'real world' are transparent or translucent. These surfaces also tend to refract the light coming through them.
Dealing with refraction is quite difficult, while transparency is relatively easy.
Lets say we have the scene shown below with transparent white object 1 between us and opaque aqua object 2.
![]()
Interpolated
Transparency
I        = (1 - K   ) I          + K   I
 lambda          t1    lambda_1     t1  lambda_2
Kti is the transparency of (nearer) object 1 (0 - totally opaque, 1 - totally transparent)
if Kti is 0 then the nearer object is totally opaque and the far object contributes nothing where they overlap.
if Kti is 1 then the nearer object is totally transparent and the near object contributes nothing where they overlap.
in between 0 and 1 the intensity is the interpolation of the intensities of the two objects
each pixel is linearly interpreted
Screen-door transparency
This is the same idea as interpolated transparency except that each individual pixel is either given the value of the near object or the value of the far object. The ratio of pixels given to the far versus the near is Kti. This is faster to compute but gives a much less pleasing effect. Basically it is using dithering to generate transparency.
Filtered Transparency
I        = I          + K   O          I
 lambda     lambda_1     t1  t lambda   lambda_2
Otlambda is the transparency colour of (nearer) object 1
In all of these cases the value of Ilambda2 may itself be the result of a transparency calculation.
Screen-door transparency is easy to implement along with the z-buffer since the order that polygons are drawn does not affect screen-door transparency.
For the others, the order of drawing is important. One of the advantages of using a z-buffer is that the order in which the polygons are drawn became irrelevant. Here it is again necessary to draw the polygons back to front so that transparency can be correctly calculated.
One way to do this is to draw all of the opaque polygons first then draw all of the transparent ones. An even better solution is to draw all of the opaque ones first and then sort the transparent ones and draw them back to front. Both of these solutions take an unacceptable amount of time for real-time graphics, so it basically falls to the programmer to insure that the polygons are drawn in an appropriate order.
If the polygons are not drawn in the correct order then there are some very strange visual effects where some polygons behind the transparent polygon are visible and others are not.
Raytracers can have a lot of possible features. The one described here will be relatively simple (as raytracers go) dealing with

The power of this kind of system is that instead of just having one ray (as in visible surface determination, or shadows) that one ray can generate other rays which continue through the scene.
Given:
Want to find:
R' = N' + ( N' + V') where V' = V / | V * N |
P' = Kp x (N' + V') - N' where Kp determines the amount of refraction
For
Li:
I = Ka Ia + sum for all lights (Kd Ip (N' * L') + Ks Ip (R' * V')^n) +
Kr Ir + Kt It
most of this we talked about last week but now there are two new terms
Kr Ir deals with the reflected light
Kt It deals with transmitted light
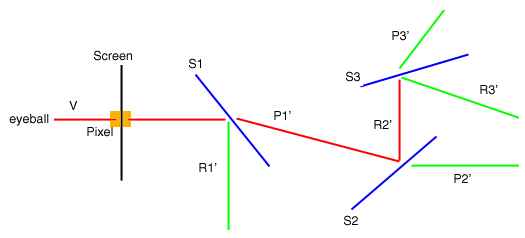
So if we follow V from the eye through a given pixel on the screen and into the scene we can see its interaction as shown in the drawing below:
V
passes through the pixel on the screen and hits S1
R1' is reflected off of S1 and does not hit anything else in the scene
P1' is transmitted through S1 and goes on to strike S2
R2' is reflected off S2 and goes on to strike S3
P2' is transmitted through S2 and does not hit anything else in the
scene
R3' is reflected off S3 and does not hit anything else in the scene
P3' is transmitted through S3 and does not hit anything else in the
scene
We compute Is from these and from It. When we compute It of S1 we finally find V. This processing is done recursively.
pseudocode
shade(object, ray, point, normal, depth)
    {
    color = ambient term
    for (each light)
     {
      sRay = ray from light to point
      if (dot product of normal and direction to light is positive)
        {
        compute how much light is blocked by opaque and transparent surfaces
        scale diffuse and specular terms before adding them to color
       }
     }

    if (depth < maxDepth)
      {
      if (object is reflective)
	      {
	       rRay = ray in reflection direction from point
	       rColor = trace(rRay, depth+1)
	       scale rColor by specular coefficient and add to color
	      }
      if (object is transparent)
	      {
	       tRay = ray in refraction direction from point
	       if (total internal reflection does not occur)
           {
            tColor = trace(tRay, depth+1)
            scale tColor by transmission coefficient and add to color
           }
       }
      }

    shade = color
    }

//-------------------------------------------------------------------------

trace(ray, depth)
    {
    determine closest intersection of the ray with an object

    if (object is hit by ray)
       {
       compute normal at intersection
       return(shade(closest object hit, ray, intersection, normal, depth))
       }
    else
      return(BACKGROUND_VALUE)
    }

//-------------------------------------------------------------------------

main()
    {
    for each scan line in the image
       for each pixel in the scan line
	      {
       determine ray from center of projection through that pixel
       pixel = trace(ray, 1)
	      }
    }
Here is another short turorial: http://www.education.siggraph.org/materials/HyperGraph/raytrace/rtrace1.htm
Some POV Ray images: http://www.povray.org/hof/index.html
Radiosity is a method of trying to simulate lighting effects using much more realistic models than were used previously.
The assumption is that the scene being lit is a closed environment, so light energy is conserved. All of the light energy is accounted for. No need for an ambient light term anymore as what the ambient term simulated will now be specifically computed.
radiosity is the rate at which energy leaves a surface (via emittance, reflectance or transmittance)
Light interactions are computed first for the entire scene without regard for the viewpoint. This 'works' because only diffuse reflection is dealt with - not specular reflection. Then individual views of the scene are generated from particular points of view that only need to compute visible surfaces and interpolation of the surfaces
Light sources are not treated as separate from the objects in the scene. Any (all) objects emit light which can give more realistic effects when areas are giving off light rather than several discrete sources.
We can divide the space into n discrete finite sized patches which emit and reflect light uniformly over their area:
B  =  E  + p  *  summation  ( B  F    ( A  / A )
 i     i    i   1 <= j <= n    j  j-i    j    i
So the radiosity of a unit area is the sum of the emitted light + reflected incident light
note that the summation includes patch i - that is an object can reflect light onto itself
since
A  F     = A   F
 i  i-j     j   j-i
because Fi-j = (1 / Ai) * Sum over Ai Sum over Aj ( cos thetai cos thetaj / ( pi R R)) dAi dAj
then
B  =  E  + p  *  summation  ( B  F    )
 i     i    i   1 <= j <= n    j  i-j
or
B  -  p  *  summation  (  F     B )  = E
 i     i   1 <= j <= n     i-j   j      i
so you end up with a set of simultaneous equations to solve, one for each object in the scene.
Since these equations have nothing to do with the users viewpoint there is no need to recompute if the user moves through the scene.
Some more good examples of radiosity images can be found here: http://www.graphics.cornell.edu/online/research/
How can you tell if the images you have created are actualy realistic. Cornell has put a lot of effort into this in particular with the 'Cornell Box': http://www.graphics.cornell.edu/online/box/
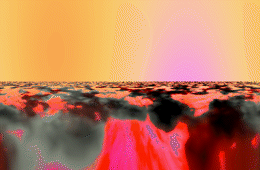
While this doesn't fit under 'Shading and Illumination' (and fractals are not as 'in' as they used to be) it is a topic that is worth discussing and brightens up the page somewhat.
Here
are several fractal images taken from:
http://www-users.informatik.rwth-aachen.de/~afw/fractim.html
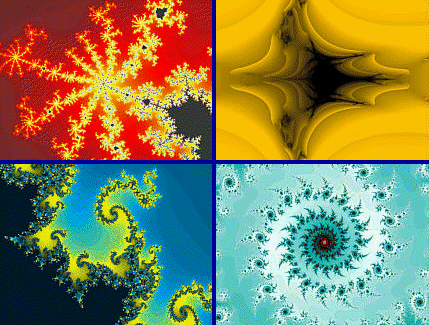
The major defining feature of a fractal is 'self similarity' - that is the shape is made up of parts that look like the shape itself, or that its shape is similar at all scales.
So we can take a line segment and break it into 4 line segments, each of which is 1/3 the length of the original. We can then do this again as shown in the image below:
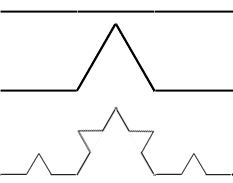
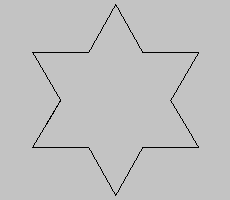
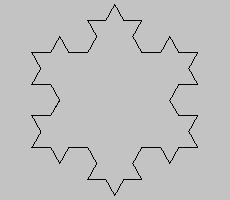
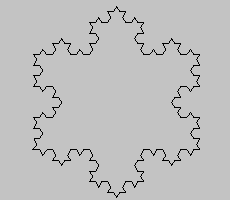
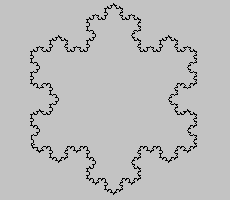
If instead we start with a triangle and apply the same algorithm we get the von Koch snowflake.
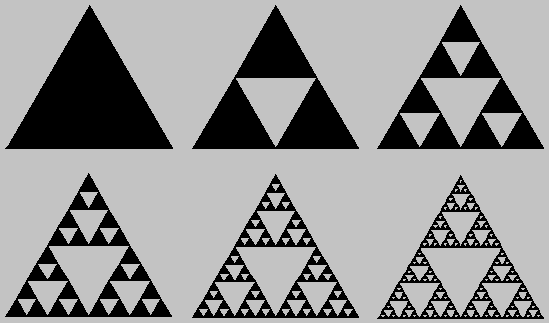
Similarly we can take a triangle and break it into 4 triangles. We continue this process breaking each smaller triangle into 4 triangle as shown in the figure below:
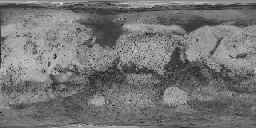
Here
are several fractal images taken from:
http://bang.lanl.gov/video/sunedu/math/fractals/more.html
the von Koch snowflake:

Sierpinski:
This page http://astronomy.swin.edu.au/~pbourke/fractals/fracintro/ has a nice introduction to fractals.
Current Topics (stuff that I think is pretty neat)
and evaluation forms - so bring a #2 pencil