Using Bloodshed Dev-C++ for OpenGL-GLUT Programming
By: Allan Spale,
Teaching
Associate
Fall 2005
CONTENTS
Background
Obtaining the Software
Installing the Software
Obtaining GLUT Files
Project Settings For an GLUT OpenGL Project
Compiling and Running Your Project
Background
OpenGL is an open graphics programming library developed by Silicon Graphics. Programmers use the application programming interfaces (APIs) of these libraries in order to write graphics programs using a variety of different languages including C++, Java, and Python. The purpose of this document is to enable you to use an open-source integrated development environment (IDE) for writing OpenGL programs using C++.
Writing a program in any programming language requires a text editor, compiler, and linker in order to generate the executable, or software application that runs on a particular operating system such as Windows XP or Mac OS X. To simplify the task of writing programs, software developers created an IDE that organized all of the tasks of writing a program into one application. Popular IDEs include NetBeans (Java), Eclipse (multiple language bindings), and Visual Studio (all Microsoft-supported languages). NetBeans and Eclipse are freely available, while Visual Studio is not free. Additionally, many of these IDEs have more features than you will probably need to use in an introductory programming course.
Obtaining the Software
In order to find the best of both worlds-- a free IDE and a fairly straightforward IDE for C++, I recommend downloading Bloodshed Software's Dev-C++ for writing OpenGL C++ programs. The link to Bloodshed Software is: http://www.bloodshed.net. The link to downloading the most recent version of Dev-C++ can be found at: http://www.bloodshed.net/dev/devcpp.html and select the link that says "Dev-C++ 5.0...with Mingw/GCC". Please be aware that this software only runs on Windows operating systems.
Installing the Software
To install the software, follow these steps:
If you are running a Windows computer, the necessary OpenGL files should already be available. When in doubt, check the directory C:\WINNT\system32. In this directory, there should be files like opengl32.dll and glu32.dll. If you are missing any of these files, things will not work correctly when you try to write OpenGL. Traditionally, the windows that are used for OpenGL programs were dependent upon the underlying operating system window management system. This did not allow OpenGL programs to be as portable across platforms as they should be. To solve this problem, the OpenGL Utility Toolkit, or GLUT, was created. If you have never written any OpenGL programs using GLUT before, the necessary files for running GLUT will not be avaiable. For this reason, you need to download them. A website which explains how to use Dev-C++ to write OpenGL GLUT programs also provides information on where to download the appropriate GLUT files in addition to where to put them. The information about how to do these tasks was taken from: http://www.cs.uofs.edu/~mpc3/cmps370/glutsetup.html. Download the following files from these locations:
Project Settings For an GLUT OpenGL Project
In Dev-C++, the IDE organizes your code files into projects. For this reason, you need to specify the project type whenever you begin start writing a new application. Follow the steps below to setup an OpenGL GLUT project:
You want to choose a console application because the program that you write should not contain any Win32 API code (this is code written that accesses programming libraries specific to the Windows operating system). The console application will enable you to have code that can be run on an operating system that does not have Windows.
The next series of steps involves configuring the project options so that files needed to make an OpenGL GLUT program can be easily found by the Dev-C++ IDE. Instructions similar to the steps listed below appear on the website whose address is: http://www.cs.uofs.edu/~mpc3/cmps370/glutsetup.html.
Compiling and Running Your Project
Compiling and running the code in your project is very easy...but...figuring out why your specific program does not compile or run can become very difficult. This is true of anyone-- those who have spent a lot of time programming and those people who are learning how to program. Since errors are typically unique to each situation for compiling or debugging, it is up to you to learn how to do this. Assuming that everything written correctly and the project is configured to use the proper libraries, do the following:
Background
Obtaining the Software
Installing the Software
Obtaining GLUT Files
Project Settings For an GLUT OpenGL Project
Compiling and Running Your Project
Background
OpenGL is an open graphics programming library developed by Silicon Graphics. Programmers use the application programming interfaces (APIs) of these libraries in order to write graphics programs using a variety of different languages including C++, Java, and Python. The purpose of this document is to enable you to use an open-source integrated development environment (IDE) for writing OpenGL programs using C++.
Writing a program in any programming language requires a text editor, compiler, and linker in order to generate the executable, or software application that runs on a particular operating system such as Windows XP or Mac OS X. To simplify the task of writing programs, software developers created an IDE that organized all of the tasks of writing a program into one application. Popular IDEs include NetBeans (Java), Eclipse (multiple language bindings), and Visual Studio (all Microsoft-supported languages). NetBeans and Eclipse are freely available, while Visual Studio is not free. Additionally, many of these IDEs have more features than you will probably need to use in an introductory programming course.
Obtaining the Software
In order to find the best of both worlds-- a free IDE and a fairly straightforward IDE for C++, I recommend downloading Bloodshed Software's Dev-C++ for writing OpenGL C++ programs. The link to Bloodshed Software is: http://www.bloodshed.net. The link to downloading the most recent version of Dev-C++ can be found at: http://www.bloodshed.net/dev/devcpp.html and select the link that says "Dev-C++ 5.0...with Mingw/GCC". Please be aware that this software only runs on Windows operating systems.
Installing the Software
To install the software, follow these steps:
- From the section labeled "Dev-C++ 5.0...with Mingw/GCC", select the SourceForge link or click here.
- You will be taken to the SourceForge download server. Here, you can select the serve from which to download Dev-C++. In most cases, it will be better to choose a mirror (or download server) somewhere in the United States; however, this is not required. In the Download column, click on the link of the server of your choice.
- The page will refresh. If a download window does not appear after a few seconds, click on the link given near the top of the page. Then, choose a location to save the file. Wait while the file downloads.
- Find the location on your computer where you downloaded the file and double-click on the Dev-C++ installation icon. A dialog box will appear indicating the progress of preparing for the installation.
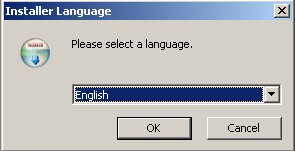
- A dialog box will appear asking what language you want for this
installation and then press the Ok button.
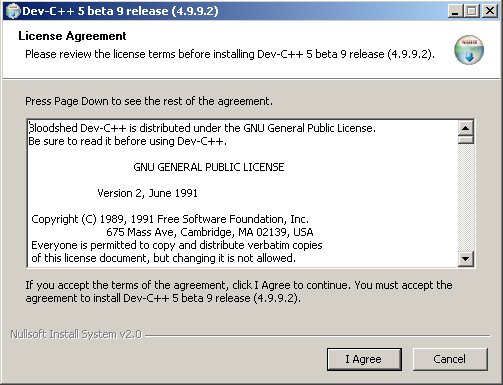
- Review the license agreement. If you are able to accept the terms of the license agreement, press the I Agree button.
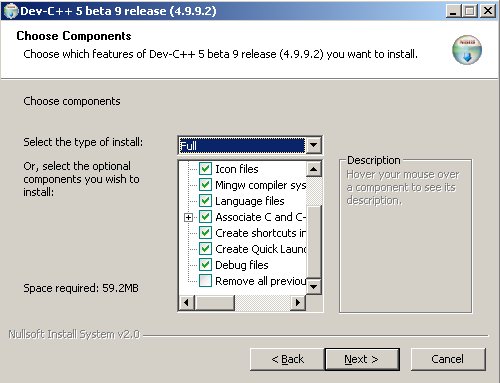
- Now it is time to select the type of installation. In order to keep things simple, choose the option Full for the option of Select the Type of Install. Make sure that you have sufficient space to perform the full installation.
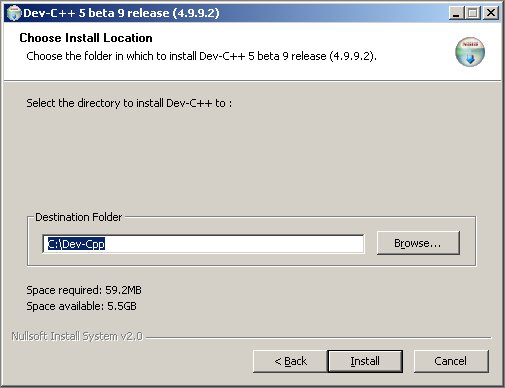
- Select the location where you want the files installed. Because of some difficulties that may occur if you install to a directory name that contains spaces, choose a directory location or make a new directory that does not contain spaces. Although program installation should typically be in C:\Program Files, either make a new directory called C:\other-programs or simply accept the default location of C:\Dev-cpp.
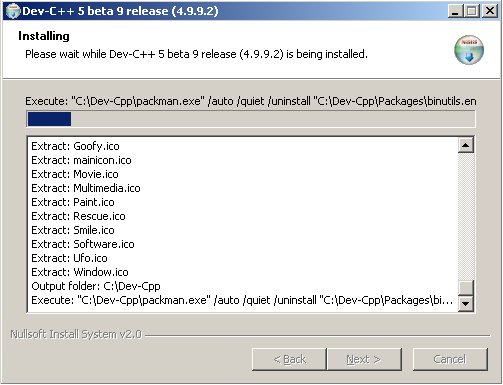
- Watch the program install the files.
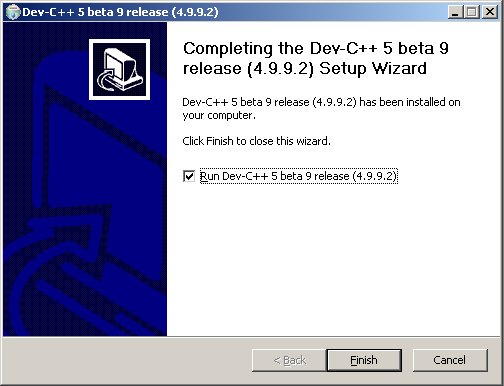
- After the installation program installs all of the necessary files, Dev-C++ should be ready to run. If you want to run Dev-C++ now, make sure to check the item labeled Run Dev-C++ 5... Then, click on the Finish button.
- Read the notice that appears with the beta software.
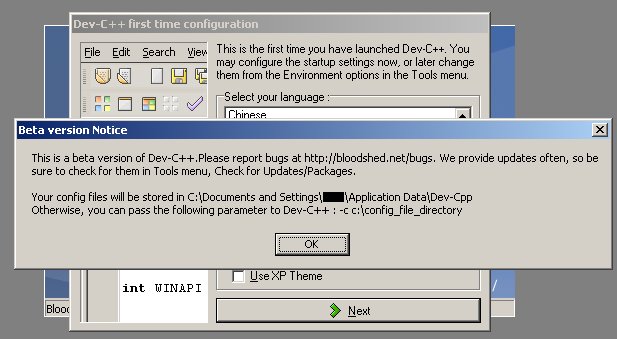
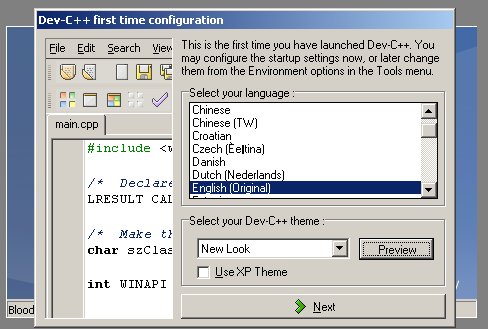
- Configure the software using the dialog boxes. Speicifically, you will choose the language that you want to use and decide on the style of the user interface.
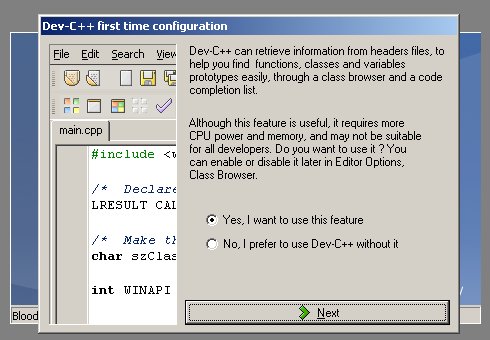
- If you would like to have a hierarchy of the classes that you are using and/or would like to have the ability for code to be completed by the editor if you type in a series of unique letters, select the Yes... option; otherwise, select the No... option.
- If you selected the Yes... option, you will be presented with the option of using a cache to assist the IDE with code completion. Unless there is a good reason not to do so (such as in the case with the IDE using too much memory and CPU power), create the cache now by selecting the Yes... option and pressing the Next button.
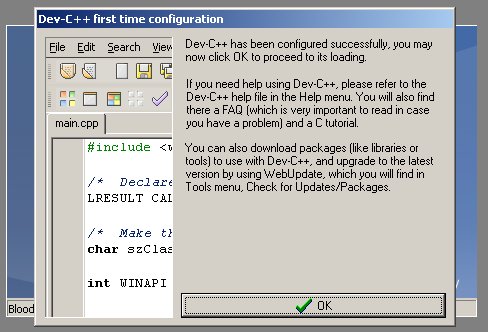
- If everything worked as expected, you should see the following message:
If you are running a Windows computer, the necessary OpenGL files should already be available. When in doubt, check the directory C:\WINNT\system32. In this directory, there should be files like opengl32.dll and glu32.dll. If you are missing any of these files, things will not work correctly when you try to write OpenGL. Traditionally, the windows that are used for OpenGL programs were dependent upon the underlying operating system window management system. This did not allow OpenGL programs to be as portable across platforms as they should be. To solve this problem, the OpenGL Utility Toolkit, or GLUT, was created. If you have never written any OpenGL programs using GLUT before, the necessary files for running GLUT will not be avaiable. For this reason, you need to download them. A website which explains how to use Dev-C++ to write OpenGL GLUT programs also provides information on where to download the appropriate GLUT files in addition to where to put them. The information about how to do these tasks was taken from: http://www.cs.uofs.edu/~mpc3/cmps370/glutsetup.html. Download the following files from these locations:
- glut.h from http://www.cs.uofs.edu/~mpc3/cmps370/glut.h and save the file to C:\Dev-C++\include\GL.
- glut32.def from http://www.cs.uofs.edu/~mpc3/cmps370/glut32.def and save the file to C:\Dev-C++\lib.
- glut32.dll from http://www.cs.uofs.edu/~mpc3/cmps370/glut32.dll and save the file to C:\WINNT\system32.
Project Settings For an GLUT OpenGL Project
In Dev-C++, the IDE organizes your code files into projects. For this reason, you need to specify the project type whenever you begin start writing a new application. Follow the steps below to setup an OpenGL GLUT project:
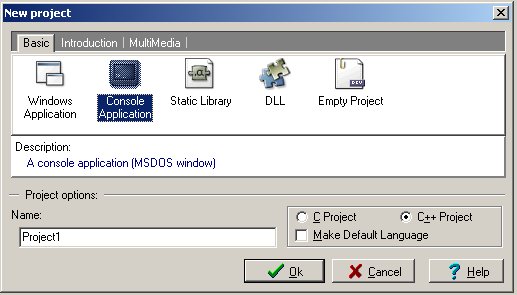
- From the Dev-C++ menu, select File -> New -> Project. A new dialog box will appear.
- Press the Basic tab and select Console Application from the types of projects.
- Type the name of the project in the field named Name.
- Select the C++ Project option from the box with options.
- Press the Ok button.
- It would be advisable to keep your projects organized in some hierarchy. It may be suitable to make a new directory that contains all of your Dev-C++ projects or place these Dev-C++ projects in some other appropriate directory. In any case, choose a location and make sure that the project name is indeed what you want the project to be named. The settings for the project will be stored in a file called project-name.dev where project-name is the name you wanted to name the project.
You want to choose a console application because the program that you write should not contain any Win32 API code (this is code written that accesses programming libraries specific to the Windows operating system). The console application will enable you to have code that can be run on an operating system that does not have Windows.
The next series of steps involves configuring the project options so that files needed to make an OpenGL GLUT program can be easily found by the Dev-C++ IDE. Instructions similar to the steps listed below appear on the website whose address is: http://www.cs.uofs.edu/~mpc3/cmps370/glutsetup.html.
- From the Dev-C++ menu, select Project -> Project Options. A new dialog box will appear
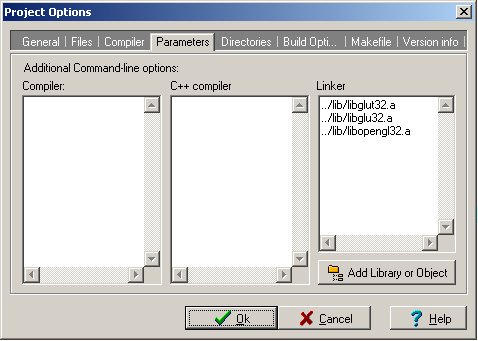
- Press the Parameters tab which should make the dialog box appear as seen below:
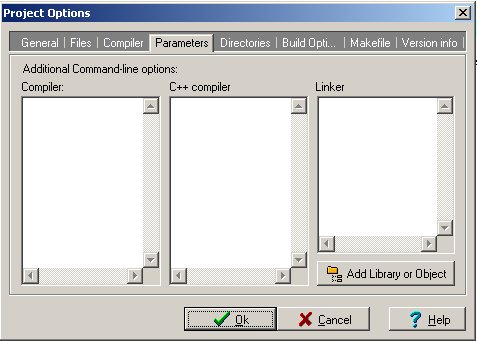
- It is necessary to add libraries that will support the operation of OpenGL and GLUT. Repeat the following steps-- press the Add Library or Object button and then select the appropriate library file. These files begin with the letters "lib" and ends in ".a". It will be necessary to add the following files: libglut32.a, libglu32.a, and libopengl32.a. These files will be located in the lib\GL directory of your Dev-C++ installation directory. For instance, one path possibility could be: C:\Dev-C++\lib. When you are finished, the dialog should look like this:
- Then press the Ok button.
Compiling and Running Your Project
Compiling and running the code in your project is very easy...but...figuring out why your specific program does not compile or run can become very difficult. This is true of anyone-- those who have spent a lot of time programming and those people who are learning how to program. Since errors are typically unique to each situation for compiling or debugging, it is up to you to learn how to do this. Assuming that everything written correctly and the project is configured to use the proper libraries, do the following:
- To compile a file, make sure that this file is visible in the editor by selecting it from the list of files in the project browser and select Execute -> Compile from the menu. If you have multiple files in a project, complete this task for each file.
- To run a file, select from the menu Execute -> Run. If your program needs parameters in order to run properly, first select Execute -> Parameters and fill in the appropriate values in the dialog box. Then, choose this menu option Execute -> Run.