|
 Use the project settings dialog to set parameters for capturing your footage.
- Determine the capture format.
- Set the resolution for the digitized video.
- Indicate whether audio should be digitized with the video.
- Use the video and audio buttons to access video and audio settings dialogs.
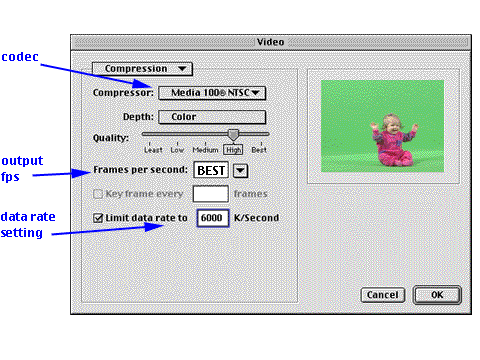
 The video settings dialog box allows you to set several parameters that effect the incoming video signal.
- Select the compression pulldown menu and then set the compressor and color depth based on the codec your hardware supports. This dialog shows the Media 100 qxc hardware options.
- Set the quality slider to the desired level.
- It's a good idea to stay at high or medium quality.
- The Best setting creates huge file sizes, and may cause dropped frames during digitization.
- Select the target frames per second.
- You should always digitize at BEST fps.
- Some digitizing hardware operates better if you let it do it's "BEST" when digitizing. This allows the hardware to just digitize without checking if ever frame is at the appropriate point in relation to the timecode.
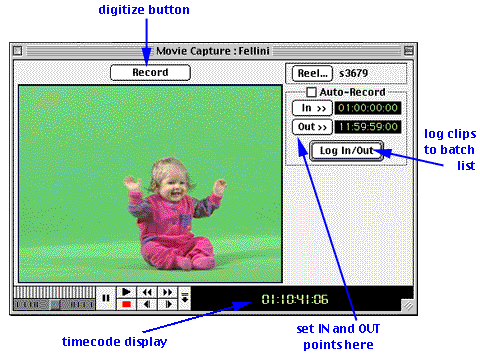
 Use the Movie Capture window to digitize your media.
- You can set your IN and OUT points in this window.
- You can either digitize the media immediately, or log it into a batch list for future digitization.
|
|


