Osman Baig, Jason Leigh
This simple tutorial shows you how to create a simple, animated model and load it into DarkBASIC Pro for viewing.
Launch 3D Canvas by going to the Start Menu -> All Programs -> Amabilis -> 3D Canvas 6
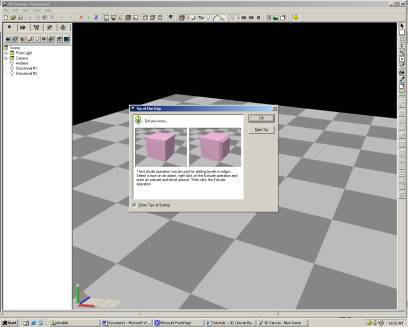
| Click OK to skip past the initial welcome messages. |
|
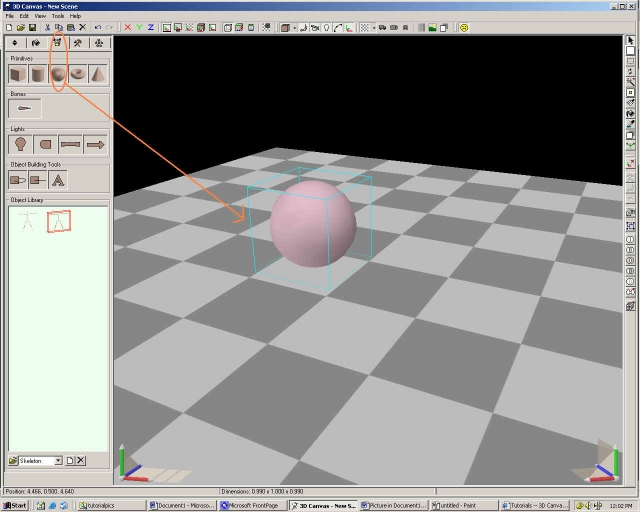
| Click on the components panel located on the top left corner of the screen. |
 |
| Click on the sphere and drag it to the scene and let go of the mouse just like how you normally click and drag icons on your desktop. |
 |
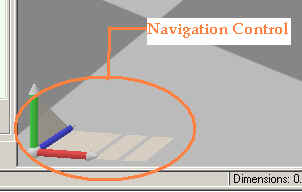
The image on the lower left side of the screen is the navigation control. It allows you to change your viewing perspective so that you can be at a better vantage point to look at your model as you are creating it. The red arrow is the X-Axis. Green is the Y-Axis and blue is the Z-Axis. Clicking your mouse on any one of those axes changes the cursor to a '+' sign and moving the mouse will rotate the scene about that axis. Furthermore if you click and drag your mouse in any of the shaded areas (planes) adjacent to the axes you will move the scene along that plane. Try clicking and dragging in each of the axes and shaded areas to see what effect it has on the scene. |
 |
| We are now going to apply a picture (often called a texture) to your sphere. To do this we need to open the Material Palette tab to design a "material". Click on the Material Palette tab on the left of the screen.
|
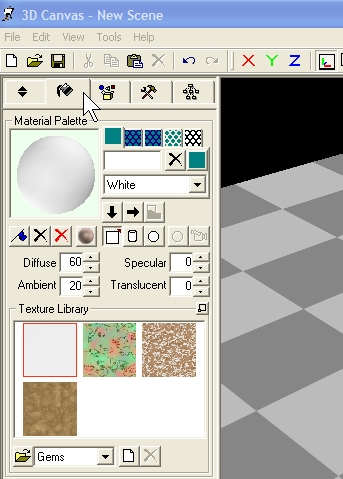 |
Click on one of the pictures (textures) in the Texture Library. |
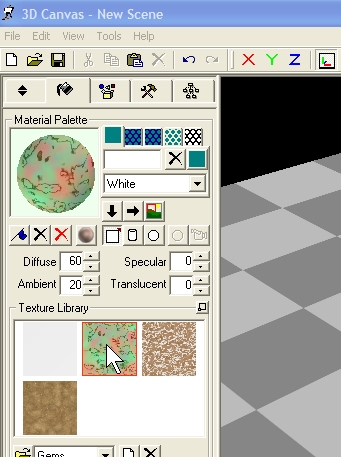 |
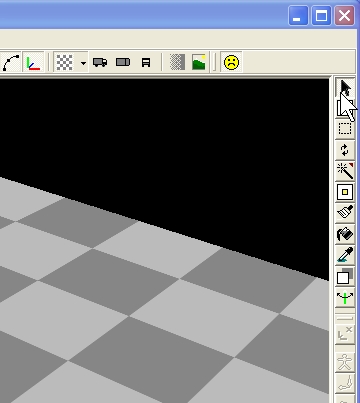
On the right hand side of the
screen is the edit toolbar. Click on the fill tool |
 |
Now click on the sphere to apply the texture to it. |
 |
| Click on the Component Selection Tool to return to object-selection "mode". |
 |
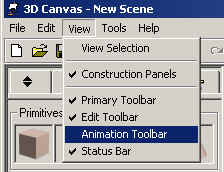
| Go to the View menu and make sure that the Animation toolbar is checked. |
 |
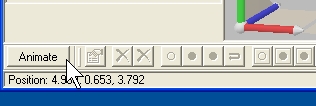
The animation toolbar should appear on the bottom of the screen. Click on the Animate button to enable the toolbar. |
 |
|
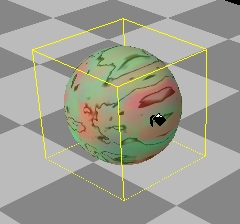
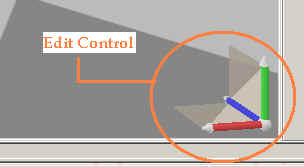
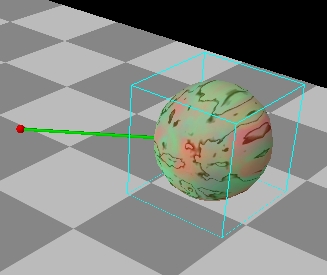
Now select your sphere. Notice that when you do so an icon appears on the lower right side of the screen. This is the edit control and is only enabled or visible when an object in the scene (e.g. your sphere) is selected. The edit control is used to change the position, size, and orientation of your selected object. Now try clicking and dragging on the axes and the shaded planes to see what effect this has on your sphere. Try clicking and dragging in each of the separate areas in the shaded plane to see its effect on the sphere. |
 |
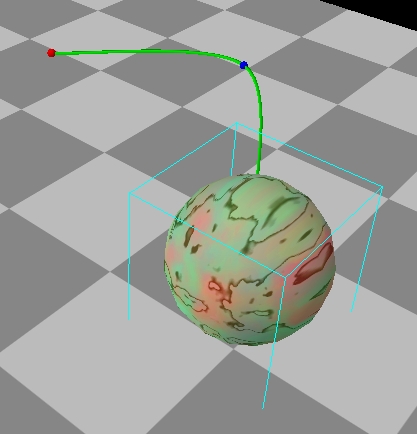
| In the animation toolbar, change the "animation time" value from a 0.00 to a 1.00 by clicking on the up-arrow next to the animation time box. |
| Now use the edit control again and move the sphere to a new position. This tells 3D Canvas that at the 1-second time-point the sphere should be in this new position. In animation terms, you have just set a "key frame." Notice that 3D Canvas has drawn a green line to show you the path of the sphere from the original position at the 0-second time-point. |
 |
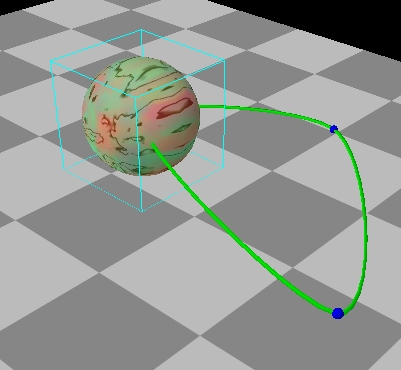
| Now set the animation time to 2.00, again by clicking on the up arrow next to the animation time box. Once again, move your sphere to a new position to create another keyframe. |
 |
Now increment the animation time to 3.00 and click on the repeat animation button This creates a loop in your animation so that the sphere will go back to the position of keyframe 0 at the end of the animation sequence. |
 |
| Now go ahead and play the animation by clicking on the play button. |
Launch DarkBASIC Pro from the Start Menu.
Create a new project by clicking on File menu-->New Project. A dialog box like the one below will appear. Type in a project name (e.g. project_one) in the Project Name box:
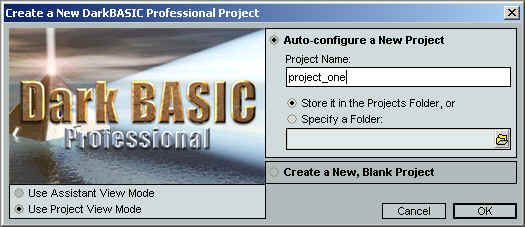
Now specify a folder where you will keep your project. Do this by clicking on the "Specify a Folder" button and then clicking on the folder icon to the far right of the interface to select the parent folder in which DarkBASIC should create your project folder. In this example your project folder will be called project_one.
Once you click OK, 2 files should be created in the project_one folder: one will be project_one.dbpro which is the project file and the other is a project_one.dba which is the source file. The .dbpro file keeps track of all the other files that your project depends on. The .dba file consists of your main source file.
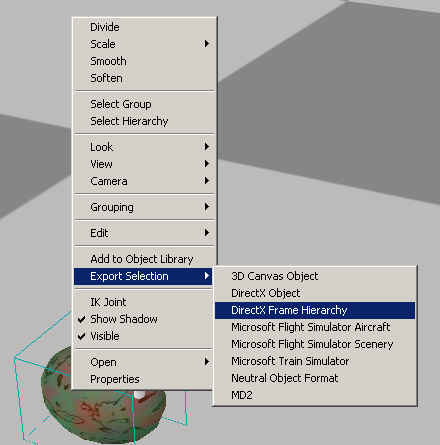
Now go back to 3d Canvas and export the sphere you created into a DirectX object. To do so, right-click on the sphere and select 'Export Selection' -->'DirectX Frame Hierarchy'. Save the file inside your project_one folder. Give it a file name for example, sphere.x, and answer 'YES' to dialog box that appears. (the dialog box will say: 'Include root group animation? If you are not sure, answer 'YES'.)
Now make sure that the texture that you applied in 3D Canvas is also in the project_one directory. Just copy the abalone.bmp file to the project_one directory. The abalone.bmp file should be located at: C:\Program Files\Amabilis\Media\Textures.
Now go back to DarkBASIC and cut and paste the following source code text into your project_one.dba file.
Rem Project: project_one
Rem Created: 7/29/2003 9:22:13 PM

Rem ***** Main Source File *****


remstart
This program shows the basic commands and how to manipulate your animated sphere based on input from the keyboard.
Don't worry if you don't understand how it works, just copy, paste this code into darkbasic program and play around
with it.  Go to the help menu and click on Index.  If you want to know for example what each each command and each
parameter means type in 'set object speed' in the text field and click on the link to view description of the
command.  Do that with 'loop object','move object', 'move object left', 'sync', 'point camera', 'position object'.
remend


`also notice the three ways of commenting code: rem or ` to comment single lines, or remstart and remend for commenting blocks of text..

rem first we load the object into our program

load object "sphere.x",1

   do
      loop object 1
      set object speed 1, 15
      x = object position x(1)
      y = object position y(1)
      z = object position z(1)

      print "x: "; x
      print "y: "; y
      print "z: "; z

      if inkey$()="w" then move object 1,.1
      if inkey$()="s" then move object 1,-.1
      if inkey$()="a" then move object left 1,.1
      if inkey$()="d" then move object right 1,.1

      if upkey()=1 then move object 1,.5
      if downkey()=1 then move object 1,-.5
      if leftkey()=1 then yrotate object 1, wrapvalue(object angle y(1)-.5)
      if rightkey()=1 then yrotate object 1,wrapvalue(object angle y(1)+.5)

      while spacekey()=1
          position object 1,0,0,0
          point camera 0,0,0
          sync
      endwhile

   loop
sync
|
Now Click on the  button in DarkBASIC pro to create and run the compiled program.
Note: You could have just used the following four lines of code to load the object:
load object "sphere.x", 1 |
But I wanted to show how easy it is to manipulate the sphere using DarkBASIC. Use the arrow keys to move the camera or use the w, a, s, d keys to move the object. If you accidentally lose your sphere you can restore its position by pressing the spacebar.
Press the ESC key to quit from your demo program.
Don't forget to save everything you've created before you quit 3D Canvas and DarkBASIC.
That ends the intro tutorial. Here are some shortcuts to try.
Here are some shortcuts for manipulating the scene and object in 3D Canvas.
